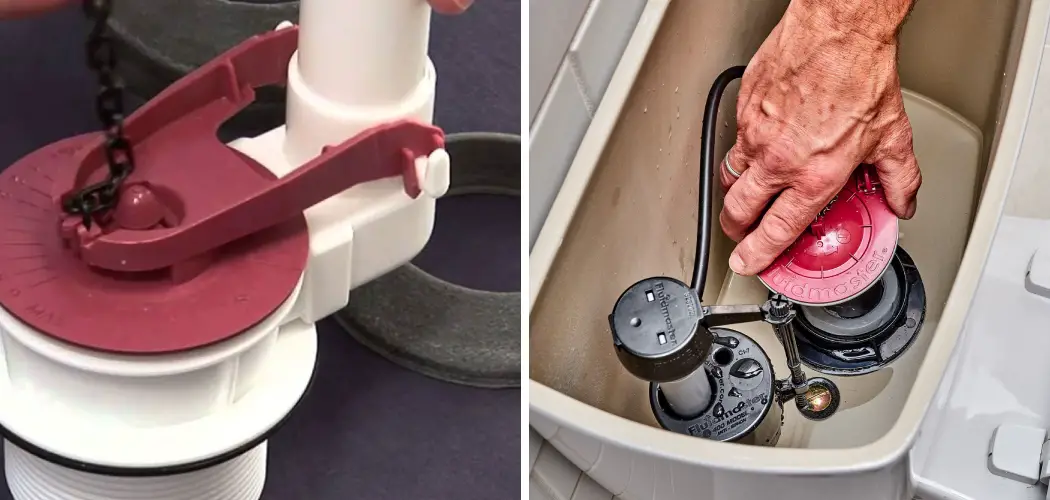
A leaking flapper on a toilet can be a major inconvenience, but it’s also important to fix it as soon as possible. Not only does it waste water and increase your utility bill, but it can also cause damage to your bathroom floor and subfloor if left untreated. Additionally, a constantly running toilet can be noisy and disrupt the peaceful atmosphere of your home.
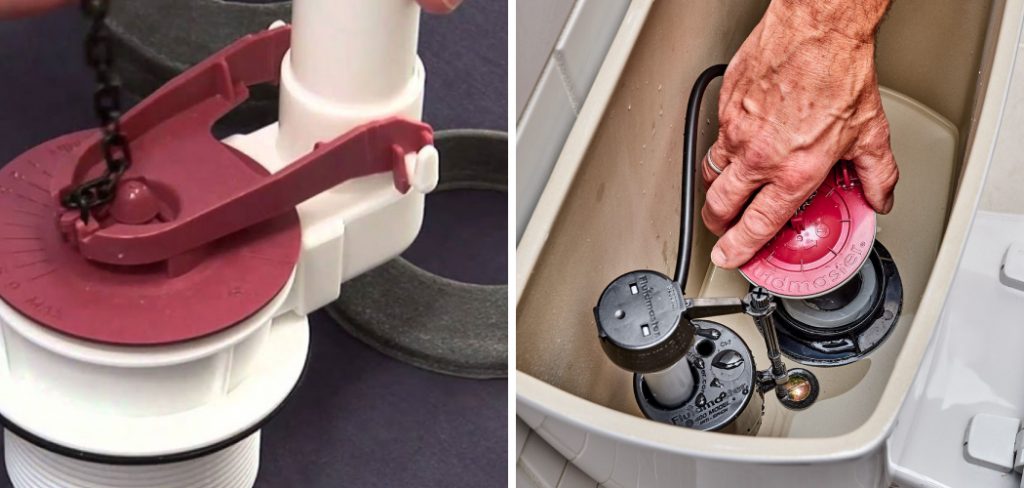
The main advantage of knowing how to fix a leaking flapper on toilet is that you can save money by avoiding the need for expensive plumbing services. By learning this simple repair, you can handle the issue yourself and prevent water waste and potential damage to your bathroom. In this blog post, You will learn in detail how to fix leaking flapper on toilet.
Step-by-step Instructions for How to Fix Leaking Flapper on Toilet
Step 1: Inspect the Flapper
Check if there are any visible signs of damages such as cracks or tears on the flapper. If you find any, then it is most likely causing the leakage and needs to be replaced. If not, move on to Step 2. Locate the shut-off valve behind your toilet and turn it clockwise to shut off the water supply. This will prevent any water flow while you work on fixing the flapper.
Step 2: Flush Toilet
Flush the toilet to drain out as much water as possible from the tank. This will make it easier to work on the flapper without getting soaked in water. The flapper is attached to the flush valve with a chain. Disconnect this chain from the flapper by unhooking it using your fingers or pliers.
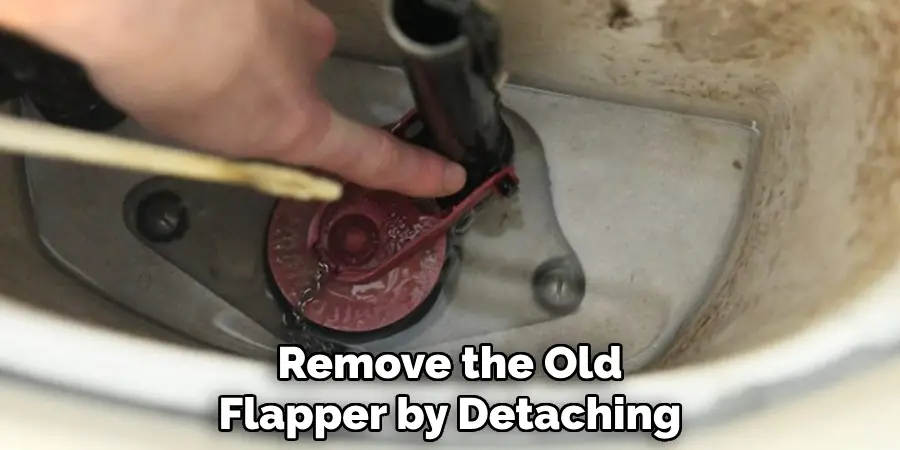
Step 3: Remove Old Flapper
Remove the old flapper by detaching it from the overflow tube and pulling it out of the tank. If there is any mineral buildup, use a scrubber or brush to clean it off. Take the new flapper and slide it onto the overflow tube. Make sure it is properly aligned and can move up and down easily.
Step 4: Reattach Flapper Chain
Once the new flapper is installed, reattach the chain to both the flush valve and the flapper. Ensure that there is enough slack in the chain to allow the flapper to fully close. Turn the water supply back on by turning the shut-off valve counterclockwise. Let the tank fill up and check for any leaks around the flapper.
Step 5: Adjust Flapper Chain Length
If the flapper does not fully close or has a weak flush, you may need to adjust the length of the chain. Make sure there is enough slack for proper movement, but not too much that it gets caught under the flapper. Finally, test the flush by flushing the toilet and checking for any leaks or issues with the flapper. If everything looks good, then you have successfully fixed your leaking flapper on the toilet.
By following these step-by-step instructions, you can easily fix a leaking flapper on your toilet and save money on water bills. Regularly checking and replacing damaged or worn out flappers can also help prevent future leaks and potential water damage in your bathroom.
Precautions for How to Fix Leaking Flapper on Toilet
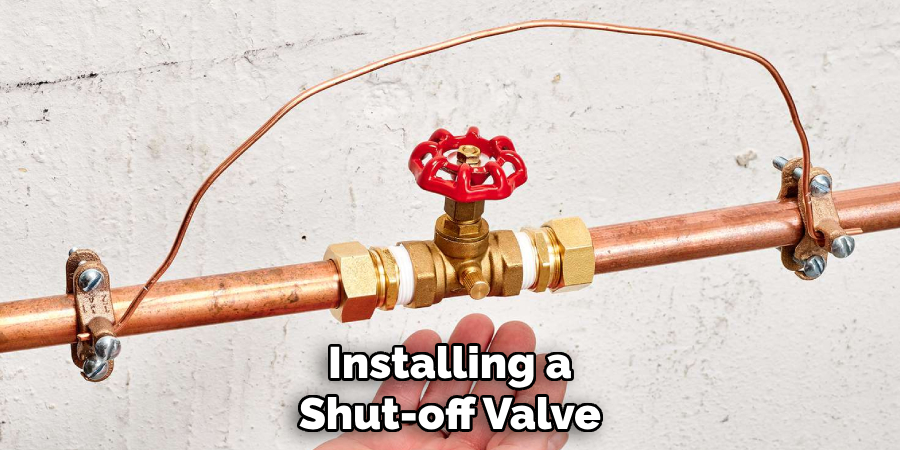
- Install a Shut-off Valve: One of the simplest ways to prevent leaks is by installing a shut-off valve. This will allow you to turn off the water supply to your toilet quickly in case of an emergency.
- Check for Cracks and Wear: Regularly inspect the flapper on your toilet for any signs of cracks or wear. If you notice any damage, it’s important to replace the flapper immediately as it can lead to leaks.
- Clean the Valve Seat: Over time, mineral deposits and debris can build up on the valve seat, preventing a tight seal between the flapper and the tank. Use a damp cloth or abrasive pad to clean the valve seat and ensure a proper seal.
- Adjust Chain Length: If your flapper is not sealing properly, it could be due to a chain that is too long or too short. Adjust the length of the chain so that there is just enough slack for the flapper to close completely.
- Use Food Coloring: To check for leaks, add a few drops of food coloring into the toilet tank and wait for 15 minutes. If any color appears in the bowl without flushing, it’s a sign of a leak and the flapper may need to be replaced.
- Replace Old Flappers: Flappers can deteriorate over time due to constant exposure to water and chemicals in the toilet tank. It’s important to replace them every 2-3 years, even if there are no visible signs of damage.
- Call a Professional: If you are unsure about how to fix a leaking flapper or if the problem persists after trying these tips, it’s best to call a professional plumber. They have the knowledge and tools to properly diagnose and fix any issues with your toilet.
By following these precautions, you can ensure that your toilet’s flapper is in good condition and prevent any leaks from occurring. Remember to always turn off the water supply before attempting to fix a leaking flapper and never hesitate to seek professional help if needed.
Importance of Fixing Leaking Flapper on Toilet
There are many reasons why fixing a leaking flapper on your toilet is important. Here are 7 reasons to consider:
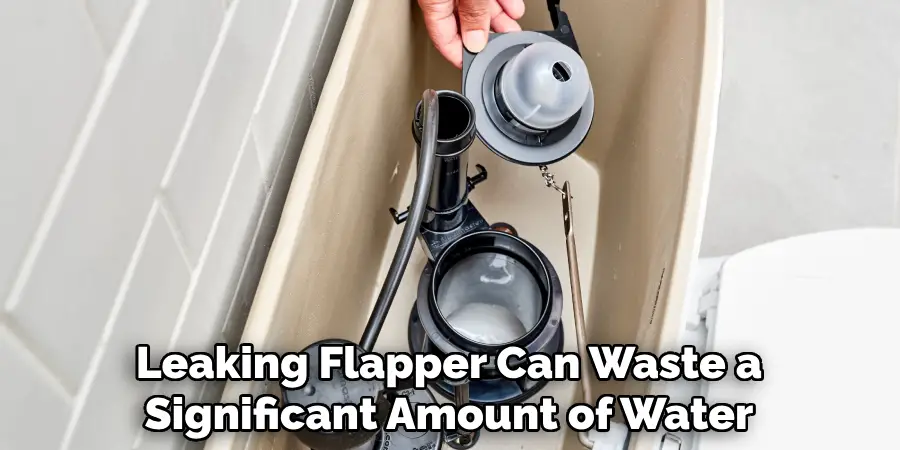
- Water Conservation: A leaking flapper can waste a significant amount of water as it continuously allows water to flow into the bowl. This can lead to an increase in your water bill and also contribute to water scarcity.
- Cost-Efficient: As mentioned above, a leaking flapper can result in a higher water bill. By fixing the leak, you can save money in the long run and avoid unnecessary expenses.
- Prevent Water Damage: When a toilet is continuously running due to a leaking flapper, it can cause damage to your bathroom floor and subfloor. This can be costly to repair and may even lead to structural damage if left unfixed.
- Avoid Mold and Mildew: A constantly running toilet can also create a humid environment, which is ideal for the growth of mold and mildew. This not only damages your bathroom but can also pose health risks to you and your family.
- Improve Toilet Functionality: A leaking flapper can cause issues with flushing and lead to a weak or incomplete flush. By fixing the leak, you can ensure your toilet functions properly and avoid any inconvenience.
- Environmental Impact: Conserving water is not just important for personal savings, but also for environmental reasons. By fixing a leaking flapper, you are doing your part in reducing water waste and protecting our planet’s resources.
- Peace of Mind: Finally, fixing a leaking flapper on your toilet can give you peace of mind. You no longer have to worry about the sound of running water or potential water damage. It also eliminates the need for constantly checking and adjusting the flapper, providing convenience and ease to your household.
In addition to these benefits, fixing a leaking flapper also promotes responsible and sustainable living. It shows that you are mindful of your water usage and taking steps to reduce waste. So if you notice a leaking flapper on your toilet, don’t hesitate to fix it promptly for the sake of your wallet, your home, and our environment.
Potential Causes of Fixing Leaking Flapper on Toilet
While a leaking flapper may seem like a simple issue, there can be multiple underlying causes for it. Here are potential reasons why your toilet’s flapper is leaking:
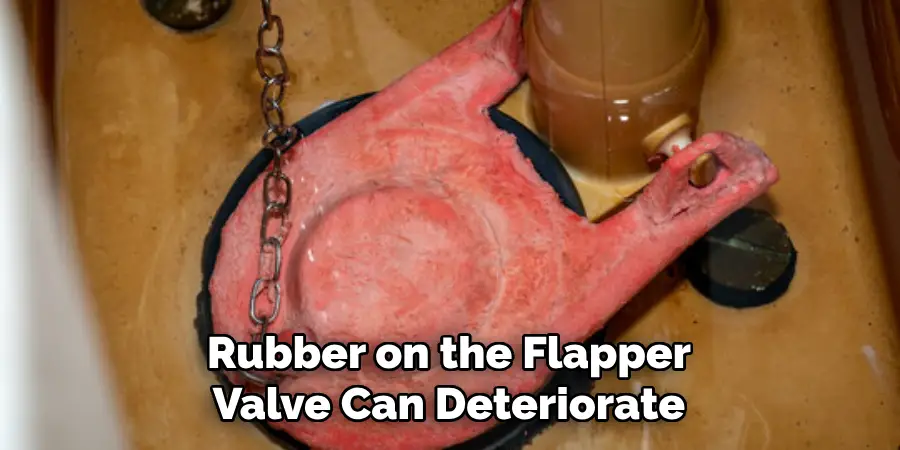
- Worn Out Flapper: Over time, the rubber on the flapper valve can deteriorate and become less effective at creating a seal. This common cause of a leaky flapper can easily be fixed by replacing the flapper.
- Build-up of Minerals: The accumulation of minerals and sediment on the flapper valve can prevent it from closing properly, causing a leak. Regular cleaning and maintenance can help prevent this issue.
- Loose Flapper Chain: If the chain connecting the flapper to the flush handle is too long or too short, it can cause the flapper to not close fully, resulting in a leak. Adjusting the chain length can solve this problem.
- Faulty Flush Valve: A damaged or malfunctioning flush valve can also cause a leaking flapper. In this case, replacing the flush valve is necessary to fix the issue.
- Incorrect Flapper Size: It’s important to use the correct size and type of flapper for your specific toilet model. Using an incorrect flapper can cause leaking or flushing problems.
- Warped Flapper: Extreme temperature changes or exposure to harsh chemicals can cause a flapper to warp, resulting in a leak. In this case, replacing the flapper is necessary.
- Damaged Toilet Parts: If other components of the toilet, such as the fill valve or overflow tube, are damaged or worn out, it can affect the performance of the flapper and lead to leaking. Regular maintenance and inspections can help identify these issues before they become a bigger problem.
By understanding these potential causes, you can better diagnose and fix a leaking flapper on your toilet. It’s important to address this issue as soon as possible to avoid further damage and expenses. Remember, a small leak can quickly turn into a bigger problem if left unfixed.
Common Signs and Symptoms of a Leaking Flapper
1. Constant or Intermittent Running of the Toilet Tank
Toilets are designed to flush and then refill with water until a specific water level is reached. If you notice that your toilet tank is constantly running, this could be a sign of a leaking flapper. The continuous flow of water from the tank to the bowl indicates that the flapper is not creating a proper seal, causing water to leak out. This can lead to an increase in your water bill and is a clear indication that the flapper needs to be replaced.

2. Low Water Levels in the Toilet Bowl
A leaking flapper can also cause low water levels in the toilet bowl. The flapper’s role is to hold the water in the tank until you flush, and when it’s not functioning correctly, the water in the bowl can also leak out. This can result in a weak flush, making it difficult to get rid of waste properly.
3. Visible Water Leakage or Dripping Sounds
Leaking flappers often result in visible water leakage around the toilet tank or audible dripping sounds. If you notice water pooling around the base of your toilet or hear dripping sounds when the toilet is not in use, it’s a clear indication that there is a leak. This can lead to water damage and mold growth if left untreated.
4. Difficulty Flushing or Multiple Flushes Needed
A faulty flapper can also cause difficulty flushing or requiring multiple flushes to get rid of waste effectively. If you find yourself having to hold down the flush handle for an extended period or flushing multiple times, it could mean that your flapper is not sealing correctly, and water is leaking out. This can also lead to clogs and blockages in your toilet.
5. Mineral Buildup on the Flapper
Minerals found in hard water can build up on the flapper over time, causing it to become stiff and unable to form a proper seal. This can result in leaks and other issues with the toilet’s flushing mechanism. If you notice a white or rust-colored buildup on your flapper, it may be time to replace it.
6. Moldy or Musty Smell
A leaking flapper can also cause moisture buildup, leading to a moldy or musty smell in your bathroom. If you notice a foul odor coming from your toilet, it could be a sign of a leaking flapper that is allowing water to escape and creating the perfect environment for mold growth.
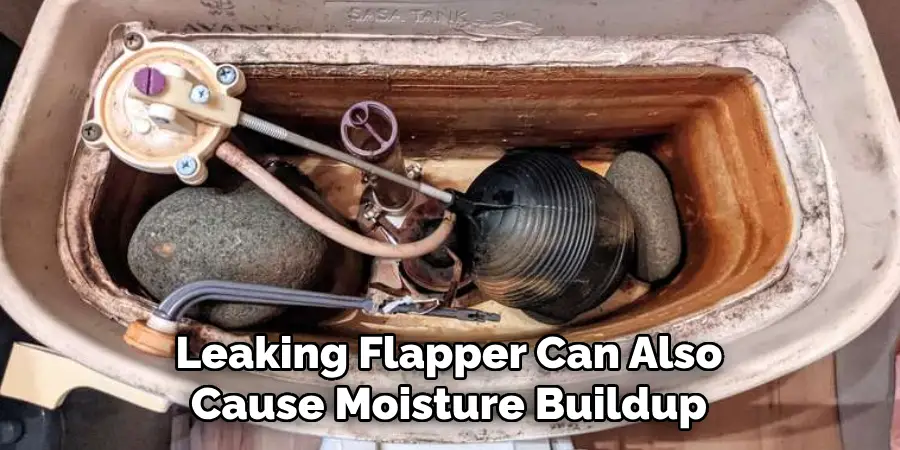
7. Constantly Refilling Toilet Tank
Lastly, another common symptom of a leaking flapper is a constantly refilling toilet tank. As mentioned before, the flapper’s role is to hold water in the tank until you flush, and when it’s not functioning correctly, the tank will constantly refill to maintain its desired water level. This can be a significant waste of water and result in a higher water bill.
While these are seven common signs and symptoms of a leaking flapper, there could be other underlying issues causing these problems with your toilet. It’s essential to address the issue promptly and consult a plumber if needed to avoid further damage and costly repairs. Regular maintenance and replacing worn-out parts can also help prevent these issues from occurring in the future.
Cleaning and Maintenance After Fixing Leaking Flapper on Toilet
1. Turn Off the Water Supply
Before starting any cleaning or maintenance, make sure to turn off the water supply to your toilet. This will prevent any accidental flooding or spraying of water while working on the flapper.
2. Clean and Disinfect the Toilet Bowl
After fixing the leaking flapper, it’s essential to clean and disinfect the toilet bowl thoroughly. Use a toilet cleaner and brush to remove any stains or residue inside the bowl. This will not only make your toilet look clean but also eliminate any lingering bacteria or germs.

3. Check for Any Other Leaks
While fixing the flapper may have solved the primary leak, it’s always a good idea to check for any other leaks in your toilet. Check for cracks or damage in the toilet tank and base, as well as any other areas where water could potentially leak from.
4. Replace Any Worn-Out Parts
If you notice any other worn-out or damaged parts while inspecting your toilet, it’s best to replace them. This will ensure that your toilet is functioning correctly and prevent any future leaks or issues.
5. Adjust Water Level in Tank
After fixing the leaking flapper, it may be necessary to adjust the water level in your toilet tank. The water level should be about an inch below the top of the overflow tube. If it’s too high or too low, use the adjustment screw on the fill valve to make the necessary changes.
6. Test Flush and Properly Seal Flapper
Once you have completed cleaning and maintenance, it’s crucial to test the flush and make sure that the flapper is sealing properly. If it’s not, adjust or replace the flapper as needed.
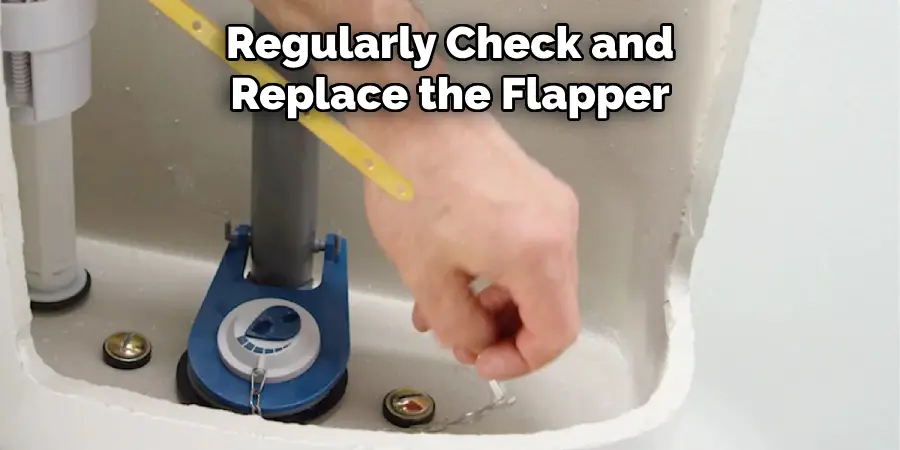
7. Regularly Check and Replace Flapper
To prevent future leaks, it’s essential to regularly check and replace the flapper when necessary. As a general rule, it’s recommended to replace the flapper every 5 years to ensure proper functioning.
By following these cleaning and maintenance tips, you can not only fix a leaking flapper but also prevent any future issues with your toilet. Remember to regularly check and maintain your toilet to keep it in good working condition and avoid any costly repairs.
Conclusion
In conclusion, fixing a leaking flapper on a toilet is a simple and cost-effective task that can save you from wasting water and money. It is important to regularly check for leaks and address them promptly to avoid further damage.
One of the most common causes of a leaking flapper is mineral deposits or debris buildup around the seal. This can be easily fixed by cleaning the flapper and the seal with a mixture of vinegar and water.
Another common issue is a misaligned or worn-out flapper. In this case, replacing the flapper with a new one is necessary. It is important to choose the right size and type of flapper for your toilet model. I hope this article has been beneficial for learning how to fix leaking flapper on toilet. Make Sure the precautionary measures are followed chronologically.

