A cleanout plug is an essential component of plumbing systems, designed to provide access to pipes for clearing blockages or conducting maintenance. Typically found on drain pipes or sewer lines, these caps allow homeowners and professionals to quickly address issues without extensive disassembly of the plumbing system.
There are several common reasons one may need to remove a cleanout plug, including clearing a clog, inspecting the pipes for damage or buildup, and performing routine maintenance to ensure system efficiency. Understanding how to remove cleanout plug correctly is crucial, as improper handling can lead to safety hazards or further plumbing issues.
This guide will outline the essential steps in safely removing a cleanout plug, emphasizing the importance of following proper safety protocols to protect yourself and your plumbing system.
Tools and Materials Needed
Tools
To successfully remove a cleanout plug, you will need a pipe wrench, pliers, an adjustable wrench, penetrating oil, and a bucket. These tools will help you safely and effectively loosen and remove the cleanout plug without damaging the surrounding pipes.
Materials
In addition to tools, gather materials such as rags for cleaning up any spills, gloves for protection during the process, a replacement cleanout plug (if necessary), and plumber’s tape for re-sealing the plug after maintenance. Having these materials on hand will ensure a smoother operation.
Types of Cleanout Plugs
Plastic Cleanout Plugs
Plastic cleanout plugs are commonly used in modern plumbing systems due to their lightweight and corrosion-resistant properties. These plugs are typically threaded, making them easy to remove with basic tools. When removing plastic plugs, it is essential to use a wrench carefully to avoid cracking the material, which can lead to leaks or damage.
Metal Cleanout Plugs
Metal cleanout plugs, often made of brass or cast iron, are more prevalent in older plumbing systems. Their durability provides longevity; however, they can pose challenges during removal.
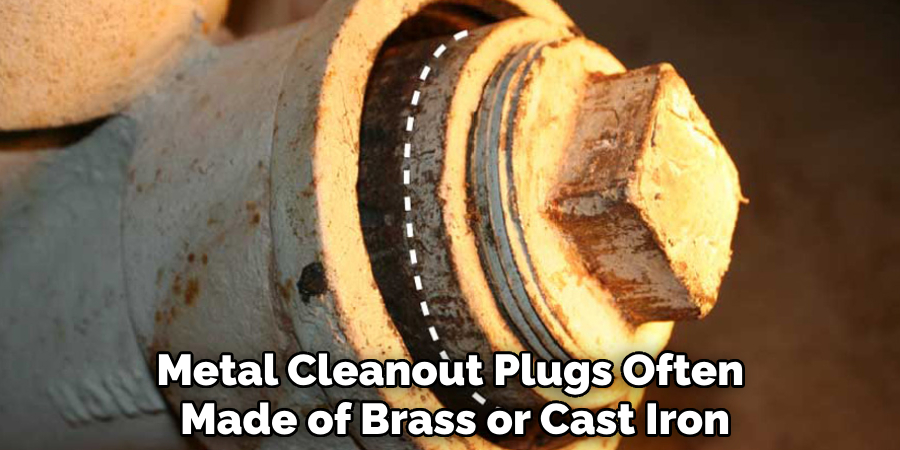
Typically, rust or corrosion may develop over time, making extraction difficult. It is advisable to apply penetrating oil beforehand to ease the removal process and reduce the risk of breaking the plug.
Slip-Joint or Wingnut Plugs
Slip-joint plugs and wingnut plugs are designed for straightforward access, with the former tightened by hand or with pliers, while the latter is often found in older or DIY plumbing setups. The removal process for these plugs is generally simple and can usually be accomplished with the appropriate tools, facilitating easy access to the plumbing system.
Safety Precautions Before Removal
Turn Off the Water Supply
Before attempting to remove a cleanout plug, turning off the water supply to the affected area is crucial. This step helps prevent potential flooding or spillage when the plug is removed, ensuring a safer and more manageable process.
Use Protective Gear
Wearing appropriate protective gear is essential during the removal of a cleanout plug. Equip yourself with durable gloves and safety goggles to safeguard against potential splashes of sewage or chemical drain cleaners that may be present in the pipes, reducing the risk of injury or irritation.
Ventilate the Area
Proper ventilation is vital when working with plumbing systems, as it helps to disperse any unpleasant odors or harmful fumes. Make sure to work in a well-ventilated area, either by opening windows or using fans, to enhance airflow and ensure a safer working environment.
How to Remove Cleanout Plug: Step-by-Step Guide
Step 1: Apply Penetrating Oil
To effectively loosen stubborn or rusted cleanout plugs, apply a generous amount of penetrating oil to the threads. Focus on saturating the area where the plug meets the pipe, allowing the oil to seep into any crevices. Let the oil sit for at least 10 to 15 minutes, enhancing its ability to penetrate and break down corrosion.
If the plug remains difficult to turn after this initial application, reapply the oil and allow it to sit for a longer period. Multiple applications may be necessary for particularly stubborn plugs, so don’t hesitate to keep the process going until you achieve better results.
Step 2: Use a Pipe Wrench
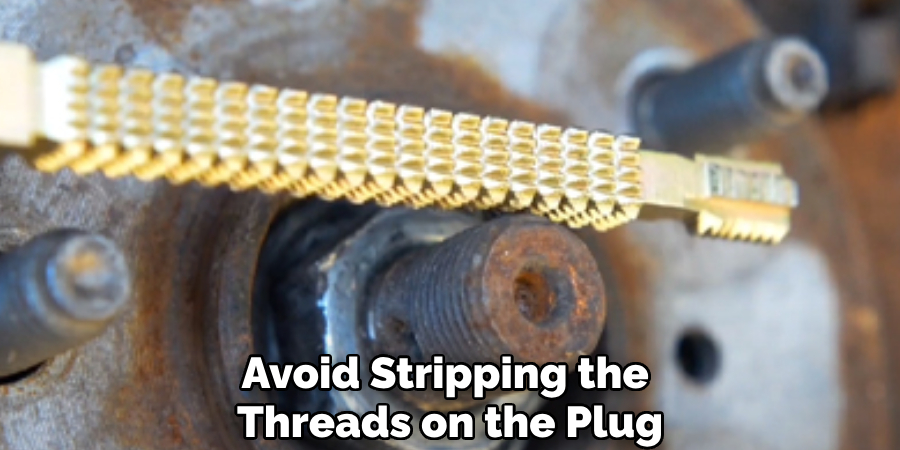
Grab your pipe wrench once the penetrating oil has had time to work. Position the wrench carefully around the cleanout plug, ensuring a tight grip without placing excessive force just yet. While you want to apply steady pressure, it’s equally important to avoid stripping the threads on the plug, as this can complicate removal significantly.
Turn the wrench slowly and methodically. If you don’t have a pipe wrench on hand, pliers or an adjustable wrench can serve as alternatives, but ensure they’re sized appropriately to grip the plug securely.
Step 3: Apply Heat (Optional)
Applying heat can be effective if you’re dealing with metal cleanout plugs that remain stubborn despite penetrating oil. Use a propane torch or heat gun to carefully heat the outer surface of the plug.
This will cause the metal to expand, potentially breaking the bonds of corrosion that may have formed. Exercise extreme caution when using heat—keep a fire extinguisher within reach and ensure that no flammable materials are nearby to prevent accidents.
Step 4: Use a Hammer and Chisel (Optional)
Another technique to loosen a stuck cleanout plug is to use a hammer and chisel. Position the chisel at the edge of the plug and gently tap it around the circumference.
This method can help break the seal formed by rust or debris that may be clinging to the threads. Applying minimal force while tapping is crucial to avoid damaging the pipe or the surrounding area, which could lead to further complications.
Step 5: Remove the Plug
Once the cleanout plug is loosened adequately, it’s time for final removal. Carefully unscrew the plug by turning it counterclockwise. When you remove the plug, some water or debris may spill out, so have a bucket or towel ready to catch any mess. Once removed, inspect the area for any signs of damage or buildup before proceeding with your maintenance tasks.
Cleaning and Inspecting the Pipe
Clean the Threads
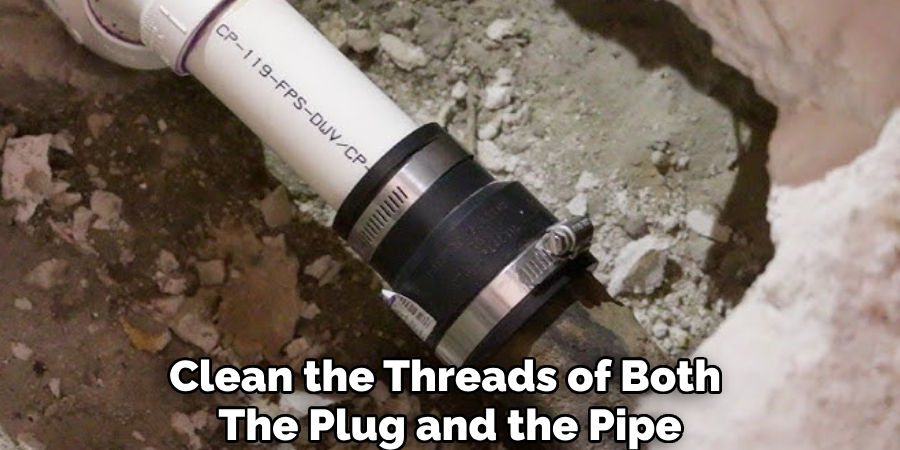
After removing the cleanout plug, it is essential to clean the threads of both the plug and the pipe. Use a wire brush or a rag to remove any debris, rust, or residue that may have accumulated. This cleaning process is vital to ensure a proper seal when reinstalling the plug, preventing future leaks.
Inspect for Damage
Once the threads are clean, take the opportunity to inspect the cleanout area and the pipe for any signs of damage. Look for cracks, corrosion, or worn threads that might compromise the integrity of the plumbing system. Identifying and addressing these issues early can help prevent more significant problems down the line.
Replace the Plug (If Necessary)
If you notice any damage to the cleanout plug during your inspection, it is advisable to replace it with a new one. Ensure that the new plug fits securely and is sealed properly to maintain the plumbing system’s functionality. A well-installed plug helps to avoid leaks and facilitates easier access for future maintenance.
Reinstalling the Cleanout Plug
Apply Plumber’s Tape
To ensure a watertight seal, begin by applying plumber’s tape (also known as Teflon tape) to the cleanout plug’s threads. Wrap the tape around the threads clockwise, covering them fully without overlapping too much. This method allows for a smooth fitting while preventing leaks when the plug is reinstalled.
Tighten the Plug
Secure the cleanout plug by gently tightening it with a wrench. Aim for a snug fit, applying firm pressure without overtightening to avoid damaging the plug’s or the pipe’s threads. Proper tightening ensures that the seal is effective while maintaining the integrity of the plumbing system.
Test for Leaks
After reinstalling the cleanout plug, turning the water supply back on is important. Run water through the system and observe the area around the cleanout plug for any signs of leakage. If you notice water seeping out, re-tighten the plug or reapply the plumber’s tape for an effective seal.
Preventive Measures for Future Maintenance
Regular Inspection
To ensure your plumbing system’s longevity and proper functioning, regularly inspect the cleanout plug and surrounding pipes for early signs of wear or corrosion. Addressing these issues proactively can prevent more significant problems and ensure that your plumbing remains efficient.
Lubricate Threads
Before reinstalling the cleanout plug, apply a thin layer of lubricant or an anti-seize compound to the threads. This practice helps prevent the plug from sticking in the future, reducing the risk of damage during removal and making future maintenance tasks easier.
Keep the Area Clean
Maintaining a clean area around the cleanout plug is crucial in preventing debris build-up that can lead to blockages or complications in accessing the plug. Regularly removing dirt and obstructions will facilitate easier inspections and maintenance, ensuring your plumbing system remains in optimal condition.
Conclusion
In summary, understanding how to remove cleanout plug effectively is crucial for maintaining a healthy plumbing system. Start by applying penetrating oil to loosen stubborn plugs, then use a pipe wrench for removal, taking care not to strip the threads.
If necessary, heating the plug or using a hammer and chisel can also aid in loosening. Once removed, clean the threads, inspect for damage, and replace if needed. When reinstalling the plug, apply the the plumber’s tape for a watertight seal and test for leaks afterward.
It’s essential to follow safety precautions throughout this process and carry out regular maintenance to ensure your plumbing remains in optimal condition. By addressing cleanout plug issues promptly, you can avoid more significant problems down the line, keeping your plumbing system functioning smoothly for years to come.

