Using a plunger may seem like a straightforward task, but mastering the technique can save you time and prevent further plumbing issues. A plunger is an essential tool for clearing minor clogs in toilets, sinks, and drains. Understanding the correct way to use a plunger can not only help you effectively handle everyday plumbing challenges but also give you the confidence to tackle stubborn blockages without calling a professional.
In this guide on how to use a plunger in a toilet, we will walk you through the necessary steps to use a plunger effectively and ensure a smoother plumbing experience.
Why Use a Plunger?
A plunger is a simple yet effective tool that uses suction and pressure to dislodge blockages in pipes. Unlike chemical drain cleaners, plungers do not contain harsh chemicals and are a safer option for clearing clogs without damaging your pipes. Additionally, using a plunger can save you money and time, as you won’t have to wait for a professional plumber to arrive or spend money on expensive plumbing services.
It is essential to have a plunger in your home as it can come in handy not just for toilets, but also for sinks and drains. Knowing how to use a plunger correctly can prevent minor clogs from turning into major plumbing issues.
What You Will Need
To effectively use a plunger, you will need the following items:
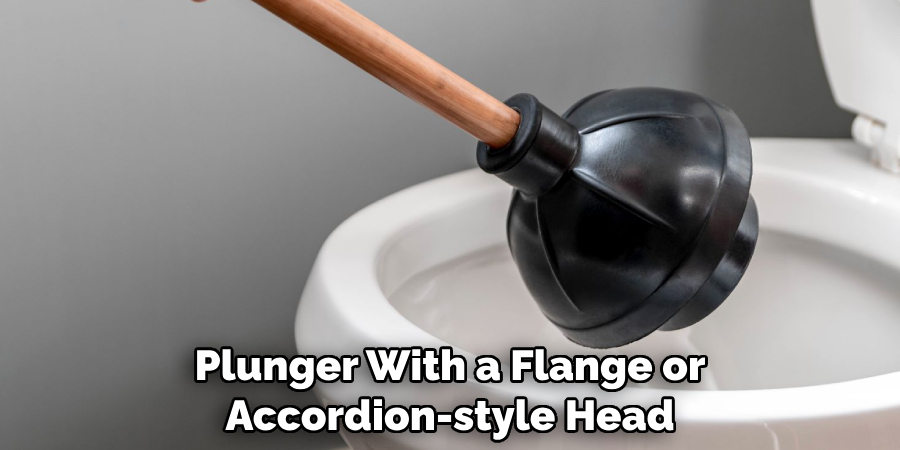
- A Plunger With a Flange or Accordion-style Head (These Types of Plungers Are Specifically Designed for Toilets)
- Rubber Gloves (Optional)
- A Bucket (Optional)
- Towels or Rags (Optional)
Having these items handy will allow you to start unclogging your toilet immediately without having to scramble for them later. Additionally, using gloves and having a bucket and towels nearby can help contain any potential mess.
8 Step-by-step Guides on How to Use a Plunger in a Toilet
Step 1: Put on Your Rubber Gloves (Optional)
Before you begin the plunging process, it’s a good idea to protect your hands by putting on rubber gloves. While this step is optional, gloves can help you maintain hygiene and provide a barrier against any unpleasant substances you might encounter.
If you choose not to wear gloves, ensure that your hands are clean before and after performing this task. Once you’re gloved up and ready, you can proceed to the next steps without worry.
Step 2: Prepare the Area
Before you start plunging, it’s important to prepare the area around the toilet to ensure a clean and effective process. First, clear any items that may obstruct access to the toilet, such as rugs, bath mats, or personal items. This will give you room to maneuver and prevent any splashes from making a mess. If necessary, place towels or rags on the floor to catch any overflow or spills.
Additionally, ensure that the toilet seat is down to contain any mess that might occur during the plunging process. By adequately preparing the area, you set yourself up for a more efficient unclogging experience.
Step 3: Position the Plunger
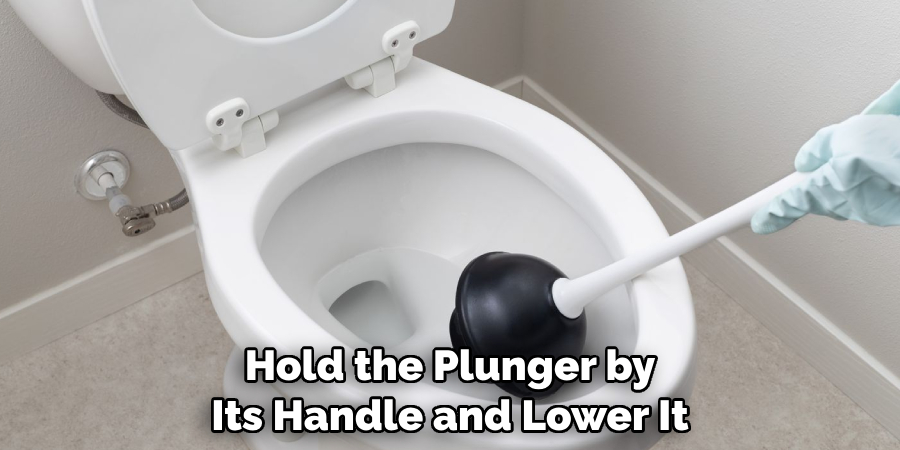
Hold the plunger by its handle and lower it into the toilet bowl until the bell-shaped rubber head covers the drain completely. The flange or accordion-style head should be facing downwards to create a seal around the drain. For best results, ensure that there is enough water in the toilet bowl to cover the rubber head of the plunger. If necessary, add more water using a bucket or by flushing with caution.
It’s important to note that the success of using a plunger depends on creating an effective seal around the drain. If there is no seal, it will be challenging to create enough suction and pressure to dislodge the clog.
Step 4: Create a Seal
To effectively unclog the toilet, you must create a strong seal between the plunger and the drain. Press down firmly on the handle of the plunger to ensure that the rubber head adheres snugly against the bottom of the toilet bowl. This may require some effort, so ensure that the plunger is positioned correctly before applying pressure.
Once you feel a secure seal, you can begin to plunge. The goal is to alternate between pushing down to create pressure and pulling up to create suction. This back-and-forth motion helps to dislodge whatever is blocking the drain. Remember to keep the seal intact throughout the process for maximum effectiveness.
Step 5: Plunge Several Times
Once you have established a seal, begin the plunging action. Start by pushing down gently on the handle of the plunger to create pressure, then pull up sharply to generate suction. Repeat this motion vigorously for about 15 to 20 seconds. It’s essential to maintain the seal during this process; if you notice the seal breaks, re-adjust the plunger to ensure it fits snugly against the drain.
The combination of pressure and suction should gradually work to break apart the clog. If you don’t notice immediate results, don’t be discouraged—continue plunging in a steady rhythm until the water in the bowl begins to drain. This may take a few minutes, so be patient and persistent.
Step 6: Check for Drainage
After plunging for a few minutes, stop and check if the water in the bowl is draining. If it’s not, continue plunging until you start to see some progress. It’s essential to avoid flushing the toilet while there is still a clog, as this can cause an overflow of water.
You can also use a flashlight to check if the water is starting to drain, or you may hear the gurgling sound of air passing through. If there are still no signs of drainage, continue plunging until you notice some improvement.
Step 7: Flush and Clean up
Once the clog has been successfully removed, flush the toilet to clear any remaining debris. If necessary, refill the bowl with enough water and flush again to ensure that everything is clear.
After flushing, remove the plunger from the toilet and clean it thoroughly with hot water and soap before storing it away for future use. Remember to also clean your gloves (if used) and any towels or rags used during the process.
Step 8: Prevent Future Clogs
To prevent future clogs, it’s essential to be mindful of what you flush down the toilet. Avoid flushing items like feminine hygiene products, wet wipes, or excessive amounts of toilet paper. Additionally, regular maintenance and cleaning can help keep your toilet in good condition and avoid any potential clogging issues.
By following these steps and having the necessary tools on hand, you can effectively use a plunger to clear minor clogs in your toilet. However, if the clog persists or you encounter more severe plumbing issues, it’s best to call a professional plumber for assistance. Remember to always prioritize safety and proper hygiene when dealing with any plumbing task.
Additional Tips
- It may be helpful to have a second person assist you by holding the plunger in place while you plunge.
- If the plunging process does not work, you can try using a plumbing snake or calling a professional plumber.
- Remember to always wear gloves and wash your hands thoroughly after handling any waste or cleaning products.
- Regularly checking and maintaining your toilet’s drainage system can help prevent future clogs. This may include using drain cleaners, removing hair from drains, and fixing any leaks promptly.
- It’s essential to use caution when plunging with chemical cleaners in the bowl as they can cause harmful fumes if mixed with other substances.
By following these tips and techniques on how to use a plunger in a toilet, you can confidently tackle minor toilet clogs without having to rely on expensive plumbing services.
Frequently Asked Questions
Q: What if the Plunger Doesn’t Create a Seal?
A: If you’re having trouble creating a strong seal, try running the rubber head of the plunger under hot water for a few seconds to make it more flexible. Additionally, you can try using petroleum jelly along the edge of the rubber head to create a tighter seal.
Q: Can I Use Dish Soap Instead of Water?
A: No, it’s not recommended to use dish soap instead of water while plunging as it can cause excessive suds and make the process more challenging.
Q: What if I Don’t Have a Plunger?
A: If you don’t have a plunger, you can try using alternative methods such as using a plumbing snake or creating suction with a plastic bag. However, these methods may not be as effective as using a plunger. It’s best to have a plunger on hand for any potential clogs.
Conclusion
In summary, effectively unclogging a toilet with a plunger involves a series of straightforward steps on how to use a plunger in a toilet that, when followed carefully, can resolve most minor blockages quickly and efficiently. By preparing the area, creating a secure seal, and using the correct plunging technique, you can restore proper drainage without the need for professional help.
Additionally, being mindful of what you flush and maintaining your toilet regularly can significantly reduce the likelihood of future clogs. Armed with these techniques and tips, you are now better equipped to handle plumbing challenges, ensuring your toilet remains in optimal working condition.

