

A flush tank is a vital component of any toilet system, responsible for storing water and releasing it efficiently during flushing. Its proper functionality ensures waste is cleared from the bowl and the toilet remains hygienic. However, one common issue many homeowners face is when no water enters the tank, rendering the toilet unable to flush. This problem can arise due to sediment buildup, clogged valves, or issues with the float mechanism.
This guide aims to provide clear, step-by-step troubleshooting and repair methods to address this specific problem and restore your flush tank to working condition. By using the tips outlined here, you will learn how to repair flush tank water not coming and ensure your toilet operates smoothly.
Safety Tip: Before starting any repair, always turn off the water supply to the toilet to avoid flooding or further damage.
Understanding Why Water Is Not Filling the Flush Tank
Possible Causes
There are several reasons why water may not be filling your flush tank. Identifying the root cause is essential for effective repair. Here are some common causes to consider:
- Water supply turned off – The main water valve connected to the toilet may have been accidentally shut off or left partially closed, restricting water flow.
- Clogged or faulty fill valve – The fill valve controls water flow into the tank and can become clogged with sediment or wear out over time, leading to water flow issues.
- Low water pressure or supply line issues – Problems with overall water pressure or damage to the supply line can disrupt the water entering the tank.
- Float mechanism malfunction – The float mechanism may be stuck, improperly adjusted, or damaged, preventing it from signaling the fill valve to allow water in.
- Blocked or kinked water inlet hose – The hose that delivers water to the tank could be blocked by debris or kinked, which restricts water flow.
Signs to Look For
To pinpoint the issue, observe the following signs:
- No sound of water entering the tank when the toilet is flushed.
- Weak or intermittent water flows into the tank.
- Loose, misaligned, or damaged components inside the tank, such as the float or fill valve.
By recognizing the potential causes and symptoms, you can better identify the problem and proceed with the appropriate repair steps.
Checking the Water Supply Line
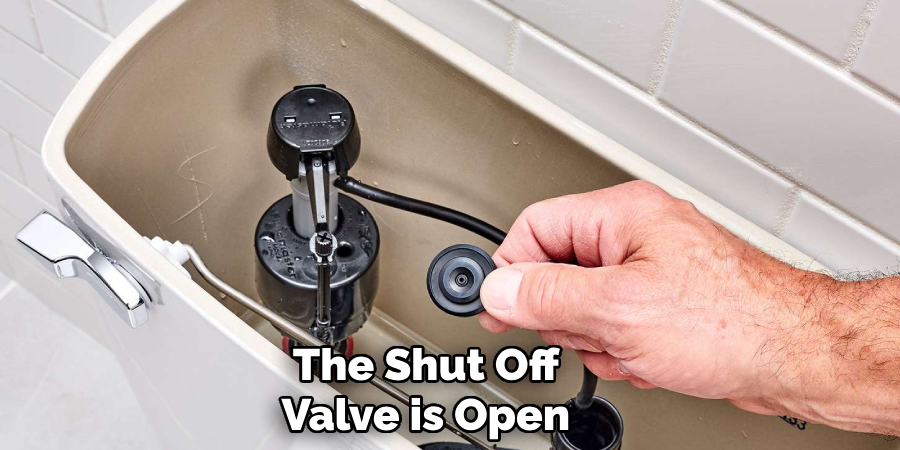
Step 1: Ensure the Shut-Off Valve Is Open
The first step is to verify that the shut-off valve is fully open. This valve is typically located on the wall or floor near the toilet’s base. Carefully turn the valve counterclockwise to ensure it is in the open position. A partially or fully closed valve can restrict water flow to the tank, so this step is crucial.
Step 2: Inspect the Supply Hose
After confirming the valve is open, inspect the supply hose that connects the shut-off valve to the toilet tank. Examine the length of the hose for any visible signs of kinks, bends, or damage that could obstruct water flow. Additionally, make sure no debris or mineral deposits are clogging the hose, as these can prevent proper water delivery.
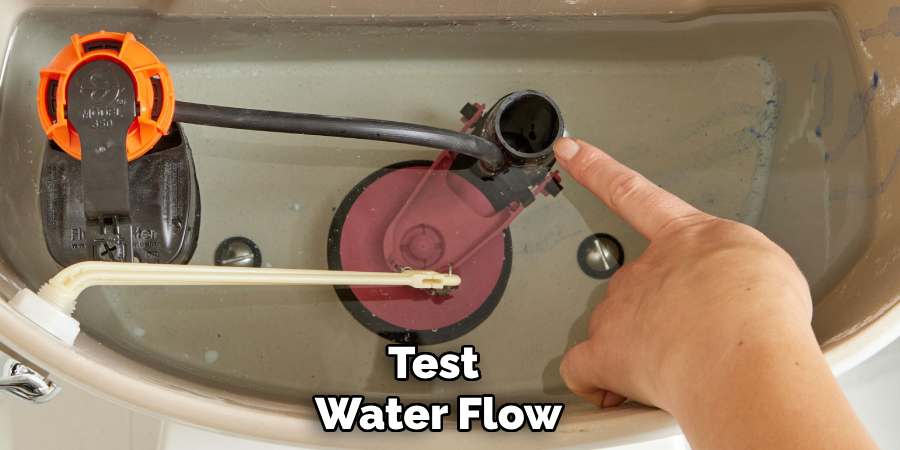
Step 3: Test Water Flow
If the first two steps don’t resolve the issue, disconnect the supply hose from the toilet tank. Place the loose end into a bucket or container and turn the shut-off valve on briefly to confirm if water flows freely from the hose. If the flow is weak or nonexistent, the issue may be within the valve or water line, requiring further investigation or professional assistance.
How to Repair Flush Tank Water Not Coming: Cleaning or Replacing the Fill Valve
If the previous steps do not resolve your toilet’s water flow issues, it may be time to clean or replace the fill valve. Follow these steps to address the problem:
Step 1: Identify the Fill Valve Type
Begin by identifying the type of fill valve your toilet uses. The two most common types are the traditional ballcock valve and the modern float cup fill valve. The ballcock valve uses a long arm connected to a ball-shaped float, while the float cup model includes a round float that moves vertically along the fill valve shaft. Determining the type of valve will help you understand how to disassemble and service it correctly.
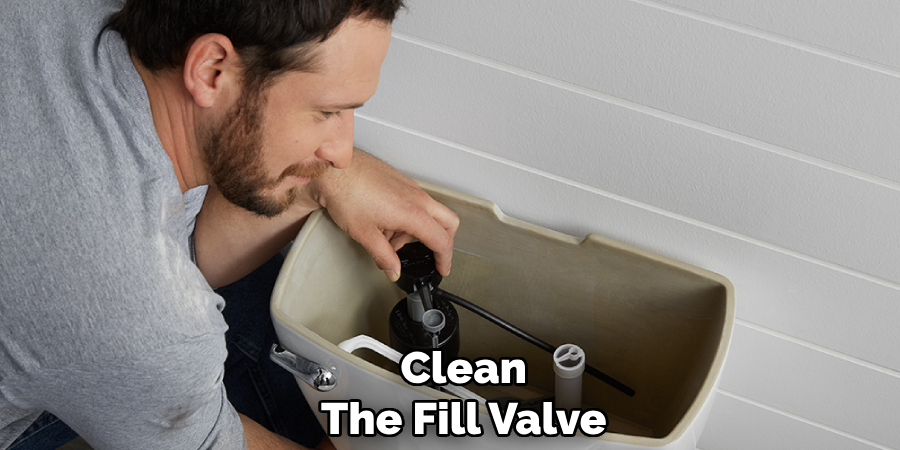
Step 2: Clean the Fill Valve
Start by turning off the water supply to the toilet by closing the shut-off valve. Next, flush the toilet to empty the tank as much as possible. Remove the top of the fill valve assembly, and inspect the interior for any debris, dirt, or mineral deposits causing a blockage. Use a needle or pin to clear the inlet hole of the valve and rinse the parts thoroughly under running water. Reassemble the fill valve and turn the water supply back on to test if cleaning resolved the issue.
Step 3: Replace the Fill Valve If Necessary
If cleaning does not restore proper function, it may be necessary to replace the fill valve entirely. To do this, disconnect the water supply line and unscrew the old fill valve from the bottom of the tank. Install the new valve according to the manufacturer’s instructions, ensuring the height is adjusted properly. Reconnect the water supply line, turn the water back on, and test the system to verify everything is functioning correctly.
Unclogging the Water Inlet and Tank Components
Properly maintaining and unclogging the water inlet and tank components can prevent issues with your toilet’s functionality.
Removing Sediment Buildup
Over time, sediment can accumulate in the water inlet hose and filter screen, restricting water flow. To address this, first shut off the water supply to the toilet. Disconnect the water inlet hose where it connects to the tank and carefully remove the filter screen. Rinse the filter screen under running water to dislodge any sediment or debris.
Use a small brush or cloth to ensure it is thoroughly cleaned. Once clean, reattach the filter screen and inlet hose. Turn the water back on and check for improved water flow into the tank.
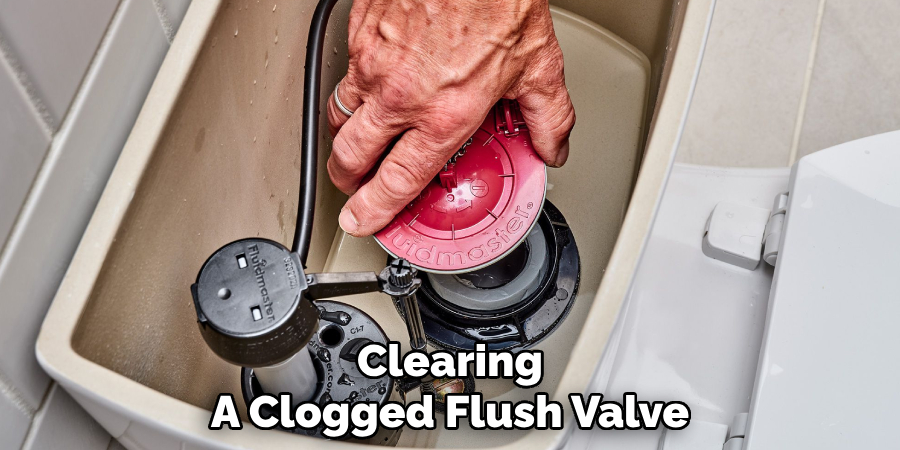
Clearing a Clogged Flush Valve
The flush valve seal plays a crucial role in allowing water to flow from the tank during a flush efficiently. If the seal is clogged with debris or mineral deposits, it can cause operational problems. Remove the flush valve seal by detaching it gently from the valve assembly. Inspect the seal and surrounding area for any blockages or buildup.
Clean the seal thoroughly using warm, soapy water and a soft brush. Reattach the seal securely once all debris is removed, ensuring a snug fit. Test the flush system to confirm smooth operation and ensure no further blockages persist.
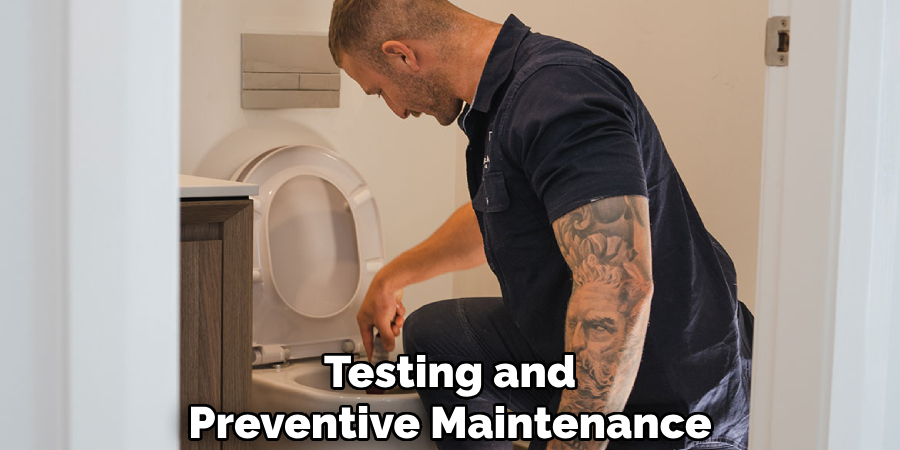
Testing and Preventive Maintenance
Step 1: Turn On the Water Supply and Test the Flush
After completing all repairs and reassembly, turn on the water supply to the toilet. Allow the tank to fill and observe whether the water fills at the correct speed and stops at the appropriate level, aligned with the manufacturer’s specifications. Perform a test flush to ensure the toilet functions as intended, verifying efficient water flow and proper operation.
Step 2: Listen for Any Leaks or Running Water
Pay close attention to any unusual sounds, such as continuous water flow or hissing, which could indicate a leak or a faulty valve. Inspect the tank’s components visually for any signs of water escaping. This step is crucial to catch minor issues before they develop into more significant malfunctions.
Step 3: Prevent Future Issues
To maintain optimal performance and prolong the life of the toilet, conduct regular cleanings of the tank components to prevent the buildup of sediment or debris. If hard water is a known issue in your area, consider installing a water softener to minimize mineral deposits within the tank. Proactive maintenance will ensure the toilet remains efficient and reduce the likelihood of costly repairs in the future.
Frequently Asked Questions (FAQs)
Q1: What Should I Do if The Water Supply to My Toilet Is Weak or Nonexistent?
A1: Check the water supply line and shut-off valve to ensure they are fully open. Inspect the hose for kinks, clogs, or damage. If the issue persists, test the water flow from the supply hose and investigate further into the valve or water line for potential blockages or damage.
Q2: How Do I Know When It’s Time to Replace the Fill Valve?
A2: If cleaning the valve does not restore normal function, or if you notice persistent issues such as slow filling, continuous running, or irregular water flow, it’s likely time to replace the fill valve. Always follow the manufacturer’s instructions for proper installation.
Q3: Can Sediment Buildup in The Inlet Hose Cause My Toilet to Malfunction?
A3: Yes, sediment buildup can restrict water flow, leading to slow tank filling or reduced overall performance. Regularly cleaning the inlet hose and filter screen can prevent these issues and improve water flow.
Q4: What’s the Best Way to Prevent Mineral Deposits and Debris from Causing Problems?
A4: Conduct routine cleaning of the tank components, including the fill valve and filter screen. If you live in an area with hard water, installing a water softener can help reduce the accumulation of mineral deposits in your system.
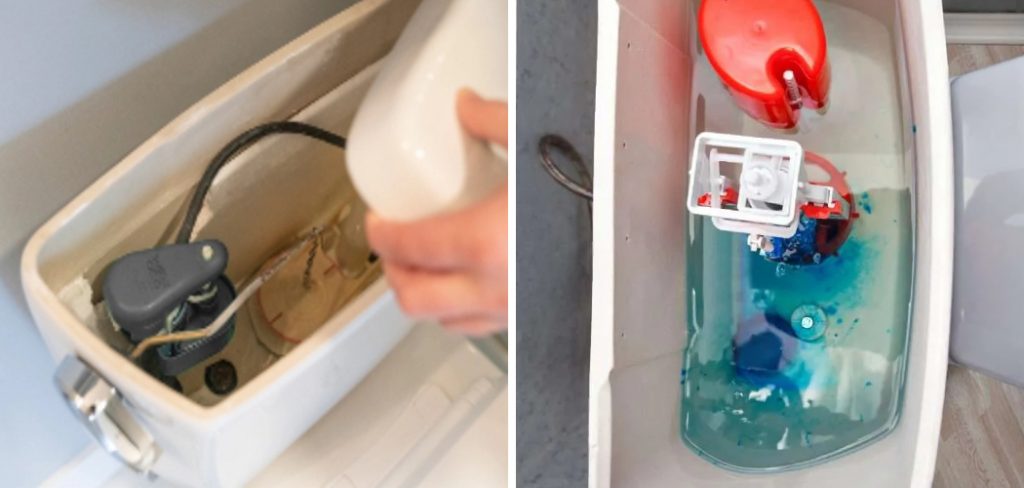
Q5: How Can I Tell if My Toilet Has a Leak I Might Have Missed?
A5: Listen for unusual sounds, like continuous running or hissing. Inspect the tank and surrounding areas for water puddles or dampness. You can also add a few drops of food coloring to the tank; if it appears in the bowl without a flush, there’s likely a leak.
Q6: Is It Safe to Perform These Repairs on My Own?
A6: Most minor cleaning and repairs, such as removing sediment or replacing a fill valve, can be done by following detailed instructions like those provided in this guide. However, seeking professional assistance is recommended if you encounter complex issues or feel unsure.
Q7: How Often Should I Perform Maintenance on My Toilet?
A7: Routine maintenance, such as inspecting and cleaning components, should ideally be performed every six months to a year. Addressing problems promptly as they arise can help prevent more significant issues over time.
Conclusion
To troubleshoot and resolve the issue of “how to repair flush tank water not coming,” start by checking the supply line for any blockages or disconnections. Next, clean the fill valve to ensure it is free from sediment or debris. Adjust the float mechanism to maintain proper water levels in the tank, and identify and unclog any other tank components as needed. Routine maintenance, such as regular cleaning and inspections, is vital to keeping the toilet in optimal working condition.
If these steps do not address the problem, consulting a professional plumber for further assistance is recommended.