Leveling a tub is a crucial step in ensuring its proper installation and long-term functionality. An uneven tub can lead to water drainage issues, structural stress, and unnecessary wear over time. By taking the time to level your tub correctly, you can prevent costly repairs and enjoy a stable, well-functioning installation. This guide will walk you through the key steps for how to level a tub effectively.

Why Leveling Your Tub Is Essential
Leveling your tub is essential to maintaining both its functionality and durability over time. An uneven tub can lead to several issues, such as improper water flow, which may result in standing water and subsequent damage from mold or mildew. This can lead to costly repairs and pose health risks in the long run. Additionally, an unlevel tub creates unnecessary pressure points that can weaken its structural integrity, potentially causing cracks or leaks. By ensuring your tub is level, you not only protect your investment but also create a safer and more visually appealing bathroom environment.
Tools and Materials Needed
Before starting the leveling process, it’s important to have the right tools and materials on hand to ensure accuracy and efficiency. Here is a list of commonly required items:
- Level: A spirit or bubble level will help you determine if the tub is properly aligned.
- Measuring Tape: Useful for checking dimensions and ensuring precise adjustments.
- Shims: These small wedges are essential for adjusting the tub’s position on uneven surfaces.
- Adjustable Wrench or Screwdriver: Depending on your tub’s installation requirements, you may need these to adjust feet or fasten components.
- Silicone Sealant: To seal gaps and secure the tub once properly leveled.
- Caulking Gun: For applying silicone sealant evenly.
- Wooden Blocks (optional): These can serve as temporary supports while making adjustments.
- Protective Gear (e.g., gloves, safety glasses): To ensure safety during the installation process.
Having these tools and materials readily available will make the task smoother and help you achieve a perfectly leveled tub.
10 Methods How to Level a Tub
1. Using a Bubble Level to Check the Surface

Before making any adjustments, the first step is to verify whether the tub is level. A standard bubble level can be placed along the length and width of the tub rim to check for inconsistencies. If the bubble is not centered, it indicates that the tub is tilted. This step should be repeated on all sides to determine which areas need adjustment. Marking the areas where the level is off will help guide the next steps in the leveling process.
2. Adjusting the Tub’s Support Feet (If Applicable)
Many modern bathtubs, especially freestanding and clawfoot models, come with adjustable feet that allow for minor height modifications. If the tub has leveling feet, they can be turned clockwise to raise a corner or counterclockwise to lower it. A wrench or adjustable pliers can be used for this process. After each adjustment, the level should be checked again to ensure even height distribution.
3. Shimming Under the Tub Base

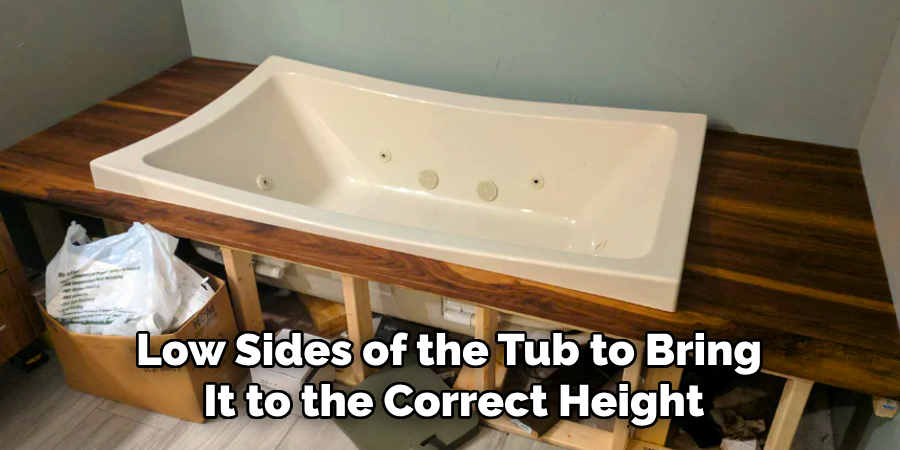
For bathtubs without adjustable feet, shims can be used to achieve the correct level. Wood or composite shims should be placed under the low sides of the tub to bring it to the correct height. The shims should be inserted gradually to prevent cracking or shifting. Once the tub is level, the shims can be secured in place with construction adhesive to prevent movement over time.
4. Using a Mortar Bed for Stability
A common method to level and stabilize a tub is to install it over a mortar bed. This is particularly useful for fiberglass and acrylic tubs, which are prone to flexing. A layer of mortar should be spread evenly where the base of the tub will sit, ensuring that it fills any gaps between the floor and the bottom of the tub. When the tub is placed on the wet mortar, slight adjustments can be made to level it before the mortar sets.
5. Adjusting the Floor Surface
If the floor beneath the bathtub is uneven, leveling the floor itself may be necessary before installing the tub. Self-leveling compound can be applied to correct minor dips and slopes in the floor. For more severe unevenness, plywood subflooring may need to be replaced or reinforced to create a stable base for the tub.
6. Securing the Tub to Wall Studs

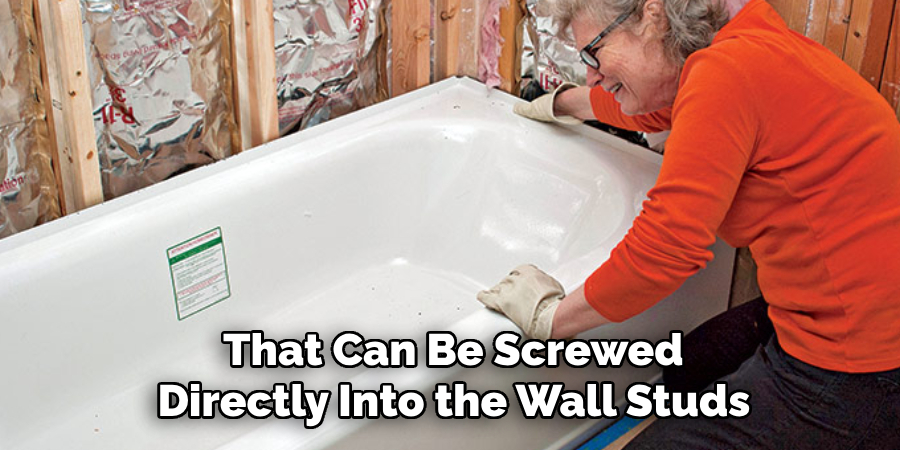
Once the tub is level, securing it to the surrounding walls will help maintain its position. Most built-in tubs have flanges that can be screwed directly into the wall studs. It is important to use corrosion-resistant screws and to avoid over-tightening, which could cause misalignment. If the tub moves slightly after securing, shims or additional supports can be added behind the flange.
7. Using a String Line for Precision Leveling
For larger or drop-in tubs, a string line can be an effective tool to check for even leveling across longer distances. Stretching a taut string from one end of the tub to the other provides a clear reference for any dips or raised areas. By comparing the string to the tub’s edge, adjustments can be made accordingly to achieve an even installation.
8. Adding Additional Support Braces
In cases where the tub’s structure does not sit evenly on the subfloor, additional support braces can be used. These braces, often made of wood or metal, are installed under the tub to provide extra stability. This method is particularly useful for heavy cast-iron tubs, which require solid reinforcement to prevent sinking over time. The braces should be positioned evenly to prevent stress points that could lead to cracking or warping.
9. Double-Checking the Plumbing Alignment
An often-overlooked aspect of leveling a tub is ensuring that the plumbing connections are properly aligned. If the drain or overflow pipes are not correctly positioned, they can pull on the tub, causing it to shift out of level. Before finalizing the installation, it is essential to test the drain alignment and make any necessary adjustments to the pipes or tub positioning.
10. Sealing and Finishing for Long-Term Stability

Once the tub is level and securely in place, sealing around the edges with caulk or silicone prevents moisture from seeping underneath. This step also helps to keep the tub in position by creating a slight adhesive effect. For added stability, expandable foam can be used in hidden areas around the tub base to prevent movement over time. Regular checks should be performed after installation to ensure that the tub remains level and secure.
Things to Consider When Leveling a Tub
When leveling a tub, several factors should be taken into account to ensure a successful and lasting installation. Here are some important considerations:
Type of Tub
Different types of tubs, such as freestanding, built-in, clawfoot, or drop-in, have unique installation requirements. Understanding the specific needs of your tub type will help you choose the most appropriate leveling method.
Floor Condition
Check the condition of the floor beneath the tub. Uneven or damaged subfloors may require repair or reinforcement before proceeding with the installation. Using a level to assess the floor’s evenness is a critical first step.
Plumbing Alignment
Proper alignment of plumbing connections, such as the drain, overflow, and water supply lines, is essential. Misaligned pipes can compromise the stability of the tub and reduce its effectiveness.
Weight Distribution
Particularly for heavier tubs, such as cast-iron models, proper weight distribution is crucial to prevent structural damage to the floor. Ensure the subfloor and any additional support braces can handle the tub’s weight.
Moisture Protection
Adequate sealing with silicone caulk or other waterproofing materials is necessary to prevent water damage. Moisture seepage can lead to mold growth, wood rot, or structural weakening over time.
Maintenance and Upkeep
Proper maintenance and upkeep of your bathtub are essential to ensure its longevity and functionality. Regular cleaning is the most straightforward way to keep your tub in good condition. Use a non-abrasive cleaner suitable for your tub’s material to prevent surface scratches or discoloration. For stubborn stains or soap scum buildup, a mixture of baking soda and water can be an effective, eco-friendly solution.
Inspect the caulking and seals around the tub regularly for any signs of wear, cracking, or detachment. Reapply silicone caulk as needed to maintain a watertight seal, preventing moisture from seeping into the surrounding areas and causing damage. Additionally, keep an eye on the plumbing fixtures, such as the faucet and drain, to ensure there are no leaks. Addressing small leaks promptly can prevent more extensive water damage.
If your tub relies on additional supports, such as braces or mortar beds, periodically check for any shifting or movement. Heavy use or settling of the floor can sometimes cause the tub to become unlevel over time. Use a level to verify that the tub remains aligned and, if necessary, adjust the supports to restore balance.
Conclusion
Leveling a bathtub is an essential step to ensure functionality, safety, and durability. Whether using adjustable feet, shims, a mortar bed, or reinforcing the subfloor, careful attention to detail will result in a properly installed tub. By following these methods, homeowners and professionals can achieve a stable and long-lasting bathtub setup that provides comfort and efficiency for years to come. Thanks for reading, and we hope this has given you some inspiration on how to level a tub!
You Can Also Check It Out To Install Csst Fittings

