Free-standing tubs are a timeless addition to any bathroom, offering both functionality and a touch of luxury. Unlike built-in tubs, free-standing designs can be placed almost anywhere in the room, creating a bold visual statement while providing flexibility in layout. However, properly installing and securing these tubs is essential to ensure both safety and longevity.

Understanding how to secure free standing tub installations is crucial. Without proper support, these tubs may shift or tip over time, leading to water leaks, structural damage, and even user safety hazards. A securely anchored tub ensures stability, protects your floors from damage, and delivers a worry-free bathing experience.
This guide will walk you through the steps of securely installing a free-standing tub, from selecting the right location and tools to performing routine maintenance. Whether installing a new tub or enhancing an older one, these tips will keep your bathroom beautiful and safe.
Choosing the Right Location for Stability
Assessing the Bathroom Floor
Before installing your free-standing tub, assessing the bathroom floor is vital to ensure stability. Check if the flooring is level, as uneven surfaces can cause the tub to wobble or shift over time. Use a spirit level to detect any inconsistencies and address them by leveling the subfloor if necessary. Additionally, consider the type of flooring in your bathroom—whether tile, concrete, or wood—and evaluate if reinforcement is required to support the tub’s weight when filled with water.
Positioning the Tub Correctly
Careful planning is essential when positioning your tub. Start by placing the tub in the intended location and marking key reference points around its base with painter’s tape or a pencil. Be sure to leave adequate space around the tub for plumbing access and future maintenance. The ideal placement often balances aesthetic appeal with functional accessibility, enhancing the overall design of your bathroom.
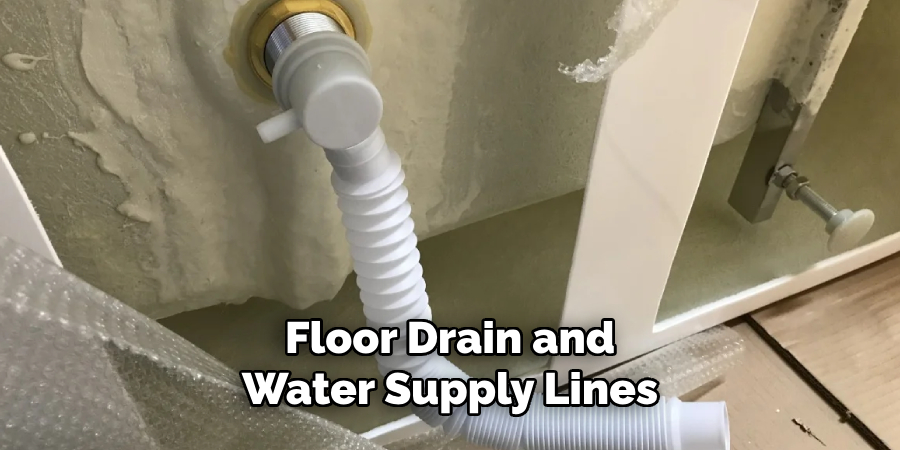
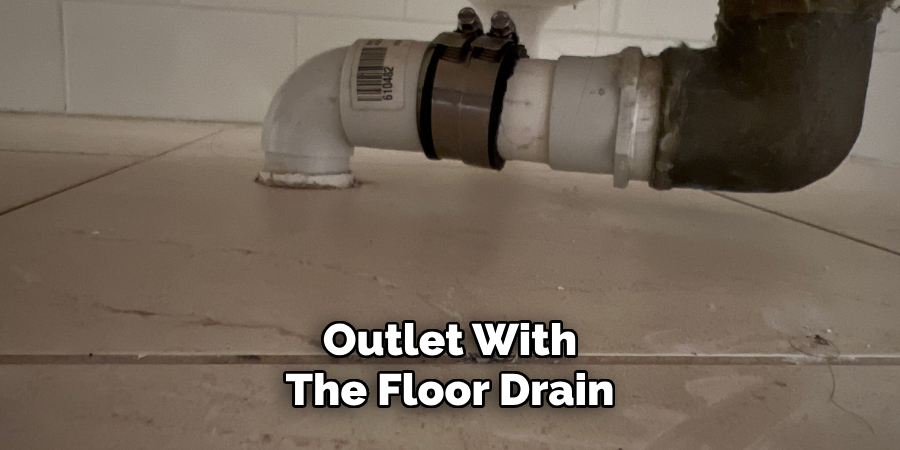
Checking Floor Drain and Water Supply Alignment
Proper alignment of the floor drain and water supply lines is critical in securing your free-standing tub. Ensure that the drain pipe is directly beneath the tub’s outlet and that water supply lines are easily connected to the tub’s filler.

Aligning these components before securing the tub prevents leaks and simplifies installation, ensuring a smooth and reliable setup.
Gathering Tools and Materials
Before beginning the installation of your free-standing tub, ensure you have all the necessary tools and materials at hand to simplify the process and avoid unnecessary delays.
Essential Tools
- Level – For ensuring the tub is perfectly balanced.
- Measuring tape – For precise placement and alignment.
- Drill and screwdriver – To secure components and adjust screws as needed.
- Wrench – For tightening plumbing connections securely.
- Silicone sealant or construction adhesive – To seal gaps and secure the tub in place.
Materials Needed
- Anchors or brackets – Used if your tub requires a mounting kit for added stability.
- Plumber’s putty – Essential for sealing connections and preventing leaks.
- Shims – Used to level the tub if the floor surface is uneven.
Safety Considerations
- Always turn off the water supply before making any plumbing adjustments to avoid accidents.
- Wear protective gloves when working with sealants or adhesives to protect your skin from irritation or potential harm.
Having these tools and materials on hand ensures that you are well-prepared to complete the setup efficiently while maintaining safety and structural integrity.
How to Secure Free Standing Tub: Securing the Tub to the Floor
Ensuring your tub is securely attached to the floor is a vital step in the installation process. Follow these steps to achieve a stable and reliable setup:
Step 1: Leveling the Tub
Begin by placing the tub on the marked location where it will be installed. Using a level, check whether the tub sits evenly

on the floor. If you notice any unevenness, place shims beneath the tub until it is perfectly level. This is critical to prevent wobbling and to ensure effective water drainage.
Step 2: Using Adhesive to Secure the Base
Once the tub is level, apply a strong construction adhesive or silicone sealant around the base of the tub where it meets the floor. Be sure to distribute the adhesive evenly to create a firm bond. Allow the adhesive to cure properly as specified in the manufacturer’s instructions before proceeding to the next steps or using the tub. Ensuring full curing time will maximize the adhesive’s strength and longevity.
Step 3: Installing Floor Anchors (Optional for Extra Stability)
Some tubs come equipped with brackets designed to affix the tub to the floor for additional stability. If your tub includes this feature, use a drill to create pilot holes for the floor anchors. Then, secure the brackets to the floor with screws, ensuring they are tightly fastened to prevent the tub from shifting over time.
By carefully following these steps, you can ensure that your tub remains firmly secured, enhancing its durability and usability.
Connecting Plumbing Securely
Step 1: Attaching the Drain Pipe
Start by aligning the tub’s drain outlet with the floor drain. Apply a generous amount of plumber’s putty around the underside of the drain flange to create a watertight seal.

Carefully place the drain in position and ensure it is seated firmly. Use a wrench to secure the drain pipe connection tightly, but avoid over-tightening, which could damage the fittings. Double-check that the alignment remains correct throughout the process to maintain proper functionality.
Step 2: Connecting Water Supply Lines
Next, attach the hot and cold water supply lines to the tub faucet. Wrap the threads of each connection with Teflon tape to ensure a secure fit and prevent leaks. Carefully thread the connections by hand initially to avoid cross-threading, then use an adjustable wrench to secure them tightly. Be sure not to overtighten, as this could damage the fittings or lines.
Step 3: Testing for Leaks
Test for leaks once the drain and supply lines are securely connected by turning on the water. Run both the hot and cold water through the faucet while checking for any drips or pooling water around the drain and connection points. Inspect each fitting closely and tighten them further if necessary, ensuring that all components are leak-free. Take your time during this step, as addressing leaks now will save time and effort in the future.
Sealing Around the Tub for Extra Stability
Applying Silicone Sealant at the Base
To ensure extra stability and prevent water damage, apply a bead of silicone sealant around the tub’s perimeter where it meets the floor. This step helps create a watertight barrier and secures the tub in place. Use a caulk tool or your finger to smooth out the sealant, creating a clean and uniform finish. Be careful not to leave any gaps, as these could compromise the seal and allow water to seep through.
Allowing Proper Curing Time
After applying the silicone, allow it to dry and cure for at least 24 hours. This curing period ensures the sealant bonds properly and provides maximum protection against leaks and movement. Avoid using the tub or exposing the area to water during this time to prevent seal disruption.
Preventing Water Damage
Regularly inspect the silicone sealant to keep your tub in excellent condition over time. Check for any cracks, gaps, or areas where the sealant has deteriorated. If necessary, remove the old sealant and reapply a fresh bead to maintain a strong barrier. Performing these checks periodically helps protect your bathroom from potential water damage and prolongs the lifespan of your tub installation.
Final Stability Checks and Adjustments
Testing the Tub’s Stability
Once the sealant has fully cured, confirming the tub’s stability before regular use is important. Gently push the tub from multiple angles—such as the sides, front, and corners—to ensure it doesn’t shift or wobble. A properly secured tub should feel firmly in place without any noticeable movement.
Inspecting Plumbing and Floor Anchors
Next, carefully inspect the plumbing connections and floor anchors. Ensure the drain, overflow, and any water supply lines are tightly connected, with no signs of leaks. Similarly, check the floor anchors or support brackets for any looseness or misalignment. These components are key in maintaining the tub’s stability and preventing unwanted movement during use.
Making Adjustments if Needed
If you detect any slight movement of the tub or loosening of connections, address the issue promptly. Apply additional adhesive or construction-grade caulk to reinforce the tub’s attachment to the floor or walls.

For floor anchors or brackets, tighten screws or bolts securely, but be cautious not to overtighten, as this could damage the tub structure. Conduct a final check after adjusting to confirm the tub is completely stable and ready for long-term use.
Maintenance Tips for a Secure Tub
Regularly Check for Movement
Over time, even a well-installed tub can begin to shift due to natural wear or changes in your home’s structure. Make it a habit to check for movement by gently applying pressure around the tub’s edges. If movement is detected, promptly reinforce the tub with additional adhesive or secure it further with floor anchors or brackets.
Inspect Silicone Sealant
The silicone sealant around your tub is crucial in preventing leaks and maintaining its stability. Inspect the seal regularly for signs of cracking, peeling, or gaps. Reapply fresh silicone sealant as needed to ensure continuous protection and a neat appearance.
Ensure Plumbing Remains Secure
Loose plumbing fittings can lead to leaks and compromise the tub’s stability. Periodically verify that all plumbing connections, including the drain and water supply lines, are tightly secured. Tighten any loose fittings immediately to prevent potential problems.
Conclusion
Securing a free-standing tub is essential for both functionality and aesthetics. Choosing the right location, leveling the base, and using adhesive or floor anchors are critical steps in maintaining its stability. Proper plumbing connections are key in preventing leaks and ensuring long-term performance. Homeowners should prioritize conducting routine inspections, checking for movement, weakened sealant, or loose plumbing fittings. By following these steps on how to secure free standing tub, you can protect your investment and avoid costly repairs. A secure tub guarantees peace of mind and enhances the overall safety of your bathroom.

