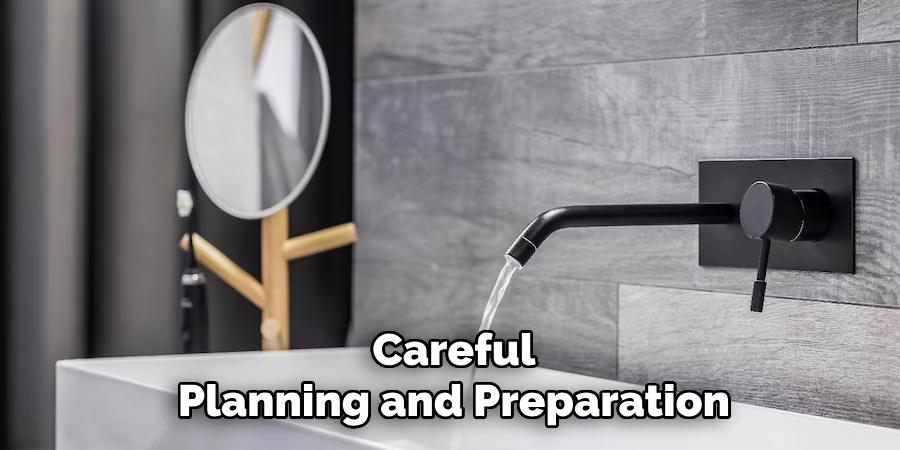
Wall-mounted faucets have become increasingly popular due to their stylish design and space-saving nature, making them a practical choice for both bathrooms and kitchens. These faucets offer a sleek, modern look that can elevate the aesthetic of any space while also providing easy-to-clean surfaces and freeing up countertop space. However, installing a wall-mounted faucet requires careful preparation and attention to detail. Unlike traditional sink-mounted faucets, this type involves hidden supply lines behind the wall, precision mounting to ensure proper alignment, and thorough leak prevention to avoid long-term issues.
The purpose of this article is to provide a comprehensive, step-by-step guide on how to plumb a wall mounted faucet. Whether you’re a seasoned DIYer or a first-time homeowner looking to tackle this project, this guide will walk you through everything you need to know to achieve a successful installation.
Tools and Materials Needed
Before beginning your wall-mounted faucet installation, gathering the right tools and materials is essential to ensure a smooth and efficient process. Here is a breakdown of what you will need:
Essential Tools
- Pipe wrench and adjustable wrench – Required for tightening and securing pipe fittings.
- Pipe cutter or tubing cutter – Useful for cleanly cutting piping materials such as PEX, copper, or CPVC.
- Drill and drill bits – Needed to create precise holes in the wall for mounting or accessing pipes.
- Level – Ensures your faucet is aligned correctly and installed evenly.
- Stud finder – Helps locate wall studs to provide proper support for the faucet.
Materials
- Wall-mounted faucet and mounting hardware – The central fixture of your installation, including brackets and screws.
- PEX, copper, or CPVC piping – Choose based on your plumbing system and preferences.
- Pipe fittings, elbows, and T-joints – Essential for connecting and directing water flow appropriately.
- Pipe thread sealant or Teflon tape – Ensures airtight and leak-free connections between fittings.
- Shutoff valves – Allow for easy water control during the installation process.
- Wood backing or blocking for faucet support – Adds durability and stability to hold the faucet securely in place.
Preparation is key, so make sure to have all these tools and materials readily available before starting your project.
Planning and Preparation
When installing a faucet, careful planning and preparation are essential to ensure a smooth and efficient process.
Mapping the Water Lines
Begin by determining the optimal path for both hot and cold water lines through the wall. Consider the layout of your plumbing system and identify the most direct and unobstructed route. Ensure the water lines avoid any existing electrical wiring or structural barriers.
Choosing the Correct Faucet Height
Choosing the right height for your faucet installation is crucial. For bathroom faucets, the typical height ranges from 6 to 8 inches above the sink countertop. Kitchen faucets may vary depending on the layout, but generally allow enough clearance for large pots and dishes. Be sure to consult the manufacturer’s recommendations or local building codes to achieve the best results.
Installing Support Blocking
Support is fundamental for maintaining the longevity and stability of your faucet. Install wood backing or blocking between the wall studs to create a secure base for mounting the faucet. This added support prevents movement and ensures that the faucet remains firmly in place over time.
Turning Off the Water Supply
Before starting any work, locate and turn off the main water supply. This step is crucial to avoid leaks, water damage, or accidents during the installation process. Test to ensure the water is fully shut off by opening nearby taps and checking for any flow.
How to Plumb a Wall Mounted Faucet: Rough-In Plumbing for Wall Mounted Faucet
Marking and Drilling Access Holes
Begin by using a stud finder to locate and avoid any existing wiring or pipes behind the wall. This step ensures that you do not accidentally damage hidden utilities while working. Mark the precise spots where holes need to be drilled for running the new water supply lines. Ensure your measurements are accurate and align with the planned position of the faucet. Use a drill with an appropriate bit to create clean access holes, ensuring they are the correct size for the piping.
Running the Water Supply Lines
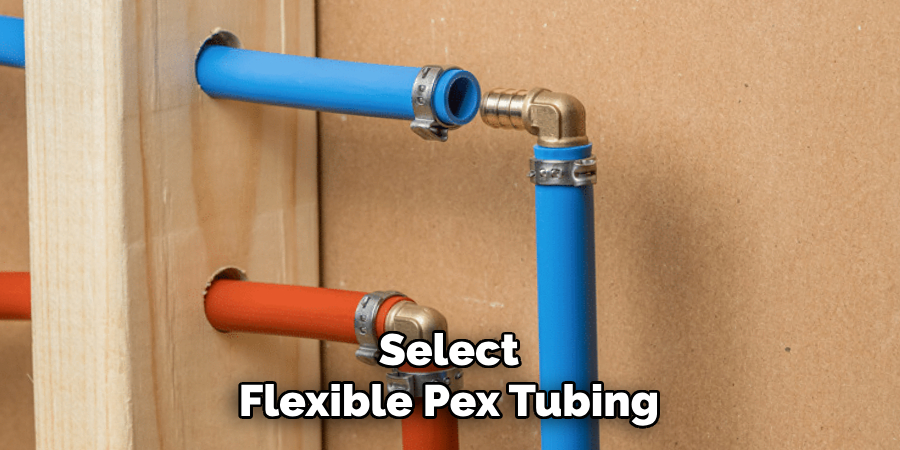
Select flexible PEX tubing, copper pipes, or CPVC piping as your water supply lines, depending on the specific requirements of your installation and personal preference. Carefully thread the pipes through the drilled holes, ensuring they follow the planned layout. Secure the piping to the wall studs using clamps or brackets to prevent any movement or shifting over time. This step is essential to maintain the plumbing’s integrity and avoid potential leaks or damage.
Positioning the Faucet Mounting Plate
Align the faucet mounting plate at the correct height on the wall’s blocking, ensuring proper placement for accessibility and functionality. Use a level to ensure the mounting plate is straight and perfectly aligned. Once positioned, fasten the mounting plate securely to the wall’s backing with screws or bolts. Double-check that the mounting plate is stable and does not shift. This ensures a sturdy base for the faucet and establishes a secure connection for the water lines.
Connecting the Water Lines
Properly connecting the water lines is a critical step to ensure the faucet functions effectively and without leaks. Follow these steps to complete the process:
Attaching Shut-Off Valves
Install shut-off valves at an accessible location directly below the faucet. These valves are essential for future maintenance, as they allow you to shut off the water supply to the faucet without affecting the rest of the plumbing system. Choose high-quality shut-off valves and secure them firmly to the water supply lines.
Connecting Pipes to Faucet Ports
Carefully align the pipes with the faucet ports to ensure a secure fit. Use elbows or other fittings as necessary to guide the pipes into the correct position for a seamless connection. To prevent leaks, wrap Teflon tape or apply a pipe thread sealant around the threads of all threaded connections before tightening them. Be sure not to overtighten, as this may damage the fittings or compromise the seal.
Testing for Leaks
Once all connections are complete, turn the water supply back on slowly to pressurize the lines. Carefully inspect every joint, fitting, and threaded connection for any signs of moisture or dripping. If any leaks are detected, turn off the water supply and re-tighten or reapply Teflon tape or sealant as needed. Repeat the process until the system is completely sealed and leak-free. Ensuring that all connections are secure and watertight is essential for the long-term reliability of the faucet installation.
Installing the Wall Mounted Faucet
Mounting the Faucet
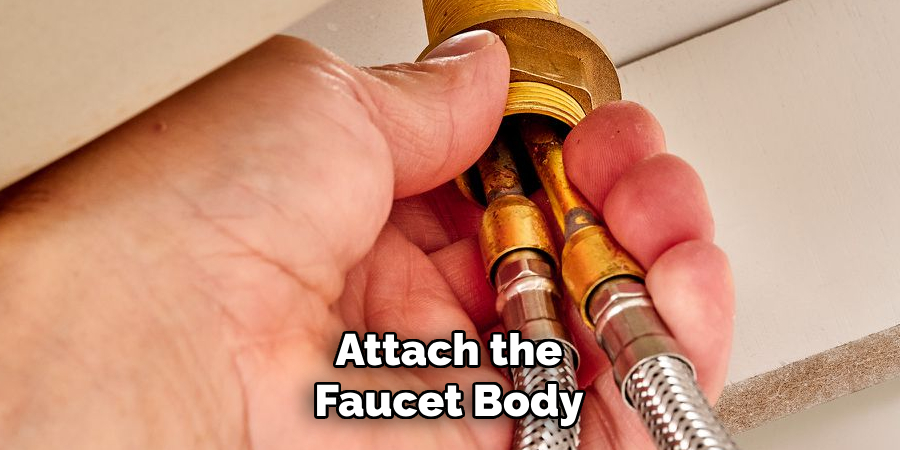
Attach the faucet body to the installed rough-in valves or mounting hardware. Begin by aligning the faucet with the valve outlets or the mounting brackets, ensuring that all components are positioned correctly. Use a level to double-check that the faucet is perfectly horizontal before proceeding. Once its placement is verified, tighten the connections using the appropriate tools, taking care not to over-tighten and damage any components. Confirm that the connections are secure but allow for gentle adjustments if needed.
Securing Handles and Trim Kits
Next, install the handles, spouts, and decorative trim plates according to the manufacturer’s instructions. Each component should slide easily into place and be secured using the provided screws or fasteners. Ensure the handles operate smoothly and align correctly with the faucet body for a clean, functional aesthetic.
Snap or fasten the decorative plates snugly to cover any exposed mounting hardware, providing a polished and professional look. Conduct a final check to confirm that all pieces are properly installed and tightly secured to prevent future movement or looseness. Proper attention to detail in this step ensures both functionality and an elegant finish for the wall-mounted faucet.
Finishing Touches and Sealing
Applying Caulk Around Faucet Edges
To ensure a watertight seal and protect against potential water damage, apply a thin bead of waterproof silicone caulk around the edges where the faucet base meets the wall. This step prevents water from seeping behind the fixture and into the wall. Use a caulking gun for precise application, and immediately smooth the caulk line with a damp finger or a caulk finishing tool for a neat and clean appearance. Wipe away any excess caulk with a damp cloth before it cures to maintain a professional finish.
Final Inspection and Testing
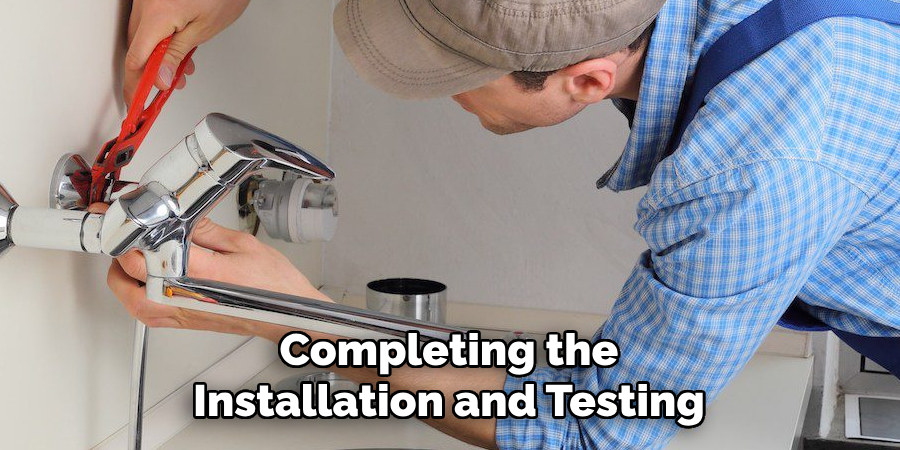
Conduct a thorough final inspection to confirm that the installation is secure and fully functional. Turn on both hot and cold water handles and check for steady water flow, ensuring that there are no irregularities in operation. Carefully examine the faucet and wall areas for any signs of leaks or drips, including hidden spaces behind the wall if they are accessible. Address any issues promptly to avoid potential long-term problems.
Cleaning Up
After completing the installation and testing, clear away any leftover debris, such as packaging, caulk remnants, or tools. Wipe down all surfaces to remove fingerprints, dust, or water spots. Finally, carefully remove any protective coverings from the new fixtures, leaving them spotless and ready for use.
Conclusion
To recap the process of how to plumb a wall mounted faucet, start by planning the layout and gathering all necessary tools and materials. Proceed with the rough-in, carefully measuring and installing the in-wall plumbing to align perfectly with the fixture. Connect the water supply lines securely and double-check all fittings for leaks. Finally, complete the installation by mounting the faucet and testing its functionality.
Accurate measurements and secure fittings are key to a successful installation. For complex setups or when local plumbing codes must be followed, always consult a professional plumber to ensure a safe and efficient result.

