Adjusting the temperature on a gas water heater is an essential maintenance task that can enhance both efficiency and safety in your home. Proper temperature settings not only ensure that you have hot water available for bathing, cooking, and cleaning, but they also help to prevent scalding and reduce energy consumption.

In this guide on how to adjust the temperature on a gas water heater, we will walk you through the steps to accurately adjust the temperature on your gas water heater, as well as provide tips on optimal temperature ranges and safety precautions to consider. Whether you’re a seasoned DIYer or a newcomer to home maintenance, this process is straightforward and manageable.
Why Do You Need to Adjust the Temperature?
Adjusting the temperature of your gas water heater is crucial for several reasons. First and foremost, setting the right temperature can significantly prevent the risk of scalding, especially for children and elderly individuals who may be more sensitive to heat. The recommended safe temperature for water heaters is typically around 120°F (49°C), which not only protects users from burns but also provides comfortable hot water for various household tasks.
Additionally, maintaining an efficient temperature can lead to energy savings. Heating water to excessively high temperatures wastes energy and increases utility bills. By optimizing the temperature settings, homeowners can achieve both comfort and cost-efficiency, ensuring that hot water is readily available while minimizing energy consumption. Furthermore, properly adjusting the temperature can prolong the lifespan of your water heater, as it reduces the strain on the system from overheating.
Necessary Tools and Materials
- Gas Water Heater
- Thermometer (Preferably One Designed for Testing Hot Water)
- Screwdriver or Control Dial, if Available
8 Step-by-step Guides on How to Adjust the Temperature on a Gas Water Heater
Step 1: Turn Off the Gas Supply
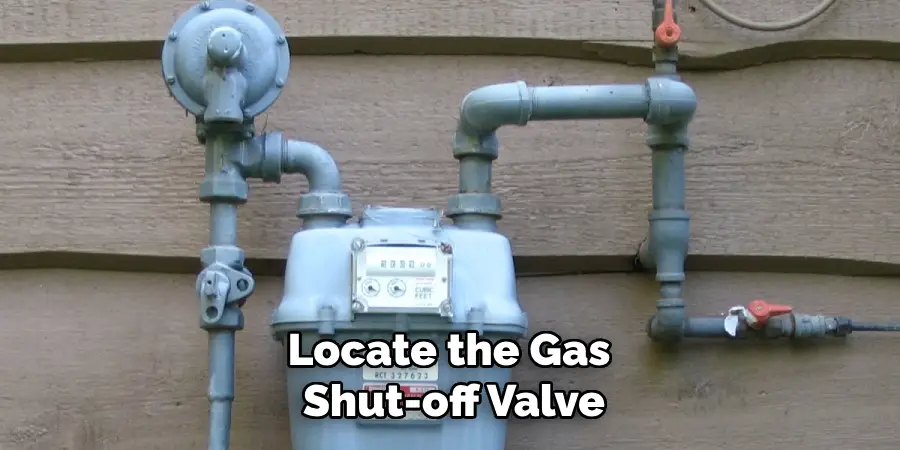
Before you begin adjusting the temperature of your gas water heater, it is imperative to ensure safety by turning off the gas supply. Locate the gas shut-off valve, which is typically situated near the bottom of the water heater, on the gas line.

Turn the valve clockwise until it is fully closed. This will stop the flow of gas to the appliance, preventing any potential hazards while making adjustments. Once the gas supply has been safely shut off, you can proceed to the next steps with confidence.
Step 2: Locate the Temperature Dial
Once the gas supply is turned off, the next step is to locate the temperature dial on your gas water heater. This dial is often found on the front or side of the heater, and it may be labeled as ‘Temperature,’ ‘Thermostat,’ or with a simple numeric scale. In some models, it may be a control knob that allows you to set the desired temperature.
Take note of the current setting to understand how much you will be adjusting it. If your water heater has a protective cover over the thermostat, remove it carefully using a screwdriver to access the temperature dial. After locating the dial, you are ready to make the necessary adjustments for optimal performance.
Step 3: Check the Current Temperature Setting
Using a thermometer designed for testing hot water, check the temperature of the hot water coming from your faucet. It is essential to do this step because sometimes the temperature settings on gas water heaters can be misleading due to inaccurate calibration or mineral build-up in the tank.
If the current setting aligns with what you measured, you may proceed to Step 4. However, if it does not match, make note of how much variance there is so that you can adjust accordingly.
Step 4: Adjusting the Temperature Dial
To increase or decrease the temperature setting on your gas water heater, turn the dial in the desired direction. Most models require you to turn the dial clockwise to increase the temperature and counterclockwise to decrease it.

If your water heater has a control knob, simply adjust it to the desired temperature setting. A general guideline is to set the temperature between 120°F (49°C) and 140°F (60°C) for optimal safety and efficiency. However, consult your manufacturer’s guidelines for specific recommendations for your model.
Step 5: Wait for the Water Heater to Heat Up
After adjusting the temperature dial, give your water heater some time to heat up before testing again with a thermometer. This process can take several hours depending on the size of your tank, so be patient and avoid making any further adjustments until the water has had time to reach the new temperature setting.
It is essential to note that gas water heaters may produce hot water at a higher temperature than the setting due to factors such as sediment build-up or fluctuations in gas pressure. Therefore, it is crucial to check the actual temperature of the water periodically and make adjustments if necessary.
Step 6: Repeat Steps 3-5 if Necessary
If your desired temperature has not been reached or if there is still a variance between the setting and the measured temperature, repeat steps 3-5 until you achieve your desired setting. It may take several attempts to calibrate accurately, but it is essential for both safety and efficiency purposes.
If your water heater does not have a temperature dial or control knob, you may need to consult the manufacturer’s instructions for specific steps on how to adjust the temperature.
Step 7: Replace Protective Cover
Once you have successfully adjusted the temperature and are satisfied with the results, carefully replace any protective coverings that were removed in earlier steps. This will ensure that the thermostat remains protected and calibrated correctly, preventing any future issues.

You may also want to consider marking the dial or control knob with a permanent marker at your desired temperature setting for easy reference in the future.
Step 8: Turn On the Gas Supply and Test the Water Temperature
With all adjustments complete and safety precautions taken, it is time to turn the gas supply back on. Slowly open the shut-off valve counterclockwise until it is fully open. Finally, test the hot water temperature from your faucet using a thermometer to ensure that it aligns with your desired setting.
Congratulations! You have successfully adjusted the temperature on your gas water heater, ensuring both safety and efficiency in your home. Remember to periodically check and adjust as necessary for optimal performance.
Frequently Asked Questions
Q: Why is It Necessary to Adjust the Temperature on a Gas Water Heater?
A: Adjusting the temperature of your gas water heater ensures both safety and efficiency in your home. A temperature that is too high can lead to scalding and an increased risk of burns, while a setting that is too low may not provide enough hot water for your needs.
Q: Is There an Ideal Temperature Setting for Gas Water Heaters?
A: The recommended temperature range for gas water heaters is between 120°F (49°C) and 140°F (60°C). However, it is best to consult your manufacturer’s guidelines for specific recommendations based on your model.
Q: How Often Should I Check and Adjust the Temperature on My Gas Water Heater?
A: It is recommended to check and adjust the temperature of your gas water heater at least once a year. However, if you notice any irregularities in the temperature or efficiency of your water heater, it is best to do so sooner.
Q: Can I Adjust the Temperature on My Gas Water Heater Without a Temperature Dial?
A: If your gas water heater does not have a temperature dial or control knob, it is best to consult the manufacturer’s instructions for specific steps on how to adjust the temperature. In some cases, you may need to hire a professional plumber to make the necessary adjustments.

Additionally, routine maintenance and cleaning can also help improve the efficiency of your water heater. It is recommended to flush your tank annually to remove any sediment build-up or debris that may affect the temperature and performance of your gas water heater. This can also prolong the lifespan of your appliance.
With these easy steps on how to adjust the temperature on a gas water heater, you can confidently adjust the temperature on your gas water heater and ensure a safe and efficient supply of hot water in your home. Remember to follow all safety precautions and consult your manufacturer’s instructions for specific guidelines for your model. Happy adjusting!
Conclusion
Adjusting the temperature of your gas water heater is a straightforward process that can enhance both the safety and efficiency of your home. By following the outlined steps, from locating the temperature dial to ensuring the final setting meets your needs, you can ensure that your hot water supply is both safe and sufficient.
Regularly checking and adjusting the temperature as necessary will not only help prevent issues such as scalding but also optimize energy usage, potentially reducing your utility bills. Always remember to refer to your manufacturer’s instructions for any specific guidelines related to your model, ensuring reliable performance year-round. Thanks for reading this article on how to adjust the temperature on a gas water heater.

