If you’re remodeling your bathroom or replacing an old toilet, you may need to attach a new toilet flange to your concrete floor. This can be a daunting task, especially if you’ve never worked with concrete before.
However, with a bit of patience and the right tools, it’s a job that even a novice DIYer can accomplish. In this guide, we’ll take you through the steps on how to attach toilet flange to concrete floor.
Can You Attach the Toilet Flange to the Concrete Floor?
When installing a bathroom, one of the most important steps is attaching the toilet flange to the concrete floor. Many homeowners wonder if this is possible, and the answer is yes! With the right tools and techniques, you can secure the toilet flange to the concrete floor for a sturdy and long-lasting installation.
Some methods include using a concrete drill, anchors, or epoxy, and it’s important to follow specific instructions for your particular type of flange and flooring. This may seem daunting, but once you’ve successfully attached the toilet flange to the concrete floor, you’ll have a solid foundation for your bathroom that can withstand years of use.
Why Should You Attach Toilet Flange to Concrete Floor?
When installing a toilet, one important step that often gets overlooked is attaching the toilet flange to the concrete floor. Some DIY enthusiasts may think it’s unnecessary, but attaching the flange ensures that your toilet is securely fastened to the floor, keeping you, your family, and your visitors safe from any potential accidents.
A properly attached flange also prevents any leaks from sewage or water overflow. By taking the necessary time to install the flange correctly, you’ll have peace of mind knowing that your toilet is fitted tightly to the floor, and you won’t have to worry about any unpleasant surprises in the future.
7 Steps to Follow on How to Attach Toilet Flange to Concrete Floor
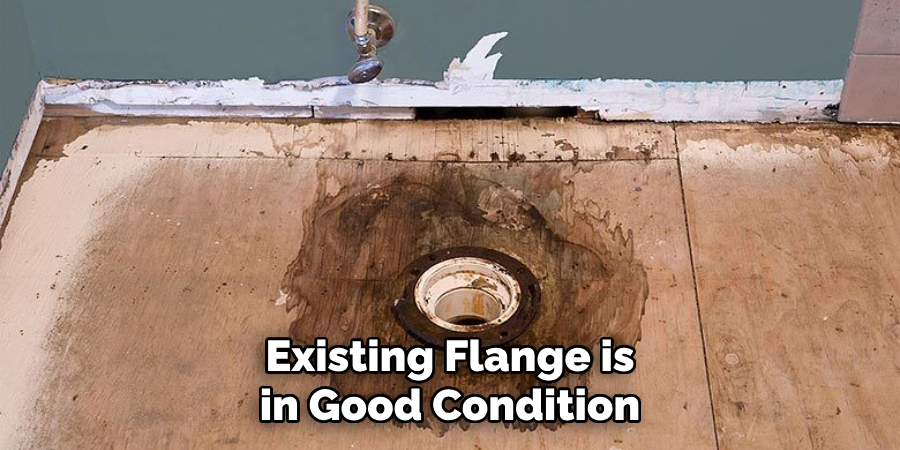
Step 1: Check the Condition of the Existing Flange
Before installing a new toilet flange, ensure the existing flange is in good condition. If the existing flange is corroded or broken, replace it. Look for any rust or cracks, as these could cause the new flange to fail. If you notice any damage, you should replace the entire flange assembly.
Step 2: Measure the Distance from the Floor to the Center of the Flange
Measure the distance from the floor to the center of the flange. This measurement is crucial to ensure a proper installation. Remember that the flange should sit flush with the finished floor, so be sure to take the type and thickness of the floor covering into account when taking measurements.
Step 3: Drill Holes in the Concrete Floor for the Flange Screws
Use a hammer drill and carbide-tipped masonry bit to drill holes for the flange screws. The diameter of the holes should be slightly smaller than the screws you’re using to attach the flange. Be careful not to drill too deep, as this can damage the plumbing pipes below the floor.
Step 4: Install the Flange
Place a bead of silicone caulk around the bottom edge of the flange and set it into the prepared holes in the concrete. Next, insert the flange bolts into the screw holes and secure them with washers and nuts. Be sure not to overtighten the bolts, which can cause the flange to crack.
Step 5: Attach the Toilet
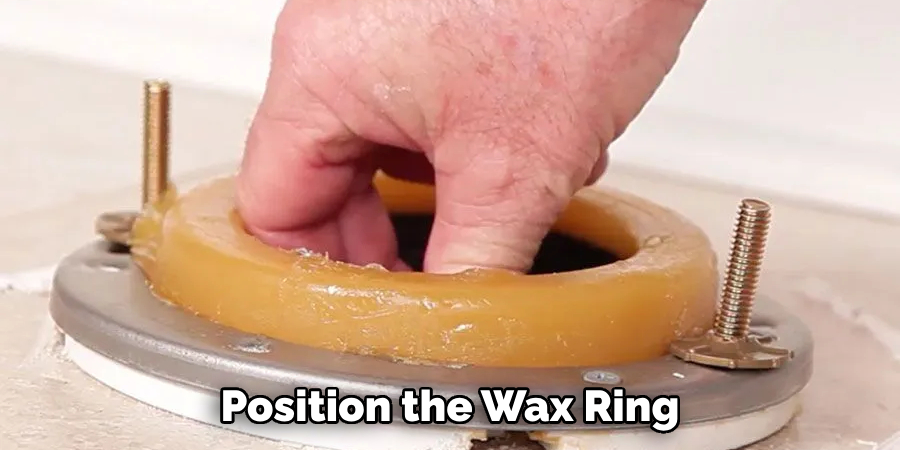
Once the flange is securely installed, position the wax ring on it, ensuring it’s centered. Lower the toilet over the flange and apply even pressure to the entire base to create a good seal. Once the toilet is in place, secure it to the flange using the nuts and bolts that come with the toilet.
Step 6: Check for Leaks
Before using the toilet, it’s important to check for leaks. Fill a bucket with water and pour it into the bowl of the toilet. Watch carefully for any signs of leaking around the base or flange. If you notice any leaks, tighten the bolts and reposition the wax ring as needed.
Step 7: Test the Toilet and Make Final Adjustments
Finally, test the toilet to make sure it is properly installed. Flush a few times and check for any movement or rocking of the toilet. If needed, use shims to stabilize the toilet. Once everything is secure and stable, you can caulk around the base of the toilet for a finished look.
And that’s it! Now you know how to attach a toilet flange to a concrete floor. Remember to regularly check the condition of your flange and make repairs or replacements as needed to avoid any potential issues in the future.
5 Considerations Things When You Need to Attach Toilet Flange to Concrete Floor
1. Type of Toilet Flange
When attaching a toilet flange to a concrete floor, it is important to consider the type of flange you will be using. Several different types are available, including PVC, cast iron, and stainless steel. Each type has its own installation process, so make sure to choose one that is suitable for concrete floors.

2. Tools and Materials Needed
Before beginning the installation process, it is important to gather all the necessary tools and materials. This may include a drill with masonry bits, screws or anchors, a hammer, and a level. It is also important to have the correct size of toilet flange for your specific toilet model.
3. Location of Existing Plumbing
Another consideration when attaching a toilet flange to a concrete floor is the location of existing plumbing pipes. The flange must be positioned correctly over the waste pipe for the toilet to function properly. If necessary, you may need to adjust the placement of the flange or make changes to your plumbing.
4. Preparation of Concrete Surface
In order for the toilet flange to securely attach to the concrete floor, the surface must be properly prepared beforehand. This may involve cleaning any debris or residue from the area and ensuring it is level and smooth. If there are any cracks or holes in the concrete, these should be repaired before proceeding with installation.
5. Proper Installation Technique
Proper technique is essential when attaching a toilet flange to a concrete floor. This includes drilling precise holes for screws or anchors and ensuring that they are installed at the correct depth and angle. It may also involve using adhesive or sealant for added stability and waterproofing measures around the edges of the flange.

Considering these factors before beginning your project, you can ensure that your toilet flange will securely attach to your concrete floor for long-lasting use.
Benefits of Attach Toilet Flange to Concrete Floor
Are you tired of dealing with a loose or wobbly toilet bowl? One solution to this pesky problem is attaching your toilet flange to the concrete floor. Not only does this improve the stability of your toilet, but it also prevents any leaks or sewer gas from escaping. By securing the flange to the concrete, you also ensure the toilet bowl is properly aligned and flush with the floor.
This can make cleaning much easier and also give your bathroom a more polished look. Making a small effort to attach your toilet flange can save you from a big headache in the long run. This simple solution offers a sturdy, leak-free toilet and a more visually appealing bathroom.
4 Common Mistakes People Make When Trying to Attach Toilet Flange to Concrete Floor
1. Not Preparing the Concrete Floor Properly
One of the most common mistakes people make when attaching a toilet flange to a concrete floor is not preparing the floor properly. It is important to clean and dry the area where the flange will be attached and remove any debris or old wax ring residue. Failure to do so can result in an uneven surface for the flange to sit on, causing leaks or other issues.
2. Using the Wrong Tools or Equipment
Another mistake people make is using the wrong tools or equipment when attaching a toilet flange to a concrete floor. This can include using regular screws instead of masonry screws, which are specifically designed for use on concrete surfaces. Using a drill with enough power and torque is also important to secure the flange properly.

3. Not Using Adequate Sealant
Proper sealing is crucial when attaching a toilet flange to a concrete floor. Many people make the mistake of not using enough sealant or not applying it evenly around the base of the flange. This can lead to water leaks and damage over time. Using a waterproof sealant specifically designed for use on toilets and plumbing fixtures is recommended.
4. Improper Alignment
Improper alignment of the toilet flange can also cause problems down the line. It is important to ensure the flange is level and centered before securing it to the concrete floor. If it is not aligned correctly, it can cause leaks or even damage to your toilet over time due to uneven pressure on its base.
Overall, taking your time and following proper instructions when attaching a toilet flange to a concrete floor can save you from potential headaches and costly repairs in the future.
Conclusion
Attaching a toilet flange to a concrete floor may seem intimidating at first, but with a little bit of know-how, you can tackle this DIY project with confidence. By following these steps, you’ll be able to install a new toilet flange that will be secure and durable for years to come.
Remember to take your time and use caution when working with concrete. Thanks for reading our post about how to attach toilet flange to concrete floor, and good luck!

