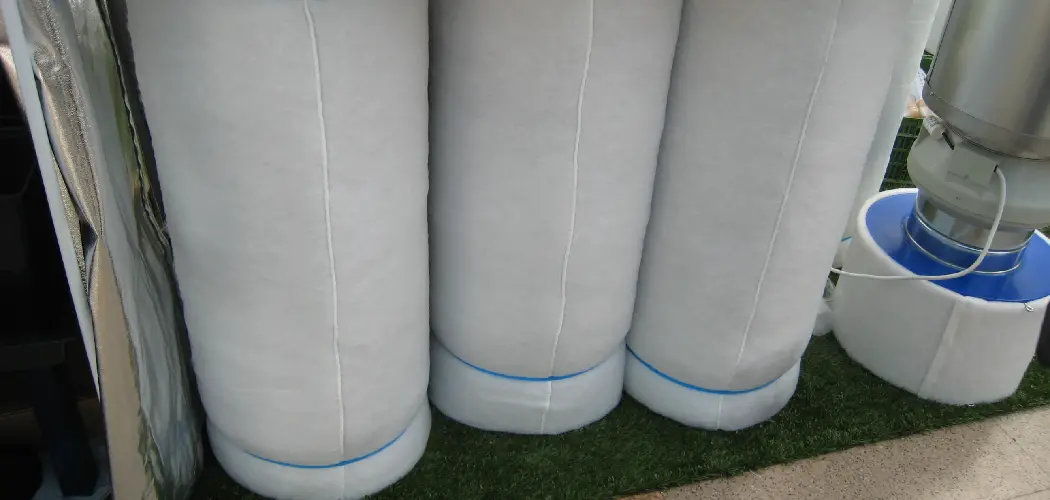
Cleaning a carbon filter is an essential maintenance task that ensures optimal performance in various applications, from air and water purification systems to range hoods and aquarium filters. Over time, carbon filters can become saturated with contaminants, rendering them less effective. Regular cleaning not only prolongs the lifespan of the filter but also helps maintain clean air and water, contributing to a healthier environment.
In this guide on how to clean carbon filter, we’ll explore the steps involved in effectively cleaning a carbon filter, ensuring it continues to function at its best.
What is a Carbon Filter?
A carbon filter, also known as activated charcoal filter, is a porous material made from activated carbon. It works by trapping contaminants and impurities in its pores, effectively removing them from the air or water that passes through it. The high adsorption capacity of activated carbon makes it an excellent choice for various filtration applications.
It is commonly used in air purifiers, water filters, and even gas masks to remove pollutants, chemicals, and odors. Carbon filters are also widely used in industrial settings to purify air or water before release into the environment.
Why Clean a Carbon Filter?
Cleaning a carbon filter is crucial for several reasons. First and foremost, it ensures that the filter remains effective in removing contaminants and impurities from the air or water. As carbon filters become saturated with particles over time, their ability to adsorb additional impurities diminishes, leading to reduced performance. This can result in poor air quality or contaminated water, which can have negative health effects.
Additionally, regular cleaning helps to extend the lifespan of the filter, allowing for better efficiency and reducing the need for frequent replacements. By maintaining a clean carbon filter, users can save on costs and ensure optimal filtration performance, ultimately contributing to a healthier living environment. Furthermore, a clean filter operates more efficiently, which can lead to energy savings in appliances like air purifiers and water filtration systems.

Needed Materials
Before diving into the steps of cleaning a carbon filter, it’s essential to gather all the necessary materials. Here’s a list of items you’ll need:
Clean Water:
You’ll need clean water to wash and rinse the carbon filter. Ideally, use distilled or filtered water to prevent adding any impurities back into the filter.
Cleaning Solution:
Depending on the type of contaminants in your filter, you may need a cleaning solution. Mild dish soap or vinegar solutions are often sufficient for general cleaning purposes.
Soft-Bristled Brush:
A soft-bristled brush will gently remove any stubborn particles from the carbon filter.
Clean Towels:
Have some clean towels ready to dry off the filter after cleaning and rinsing.
8 Step-by-step Guidelines on How to Clean Carbon Filter
Step 1: Remove the Carbon Filter
Begin by turning off and disconnecting any appliance that utilizes the carbon filter, such as an air purifier or water filtration system. Carefully locate the filter compartment and gently remove the carbon filter according to the manufacturer’s instructions. Take care not to damage any surrounding components during this process.
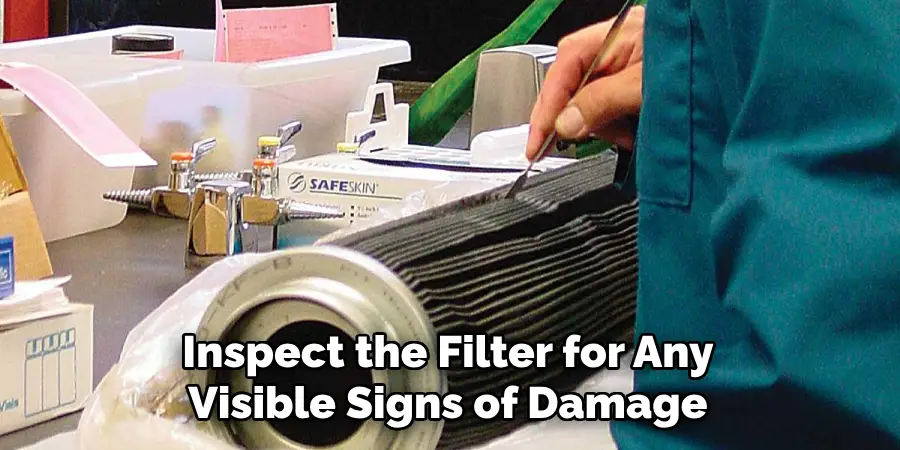
It’s a good idea to inspect the filter for any visible signs of damage or excessive saturation before proceeding with the cleaning process. Once removed, place the carbon filter in a clean, designated area to prepare for cleaning.
Step 2: Preliminary Cleaning
Once you have removed the carbon filter, begin the preliminary cleaning by gently tapping the filter to dislodge any loose debris or dust. This initial step helps to remove larger particles that can hinder the effectiveness of the cleaning process. Next, rinse the filter under a stream of clean water, ensuring that you thoroughly wet all surfaces.
Avoid using strong jets of water, as this can damage the filter structure. If possible, do this outside or in a designated cleaning area to minimize mess. After rinsing, allow the filter to sit for a minute to drain the excess water before applying any cleaning solution. This step prepares the filter for a more thorough cleaning by reducing the amount of buildup that needs to be addressed.
Step 3: Prepare a Cleaning Solution
To effectively clean the carbon filter, it’s important to prepare an appropriate cleaning solution. For general cleaning, you can create a solution using mild dish soap or white vinegar mixed with clean water. If using dish soap, mix a few drops with about a gallon of warm water in a clean container or bucket. Alternatively, if using vinegar, combine one part vinegar with four parts water. This solution will help break down dirt and grease without damaging the filter material.
Once your solution is prepared, immerse the carbon filter into the mixture, ensuring it is fully submerged. Allow it to soak for 10 to 15 minutes, which helps loosen any remaining contaminants and prepares the filter for more thorough scrubbing.
Step 4: Gentle Scrubbing
After the carbon filter has soaked in the cleaning solution, it’s time to begin the scrubbing process. Using the soft-bristled brush, gently scrub the surface of the filter in a circular motion. Focus on areas where dirt and debris may have accumulated, but be careful not to apply excessive pressure, as this could damage the delicate structure of the carbon material. Continue scrubbing for several minutes, ensuring that all sides of the filter are thoroughly cleaned.

If needed, periodically rinse the brush in clean water to remove any accumulated dirt, which will help maintain its effectiveness during the cleaning process. Once you are satisfied with the scrubbing, rinse the filter under a gentle stream of clean water to remove any remaining cleaning solution and loosen contaminants. This step is crucial for restoring the filter’s capacity to adsorb impurities efficiently.
Step 5: Final Rinse
After thoroughly scrubbing the carbon filter, it’s time for the final rinse. Hold the filter under a gentle stream of clean water, ensuring that all soap and debris are completely washed away. Be sure to rinse both the inside and outside of the filter to ensure no residues remain. This step is vital as any leftover cleaning solution can negate the effectiveness of the filter and contaminate the air or water it is meant to purify.
Allow the water to run through the filter for a minute or two, observing the clarity of the water to ensure it is free from any remaining particles. Once rinsed, gently shake off any excess water and place the filter in a clean area to air dry.
Step 6: Drying the Filter
After rinsing, it’s essential to let the filter air dry completely before placing it back into your appliance. Depending on the temperature and humidity levels in your home, drying time may vary from a few hours to several days. You can speed up this process by using a clean towel to gently pat the filter and absorb any excess water. However, avoid wringing or squeezing the filter as this can damage its structure.
Once fully dried, you can perform a final inspection for any remaining particles or stains that may require further cleaning. If satisfied with the results, move on to the next step of reinstalling the carbon filter.
Step 7: Reinstalling the Filter
After your carbon filter is clean and dry, it’s time to reinstall it into your appliance. Refer to the manufacturer’s instructions for proper installation, as this may vary depending on the type of appliance you are using. Ensure that all connections are secure and any filters or seals are properly in place before turning the appliance back on.

It’s also a good idea to run the appliance for a few minutes after reinstalling the filter to ensure it is working correctly and there are no leaks or malfunctions.
Step 8: Maintenance and Replacement
To maintain the effectiveness of your carbon filter, it’s essential to perform regular cleaning and replacement as recommended by the manufacturer. This will not only extend the life of your filter but also ensure that it continues to purify your air or water efficiently. If you notice any signs of damage or excessive buildup during routine maintenance, do not hesitate to replace the filter immediately.
Following these step-by-step guidelines on how to clean carbon filter for cleaning your carbon filters will help keep your appliances running smoothly and ensure they effectively remove impurities from your air or water. Remember to use gentle cleaning methods and appropriate solutions to avoid damaging the filter and always follow manufacturer recommendations for maintenance and replacement. With regular care, your carbon filter can continue to provide clean and pure air or water for you and your family to enjoy. Happy cleaning!
Frequently Asked Questions
Q: How Often Should I Clean My Carbon Filter?
A: It is recommended to clean your carbon filter every 3-6 months, depending on usage and the manufacturer’s recommendation. However, if you notice reduced airflow or a decrease in the effectiveness of purifying air or water, it may be time to clean your filter sooner.
Q: Can I Use Harsh Chemicals to Clean My Carbon Filter?
A: No, harsh chemicals such as bleach or ammonia should not be used to clean carbon filters as they can damage the material and compromise its ability to purify air or water effectively. Stick to mild dish soap or white vinegar mixed with water for gentle yet effective cleaning.

Q: How Do I Know When It’s Time to Replace My Carbon Filter?
A: If your filter is damaged, has excessive buildup that cannot be cleaned off, or is past its recommended lifespan, it’s time to replace it. Signs of reduced airflow or decreased efficiency in purifying air or water may also indicate the need for a new filter. Refer to the manufacturer’s recommendations for replacement intervals.
Conclusion
In conclusion, maintaining the cleanliness and efficiency of your carbon filter is essential for ensuring that your air or water remains pure and free from contaminants. By following the outlined steps onhow to clean carbon filter—from initial cleaning to regular maintenance—you can extend the lifespan of your filter and keep your appliances functioning optimally.
Remember to perform routine checks and adhere to the manufacturer’s guidelines to detect any signs of wear or the need for replacement. With proper care, your carbon filter will continue to play a vital role in promoting a healthier environment for you and your family. Happy cleaning!

