Maintaining a well-functioning irrigation system is essential for lush, green lawns and vibrant gardens. One crucial aspect of this maintenance is keeping your sprinkler valves clean and free from debris that can cause blockages and malfunctions. If you’ve noticed reduced water flow, uneven watering, or a sprinkler system that doesn’t shut off as it should, it’s time to learn how to clean sprinkler valves.
In this comprehensive guide, we’ll walk you through the step-by-step process of cleaning sprinkler valves effectively. From identifying the types of valves in your system to using the right tools and techniques, you’ll gain the knowledge and confidence needed to tackle this essential task.
Don’t let clogged valves disrupt your beautiful landscapes—discover the secrets to keeping your irrigation system in top shape with proper sprinkler valve cleaning.
Importance of Cleaning Sprinkler Valves for Efficient Irrigation
Sprinkler valves are important components of a sprinkler system, responsible for controlling the flow of water to the different zones or sections of your lawn. This is crucial in ensuring that each area receives the right amount of water for optimal irrigation.
However, over time, these valves can get clogged with dirt, debris and mineral deposits from hard water. This can impact the overall efficiency and performance of your sprinkler system. Hence, regular cleaning of sprinkler valves is essential to maintain a healthy and well-functioning lawn.
Benefits of Regularly Cleaning Sprinkler Valves
- Prevents Blockages and Malfunctioning: As mentioned earlier, buildup of dirt, debris, and mineral deposits can clog the valves, preventing proper water flow. This can result in uneven watering or even complete blockage, leading to patches of dry or over-watered areas on your lawn. By regularly cleaning the sprinkler valves, you can prevent such issues and ensure that your lawn receives adequate water for healthy growth.
- Saves Water and Reduces Utility Bills: A clogged or malfunctioning sprinkler valve can result in water wastage, as it may continuously leak or release more water than needed. This not only impacts the health of your lawn but also increases your utility bills. By keeping the valves clean and functioning properly, you can save on water and reduce your expenses.
- Extends the Lifespan of Your Sprinkler System: When sprinkler valves are clogged, your system has to work harder to distribute water, putting a strain on the entire system. This can lead to premature wear and tear, reducing its lifespan. Regular cleaning helps to maintain the efficiency of the valves and prolongs the life of your sprinkler system.
- Promotes a Healthier Lawn: By ensuring that your sprinkler valves are clean and functioning properly, you can provide your lawn with the right amount of water for healthy growth. This not only results in a greener and lusher lawn but also helps to prevent diseases caused by over or under-watering.
10 Methods How to Clean Sprinkler Valve
1. Manual Cleaning
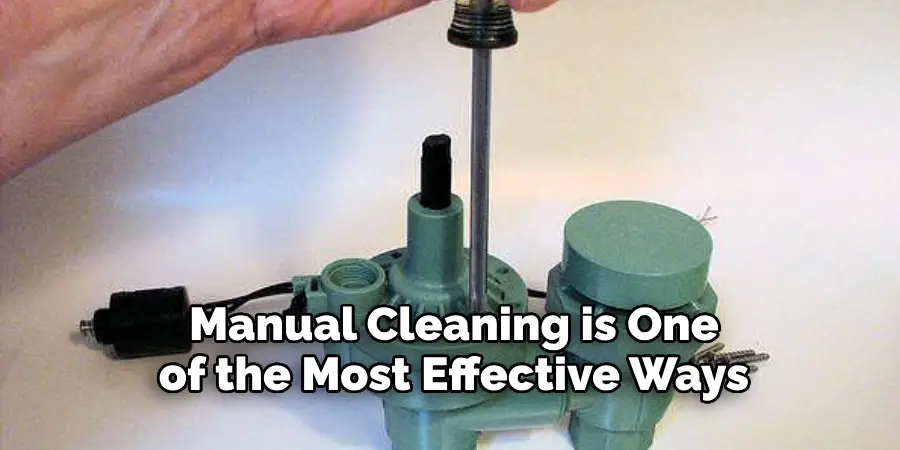
Manual cleaning is one of the most effective ways to clean a sprinkler valve. To do this, you will need to locate the valve and remove it from its housing. Once removed, you can use a brush or cloth to scrub away any dirt or debris that may have accumulated on the valve.
You should also check for any obstructions in the opening of the valve and clear them out if necessary. Once cleaned, you can re-install the valve and test it to make sure it is working properly.
2. Chemical Cleaning
Chemical cleaning is another option for cleaning a sprinkler valve. This method involves using a specialized cleaner to dissolve any dirt or debris that has built up on the valve over time.
The cleaner should be applied directly to the affected area and allowed to sit for several minutes before being wiped away with a damp cloth or brush. After applying the cleaner, you should rinse off any remaining residue with water and reinstall the valve once it has dried completely.
3. Pressure Washing
Pressure washing is another way to clean your sprinkler valves effectively and quickly. This method involves using a pressure washer to blast away dirt and debris from the surface of your valves. Make sure that you are careful when using this method, as too much pressure can damage your valves or cause them to become clogged with debris again more quickly than other methods would allow for.
4. Ultrasonic Cleaning
Ultrasonic cleaning is an effective way of deep-cleaning your sprinkler valves without damaging them in any way. This method involves submerging your valves in an ultrasonic bath filled with a special cleaning solution designed specifically for these types of applications. The ultrasonic waves created by this bath will help break down stubborn dirt and debris so they can be easily wiped away once removed from the bath itself.
5. Boiling Water
Boiling water is another simple yet effective way of cleaning your sprinkler valves without having to use harsh chemicals or abrasive tools like brushes or scrapers, which could potentially damage them over time if used improperly or excessively.
Simply fill a pot with enough water so that all parts of your valves are submerged, then boil for 10-15 minutes before allowing them to cool off completely before handling them again. This process will help loosen up any stuck-on grime or dirt particles so they can be easily wiped away afterward.
6. Vinegar Solution
Using vinegar solution is another great way of naturally cleaning your sprinkler valves without having to resort to harsh chemicals, which could potentially damage them over time if used improperly.
To do this, simply mix equal parts white vinegar and warm water in a container big enough so that all parts of your valves are submerged, then let soak for at least 30 minutes before wiping down each part with a soft cloth afterward. The acidity in vinegar helps break down tough grime while also acting as an anti-bacterial agent, which helps keep mold at bay.
7. Soda Soaking

Soda soaking is another great natural way of loosening up stubborn grime on your sprinkler valves without having to resort to harsh chemicals, which could potentially damage them over time if used improperly.
To do this, simply mix equal parts baking soda and warm water in a container big enough so that all parts of your valves are submerged, then let soak for at least 30 minutes before wiping down each part with a soft cloth afterward. The alkalinity in baking soda helps break down tough grime while also acting as an anti-bacterial agent, which helps keep mold at bay.
8. Air Compressor Blasting
Air compressor blasting is an effective way of removing stubborn grime on your sprinkler valves without having to resort to harsh chemicals, which could potentially damage them over time if used improperly.
To do this, attach an air compressor nozzle onto one end of the hose connected to your air compressor, then direct it towards each part of your valves until all visible signs of grime have been removed. Make sure not to apply too much pressure, as this could cause permanent damage!
9. Sandblasting

Sandblasting is another effective way of removing stubborn grime on your sprinkler valves without having to resort to harsh chemicals, which could potentially damage them over time if used improperly.
To do this, attach an abrasive nozzle onto one end of the hose connected to the sandblaster, then direct it towards each part of your valves until all visible signs of grime have been removed. Make sure not to apply too much pressure, as this could cause permanent damage!
10. Alkaline Cleaner Soaking
Alkaline cleaner soaking is another great natural way of loosening up stubborn grime on your sprinkler valves without having to resort to harsh chemicals, which could potentially damage them over time if used improperly. To do this, mix a solution of alkaline cleaner with warm water in a container big enough so that all parts of your valves are submerged, then let soak for at least 30 minutes before wiping down each part with a soft cloth afterward.
The alkalinity in the cleaner helps break down tough grime while also acting as an anti-bacterial agent, which helps keep mold at bay. Once finished, rinse off the valves with water and dry completely before reinstalling.
Conclusion
All in all, it’s not too difficult to clean your sprinkler valve. With a few tools and some patience, you can get the job done and have a better-performing system. It’s a budget friendly way of improving the function of your sprinkler system without making any major changes or investing in new equipment. Furthermore, if you want to maintain the same performance over time, it’s best that you do regular cleaning of your sprinklers valves.
That way, you won’t have unexpected problems or need emergency repairs in the future. We hope our guide was helpful and gave you a better idea on how to clean your sprinkler valve. Hopefully, this article gave you some helpful tips about how to clean sprinkler valve successfully, so now that you have the proper knowledge on how to get the job done, why not give it a try today?

