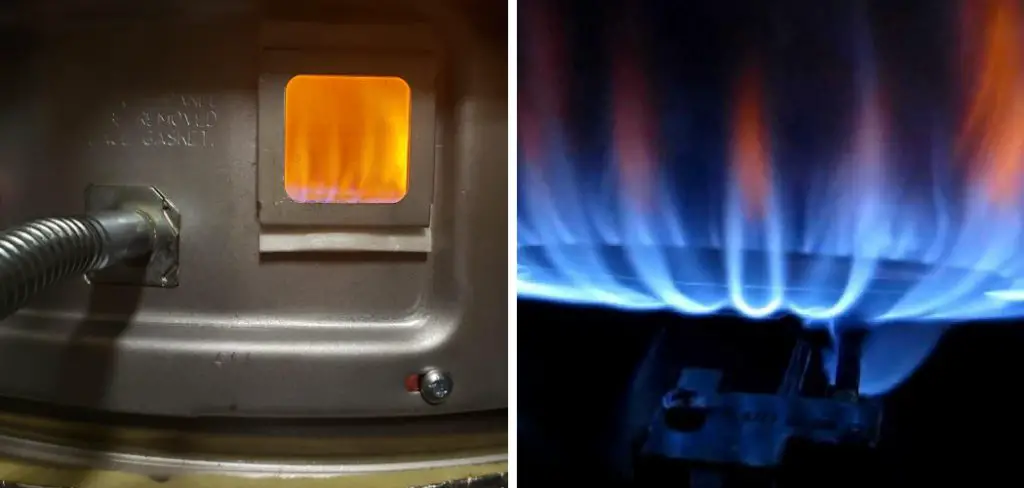
When your water heater is giving off an orange flame instead of a clean blue one, it can be particularly alarming. Not only are you concerned about the safety of your family and property, but also what kind of damage could be caused if left untreated.

Thankfully, diagnosing and fixing this common issue with water heaters is not as difficult or complicated as you might think! In this blog post, we’ll cover some simple steps to identify the cause of your orange flame and how to fix orange flame on water heater in no time at all. Don’t worry – anyone can do this with just a few readily available tools and materials.
So if your water heater’s pilot light has suddenly turned orange and yellow instead of the usual blue hue, keep reading for more information on how to remediate this situation safely.
What are the Reasons for Orange Flame on Water Heater?
The most common cause of an orange flame is a dirty or clogged burner head. This means the gas supply line to your water heater is blocked and unable to provide enough air-fuel mixture for correct combustion.
In addition, improper water heater installation can also lead to inadequate venting, resulting in an orange-yellow flame. This includes incorrect placement of the water heater and using old or worn-out venting materials.
Finally, a gas leak can be another cause of orange flames on your water heater. If you experience a rotten egg smell near or around your water heater, it indicates that there’s a gas leak, and you should take immediate action to prevent further damage.
What Will You Need?
Before you start, make sure to have the following tools and materials:
- Screwdriver/drill
- Vacuum cleaner
- Flashlight
- Replacement gas burner head
- Replacement venting material (if necessary)
Once you have everything you need, it’s time to get started.
10 Easy Steps on How to Fix Orange Flame on Water Heater
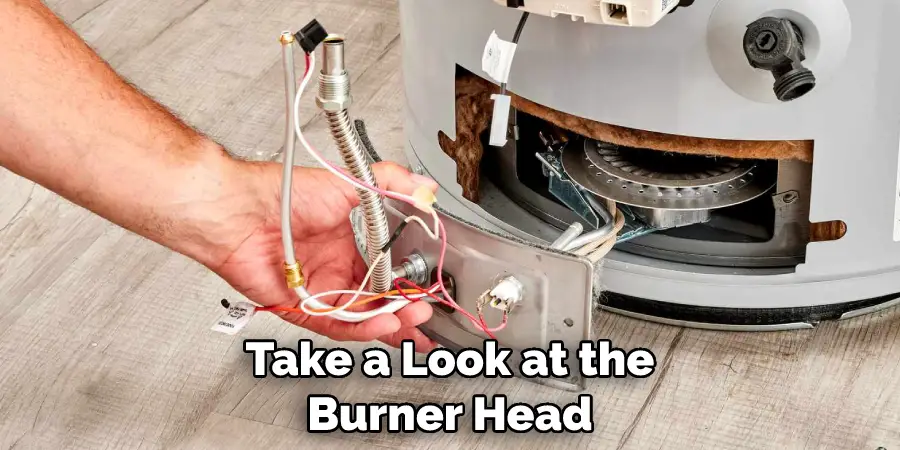
Step 1: Inspect the Burner Head
Use a flashlight and take a look at the burner head. If it’s dirty or clogged with dirt, debris, or other materials, you’ll need to clean it up before proceeding. Don’t worry – it’s easy to do.

Step 2: Clean the Burner Head
Remove the burner head from your water heater and use a vacuum cleaner to remove any build-up of debris. Be sure to also check for cracks or breaks in the burner head. If you find any, replace it right away with a new one.
Step 3: Check the Gas Supply Line
Next, check to make sure that your gas supply line isn’t blocked. Disconnect the appliance from its gas source and inspect for any blockages. If you find any, use a screwdriver or drill to remove them and then reconnect the gas source.
Step 4: Check the Venting System
Now it’s time to check your venting system for improper installation or worn-out materials. Inspect the pipes and tubing for any signs of corrosion or wear and tear that may be blocking airflow. Replace any old or damaged parts with new ones as necessary.
Step 5: Test for Gas Leaks
Once all these steps are done, it’s time to test for possible gas leaks around your water heater. Ensure that no rotten egg smell is present in the vicinity of your water heater before proceeding further. You can use a commercial gas detector to detect any leaks if necessary.
Step 6: Reconnect the Gas Supply Line
Now it’s time to reconnect the gas supply line to your water heater. Make sure that all connections are secure before proceeding further. Otherwise, you may be risking a dangerous gas leak.
Step 7: Turn On the Water Heater
Turn on your water heater and check for any signs of a flame. If everything is working properly, you should see a clean blue flame from your pilot light. Be careful when checking for the flame, and never put your face close to the appliance.

Step 8: Adjust the Flame Color
If you do not have a blue flame, adjust the air-fuel mixture using the adjustment screw located near or around the burner head. This will help ensure an even mixture of air and fuel and produce a proper blue flame. Additionally, you may need to check the thermocouple for proper operation.
Step 9: Replace Any Damaged Parts
If any of the parts need to be replaced, do so as soon as possible. Ensure all connections are secure and nothing is clogged or blocked before turning your water heater on again. You’re done if everything looks good and all parts are in working order!
Step 10: Test Your Water Heater Again
Once you’ve completed all the steps, it’s time to test your water heater again. Check for a proper blue flame, venting system operation, and lack of gas leaks in the vicinity of the appliance. If everything looks good and you’re satisfied with how your water heater is running, then you can rest assured knowing that you have successfully fixed the orange flame issue on your water heater!
Following these simple steps, you should know how to fix an orange flame on your water heater. If you’re still having issues, it may be best to call a professional for help!
5 Additional Tips and Tricks
1. Check the flue for obstructions. If there is a bird’s nest or other obstruction, carefully remove it and clean out the flue.
2. Make sure the burner tubes are free of rust, corrosion, soot buildup, or debris that could be preventing the flame from burning properly.
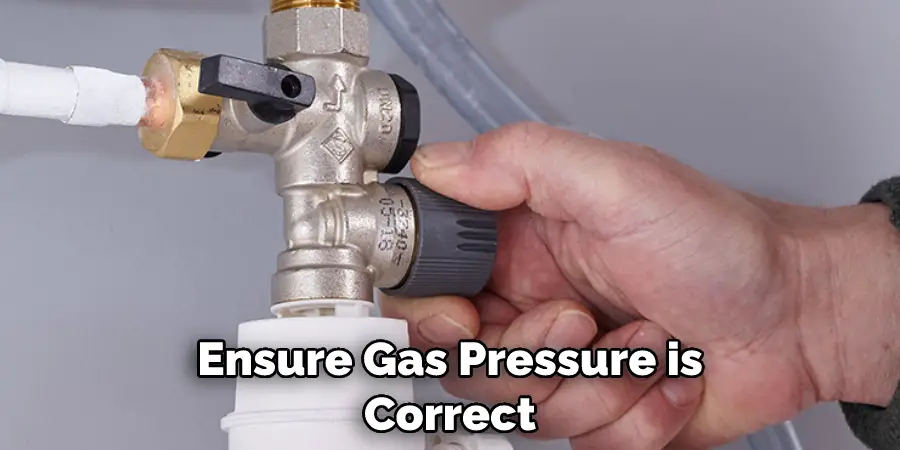
3. Ensure gas pressure is correct by checking the regulator on top of the water heater tank. It should register approximately 11 inches of water column (about 0.58 psi).

4. Check all electrical connections to ensure they are tight and secure, with no evidence of corrosion or damaged wires.
5. If none of these tips fix the orange flame on your water heater, consider calling a professional plumber to come to inspect and repair your water heater. They will be able to diagnose and repair any underlying issues that may be causing the orange flame.
With these tips in mind, you can be sure to have a safe and efficient water heater. If the orange flame persists after attempting all of these solutions, contact a professional plumber as soon as possible. It is important to address any potential issues with your water heater before they cause more serious damage.
5 Things You Should Avoid
1. Never use a gas flame that is not blue. An orange flame is not only inefficient, but it also indicates that there are potentially dangerous levels of carbon monoxide in the gas.
2. Do not leave the burner on for longer than necessary. If you notice an orange flame, shut off the water heater immediately and contact an experienced professional to diagnose and repair the issue.
3. Avoid burning paper or other materials near your water heater as this could cause a fire hazard and trigger an orange flame due to a lack of oxygen supply reaching the burner.
4. Do not turn up your thermostat too high – this can cause additional stress on your water heater, leading to inadequate combustion, resulting in an orange flame and potentially dangerous emissions.
5. Do not attempt to repair the water heater yourself, as it may be complex and hazardous; contact a qualified technician instead.
If you are experiencing an orange flame on your water heater, there are steps you can take to try to resolve the issue safely. Following these tips will help ensure that your water heater works efficiently and safely for years to come.
How Do You Reset a Water Heater Burner?
If you’ve determined that the burner on your water heater is not functioning properly, you may need to reset it. This can be done by turning off the gas supply and disconnecting the power from the water heater before attempting to reset it. Once this is done, follow these steps:
1. Remove any clogs or blockages in the pilot light system.

2. Check for a secure connection between the thermocouple and the control valve.
3. Make sure all connections are tight to avoid leaks and ensure proper burner operation.
4. Reconnect power to the water heater and turn on the gas supply again, then wait 2-3 minutes for the gas pressure regulator to adjust itself before attempting to relight the pilot light.
5. Carefully light the burner and wait for it to heat up before adjusting the temperature setting as desired.
6. Monitor the flame often while keeping an eye on how much fuel is being used, how hot it gets, and how long it stays lit.
By following these steps, you should be able to reset your water heater burner successfully and get it back up and running again quickly.
Conclusion
Overall, orange flames on water heaters can be caused by a few problems that can be identified and resolved. Proper water heater maintenance is essential to keep it functioning and avoid the orange flame problem. A householder should regularly check their water heater’s flame color, temperature setting, and air pressure to ensure it’s running correctly.
Additionally, depending on how often they use the heater, they should consider getting a yearly maintenance check from a professional to ensure their water heater’s safety. By understanding why an orange flame may appear and following suggested guidelines, a homeowner can confidently address this issue and enjoy safe hot water usage for many years to come.
Hopefully, the article on how to fix orange flame on water heater has provided you with some helpful insight and tips. Thanks for reading. Happy Fixing!

