A shower diverter is a small yet essential component in your bathroom plumbing system that directs water flow between the bathtub faucet and the showerhead. Over time, this device can wear out or malfunction, causing leaks, reduced water pressure, or difficulty switching between the tub and shower. Fixing a faulty shower diverter may seem daunting, but with the right tools and guidance, it can be a straightforward process that saves you the expense of a professional repair. This guide will walk you through the steps of how to fix shower diverter effectively.
Common Issues with Shower Diverters
Shower diverters can experience several problems that impact their functionality and efficiency. One of the most frequent issues is leaking, where water continues to trickle from the faucet even when the diverter is engaged to direct water to the showerhead. This not only wastes water but can also decrease the pressure in the shower. Another common problem is a stiff or stuck diverter, often caused by the buildup of mineral deposits or corrosion over time.
Additionally, wear and tear on the internal components can lead to difficulty switching between the tub and shower or result in an incomplete seal, allowing water to flow from both outlets simultaneously. Recognizing these issues early can help you determine the best approach for repair and prevent further complications.
Understanding the Types of Shower Diverters
Shower diverters come in various types, each designed to manage water flow between the tub spout and the showerhead effectively. The most common types include the three-valve diverter, two-valve diverter, and single-valve diverter.
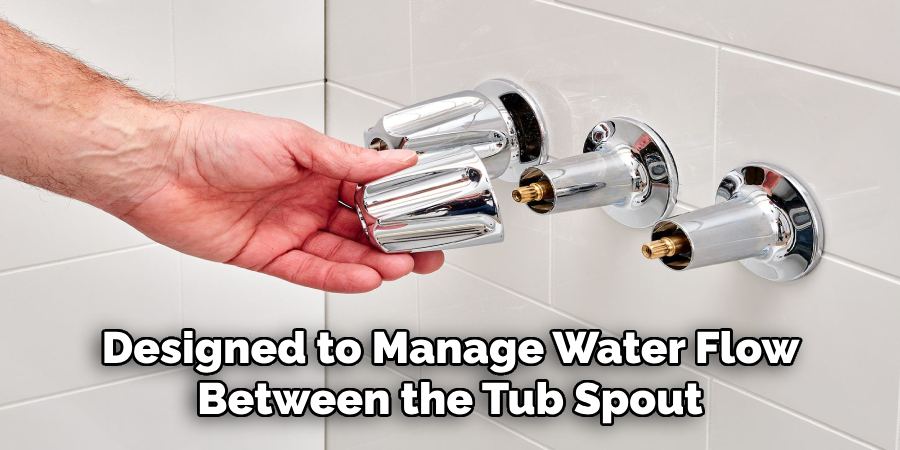
- Three-Valve Diverter: Typically found in showers with separate hot and cold water knobs, this type allows you to adjust the temperature and then direct the water to either the tub or shower by turning a central knob or lever.
- Two-Valve Diverter: Usually installed with a single temperature control knob, the two-valve diverter lets you alternate between the tub and shower with a separate lever or dial.
- Single-Valve Diverter: Common in modern bathrooms, this diverter is integrated into a single control mechanism. By pulling up a small lever on the tub spout or turning a part of the main control knob, water is redirected to the showerhead.
Understanding these types can help you identify the specific diverter in your bathroom and guide you in troubleshooting or discussing repairs with a professional.
10 Methods How to Fix Shower Diverter
1. Identify the Type of Diverter You Have
Before beginning any repair, it’s important to identify the type of diverter valve installed in your shower. The three main types are the tub spout diverter, which is built into the faucet spout and activated by lifting a small lever; the three-handle diverter, which has a dedicated handle between hot and cold knobs; and the single-handle diverter, which operates by pulling or pushing the main handle.

Understanding the mechanism will guide your repair approach, as each type disassembles differently and may require specific parts or tools. Taking a moment to correctly identify the diverter can save time and prevent accidental damage.
2. Check for Obvious Obstructions or Mineral Buildup
Often, the issue is not mechanical failure but rather mineral buildup from hard water, which can clog or jam the diverter. Begin by inspecting the diverter area for visible calcium or lime deposits. If you notice white crusty residue, try soaking the spout or handle area in a vinegar solution. For tub spout diverters, you can secure a bag of vinegar around the spout and let it sit overnight to dissolve deposits. This simple soak can free a stuck mechanism and restore smooth operation without disassembly.
3. Lubricate a Sticky Diverter
If your diverter is difficult to pull up, push down, or rotate, it may just need lubrication. Mineral buildup, wear, or rust can cause friction. Once the external parts are clean, try applying a plumber’s silicone-based lubricant to the diverter stem. Avoid using petroleum-based grease, which can degrade rubber seals. Operate the diverter a few times after lubricating to ensure smooth motion. Lubrication can often delay the need for a full replacement and extend the life of your diverter.
4. Tighten or Replace a Loose Tub Spout Diverter
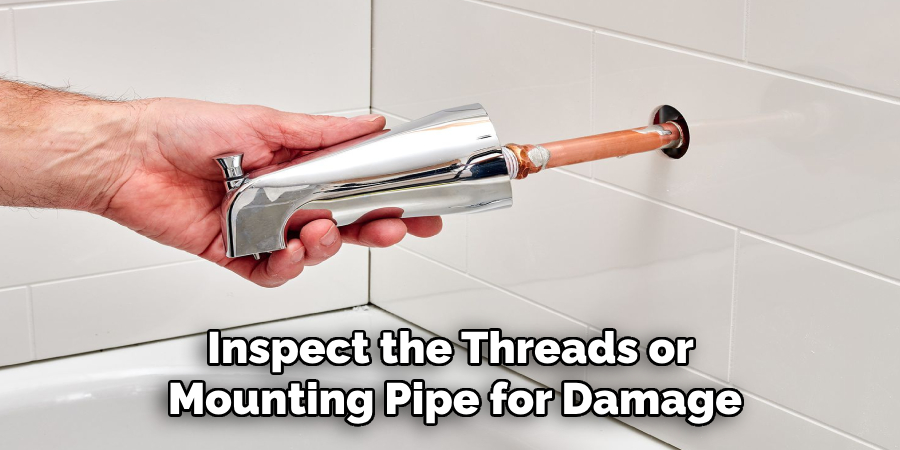
A loose or wobbly tub spout diverter can prevent the valve from fully sealing, causing water to leak from both the spout and the showerhead. Remove the tub spout by twisting it counterclockwise if it screws on, or by loosening a small set screw on the underside if it slides off. Inspect the threads or mounting pipe for damage. If they’re intact, reattach the spout snugly. However, if the diverter mechanism inside the spout is worn out, replacing the entire tub spout with a new diverter model may be the simplest and most effective solution.
5. Replace Worn Diverter Washers or Seals
In multi-handle diverter setups, the internal washers or seals can degrade over time, leading to leaks or poor water diversion. To fix this, first turn off the water supply to the shower. Remove the diverter handle using a screwdriver, then extract the diverter valve stem with a deep socket wrench or valve puller. Examine the rubber washers at the end—if they appear cracked, flattened, or stiff, replace them with identical parts. Reassemble the unit and test the diverter’s performance. New washers often solve most leakage issues and are an inexpensive fix.
6. Reseat or Replace the Diverter Valve Stem
Sometimes the valve stem itself may be stripped or corroded. After removing the handle and exposing the stem, inspect it for signs of wear such as grooves, rust, or flattened threads. If reseating the stem doesn’t improve performance, replace it with a new one designed for your specific valve type. Be sure to coat the new stem’s threads with plumber’s grease before installation. Tighten it snugly, but avoid overtightening, which could crack older plumbing. A new stem can completely restore diverter function in many aging showers.
7. Install a New Tub Spout Diverter Assembly
If cleaning, lubricating, or tightening does not resolve the issue in a tub spout diverter, replacing the entire spout is a straightforward solution. Purchase a compatible replacement (either slip-on or threaded) that matches the size and type of your existing spout. Remove the old unit, clean the supply pipe, and fit the new diverter spout in place. Apply Teflon tape to threaded models or ensure the set screw is firmly fastened in slip-on types. A new spout assembly can resolve chronic leaking and operational failure, bringing the shower system back to full function.
8. Replace a Cartridge in a Single-Handle Diverter
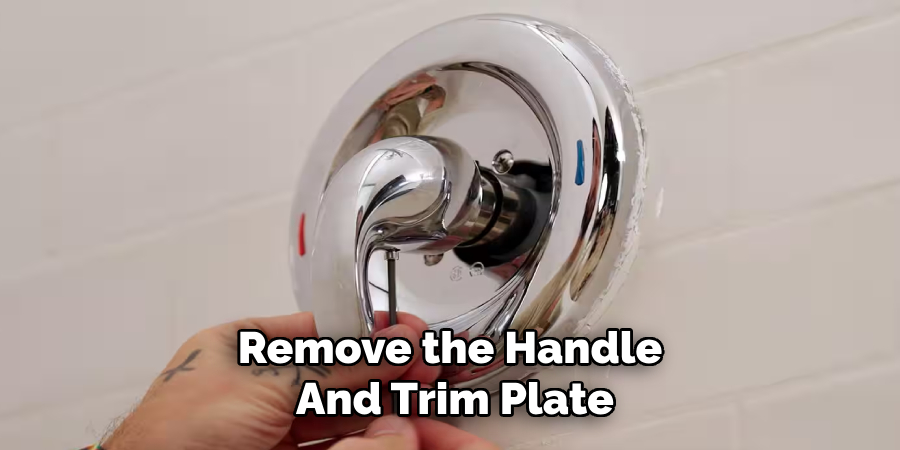
Modern single-handle showers often use a cartridge system that integrates both temperature and diverter control. If your showerhead and tub spout both leak when the shower is on, the diverter section of the cartridge may have failed. Shut off the water, remove the handle and trim plate, and extract the cartridge using pliers or a puller. Take it to a hardware store to find an exact replacement. Install the new cartridge, ensuring it is seated fully and properly aligned. This method often resolves issues where only partial water is diverted to the showerhead.
9. Clear or Replace the Shower Riser Pipe
Sometimes the issue lies not in the diverter itself, but in the shower riser—the vertical pipe that delivers water to the showerhead. If the diverter closes fully but little or no water flows from the shower, the riser may be clogged with debris or mineral deposits. Remove the showerhead and inspect the pipe for blockages.
Use a flexible wire brush or pipe snake to clear any obstructions. If flow is still inadequate, consider replacing the riser pipe entirely. This step may require access behind the wall and might be best left to a professional if major work is needed.
10. Call a Professional for In-Wall Diverter Repairs
If you’ve tried the basic fixes and your diverter is still not functioning properly—and especially if it’s an in-wall model embedded behind tile or solid surfaces—it may be time to call a plumber. Some diverter valves are installed as part of the shower valve body behind the wall, and replacing them requires opening the wall, possibly cutting tile, and soldering or reconnecting plumbing lines.
While DIY repairs are possible for accessible components, in-wall units often demand specialized tools and experience. A licensed plumber can safely and efficiently replace the diverter and ensure the entire system is leak-free.
Conclusion
Fixing a shower diverter can range from a quick soak in vinegar to a full valve replacement, depending on the cause and type of diverter involved. Whether the issue is related to age, mineral buildup, loose fittings, or failed internal parts, addressing the problem promptly will ensure a fully functional and efficient shower.
By following these ten comprehensive methods, homeowners can confidently diagnose and repair most common diverter issues, restoring their bathroom’s convenience and water efficiency with minimal cost and effort. Thanks for reading our blog post on how to fix shower diverter! We hope you found it helpful and informative.

