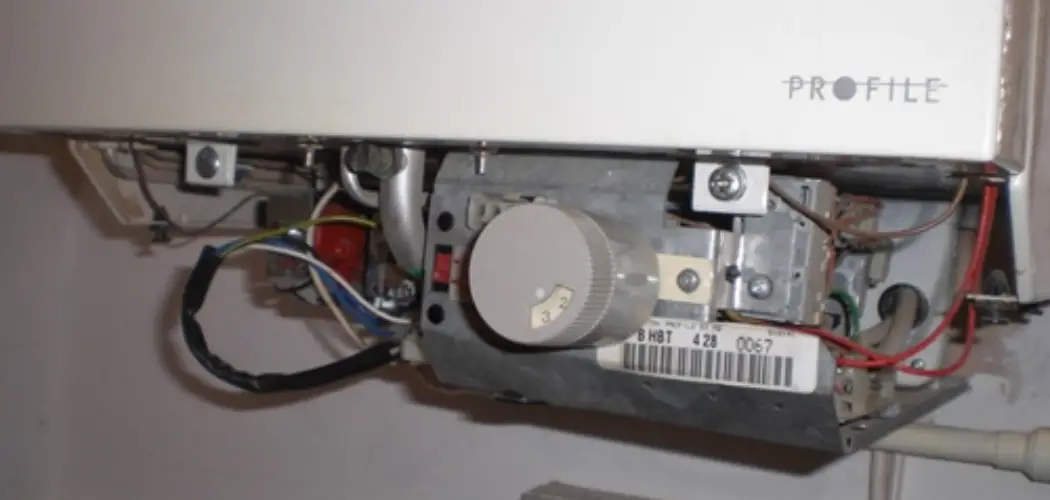
Flushing a gas hot water heater is a crucial maintenance task that ensures optimal performance and prolongs the lifespan of the appliance. Over time, sediment and mineral deposits can accumulate at the bottom of the tank, reducing efficiency and potentially causing damage to the heating elements.
Flushing the water heater removes these deposits, allowing for better heat transfer and preventing corrosion. In this article, we’ll explore the step-by-step process of how to flush a gas hot water heater, including preparation, draining the tank, and flushing out sediment. By following these instructions, homeowners can maintain their gas hot water heaters effectively, improve energy efficiency, and ensure a reliable supply of hot water for their household needs.
Importance of Regular Maintenance
Regular maintenance of your gas hot water heater is not merely a task to tick off your home care list; it’s an essential measure that guarantees safety, efficiency, and longevity of the appliance.
Ignoring maintenance can lead to a buildup of sediment and mineral deposits, which not only compromises the heater’s efficiency but can also become a safety hazard if it causes overheating or pressure buildup. Furthermore, routine flushing and inspections can identify potential issues before they escalate into costly repairs, ensuring your hot water heater operates optimally.
This proactive approach can significantly reduce energy consumption, lower utility bills, and extend the service life of your gas hot water heater, making it a wise investment in your home’s overall comfort and functionality.
Benefits of Flushing the Water Heater
Flushing your gas hot water heater offers several key benefits that extend beyond merely preventing sediment buildup. Firstly, it enhances the efficiency of your appliance, enabling it to heat water more quickly and with less energy. This efficiency translates into lower energy bills and a reduced environmental impact.
Secondly, flushing helps to increase the lifespan of your water heater. By removing sediment that can cause corrosion and wear, you’re essentially safeguarding the inner tank and heating elements from premature damage. Another significant benefit is the improvement in water quality. Sediment buildup can affect the clarity and smell of your hot water, so regular flushing ensures that the water remains clean and free from any unpleasant odors.
Lastly, maintaining your water heater through regular flushing can prevent unexpected breakdowns, ensuring that you always have access to hot water when you need it. This reliability is crucial for the comfort and convenience of your household.
Understanding Gas Hot Water Heater Systems
Gas hot water heater systems operate by using natural gas or propane as a fuel source to heat water, which is then stored in a tank until needed. Unlike electric water heaters, gas models typically heat water faster and can be more cost-effective to operate, depending on local fuel prices.
These systems consist of a water tank, gas burner, thermostat, and a series of controls and safety devices. The thermostat regulates the water temperature by signaling the gas burner to turn on and off to maintain the desired temperature setting.
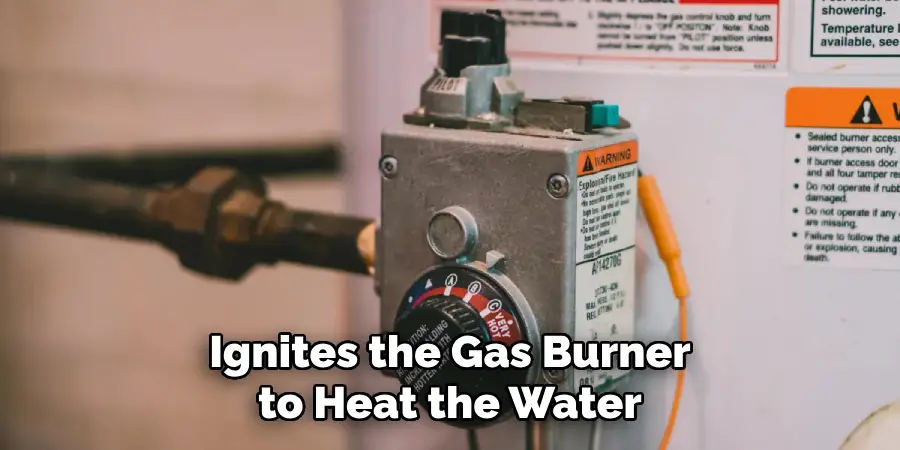
A key component of the system is the pilot light or electronic ignition, which ignites the gas burner to heat the water. Safety features include a temperature and pressure relief valve (T&P valve) that opens to relieve pressure if it gets too high inside the tank, preventing potential explosions.
Gas water heaters also require proper venting to safely expel combustion gases (by-products of burning gas) outside the home. Understanding these components and how they work together is crucial for effective operation, troubleshooting, and maintenance of your gas hot water heater system. Regularly maintaining these systems ensures they operate safely and efficiently, providing a reliable supply of hot water to your home.
Components of a Gas Hot Water Heater
A gas hot water heater consists of numerous essential components that work in unison to efficiently heat and supply hot water. Understanding these components can aid in proper maintenance and troubleshooting:
- Tank: The central component of the heater, which stores the water to be heated. This tank is insulated to keep water hot once heated.
- Gas Burner and Control Assembly: Positioned at the bottom of the tank, the burner heats the water. The control assembly regulates gas flow and ignition to maintain desired temperature settings.
- Pilot Light or Electronic Ignition: This feature is responsible for igniting the gas burner. Older models typically use a standing pilot light, whereas newer models may use electronic ignition systems for more efficient operation.
- Thermostat: This controls the temperature of the water within the tank, signaling the burner to heat the water when the temperature drops below a set level.
- Temperature and Pressure Relief Valve (T&P valve): A crucial safety feature that automatically opens to release pressure if the water temperature or pressure becomes too high within the tank, preventing potential explosions.
- Drain Valve: Located at the bottom of the tank, this valve allows the tank to be drained for maintenance, such as flushing out sediment.
- Water Supply Lines: Cold water enters the tank through the dip tube and hot water exits from the top to be distributed throughout the home.
- Venting System: Required for safely expelling combustion gases produced by the gas burner outside the home.
- Anode Rod: Suspended in the tank to prevent corrosion of the tank walls, the anode rod sacrifices itself to protect the tank.
- Insulation: Wrapped around the tank to help maintain the internal temperature of the water, reducing energy consumption by limiting heat loss.
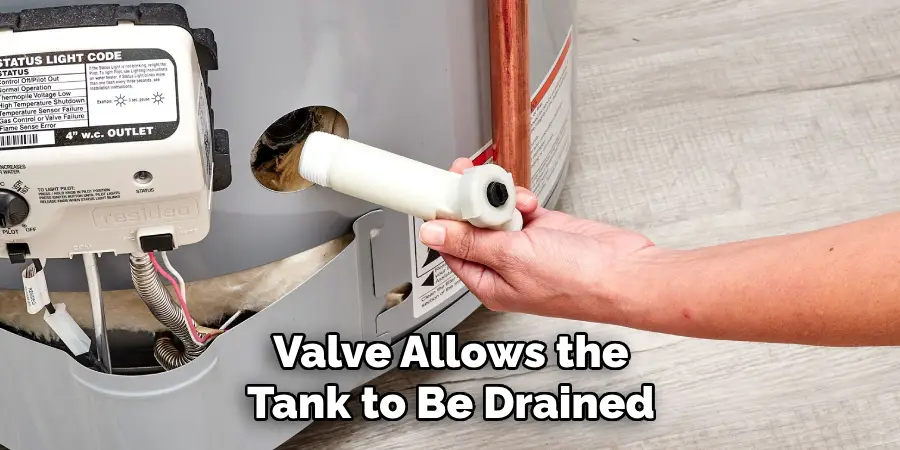
Each of these components plays a vital role in the operation, safety, and efficiency of a gas hot water heater. Regular checks and maintenance can help ensure that each part is functioning correctly, ultimately extending the unit’s lifespan and enhancing its performance.
Common Issues Caused by Sediment Buildup
Sediment buildup in a gas hot water heater can lead to a range of problems that affect efficiency, water quality, and lifespan of the unit. One of the most prominent issues is the reduction in heating efficiency.
As sediment accumulates at the bottom of the tank, where the heating element is located, it acts as a barrier between the burner and the water. This insulation effect means the burner must work harder and longer to heat the water to the desired temperature, leading to increased energy consumption and higher utility bills.
Another issue is the potential for overheating, which can weaken the tank’s structure and reduce its lifespan. The sediment layer can cause hot spots on the tank’s bottom, where the metal may become overly stressed and eventually crack or leak. Overheating can also damage the protective lining of the tank, further accelerating corrosion.
Water quality is also compromised by sediment buildup. It can harbor bacteria and other microbes, leading to unpleasant odors and possibly unsafe drinking water conditions. Additionally, as the sediment is stirred up by incoming cold water, it can cause hot water to become discolored and filled with particles.
Finally, sediment buildup can lead to frequent repairs and maintenance issues. Components such as the temperature and pressure relief valve or the drain valve may become clogged, causing them to fail or not operate as efficiently. This can necessitate more frequent service calls, increasing the overall cost of maintaining the water heater.
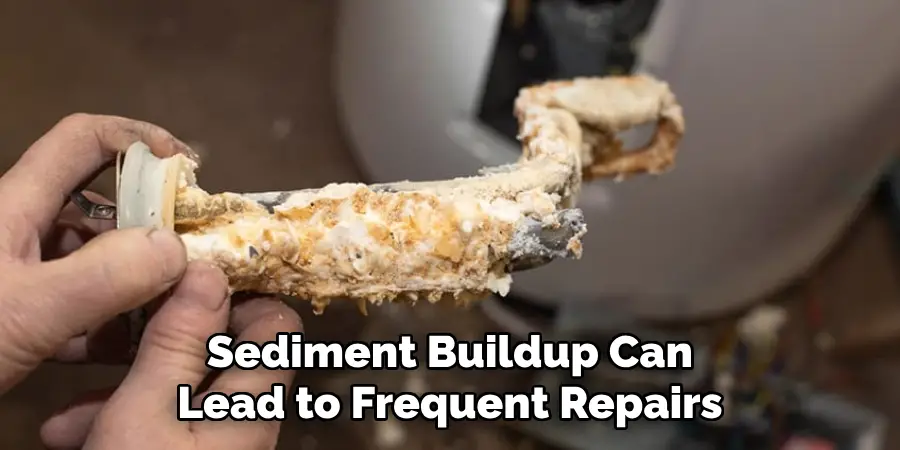
Regular flushing and inspection of the gas hot water heater are critical to mitigate these issues, ensuring the system operates efficiently and reliably while providing clean, hot water for the household.
12 Methods How to Flush a Gas Hot Water Heater
1. Safety Precautions:
Before starting the flushing process, it’s crucial to prioritize safety. Turn off the gas supply to the water heater and the power supply if it’s an electric heater. Allow the water inside the tank to cool down before proceeding to avoid the risk of burns. Although draining a water heater is a relatively simple process, there are still potential hazards that must be considered.
2. Gather Necessary Tools and Materials:
Collect all the tools and materials you’ll need for the task. This typically includes a garden hose, adjustable wrench, screwdriver, gloves, safety goggles, a bucket or drain pan, and possibly a water heater flush kit. Make sure to have all of these items ready before you begin the process.
3. Locate the Drain Valve:
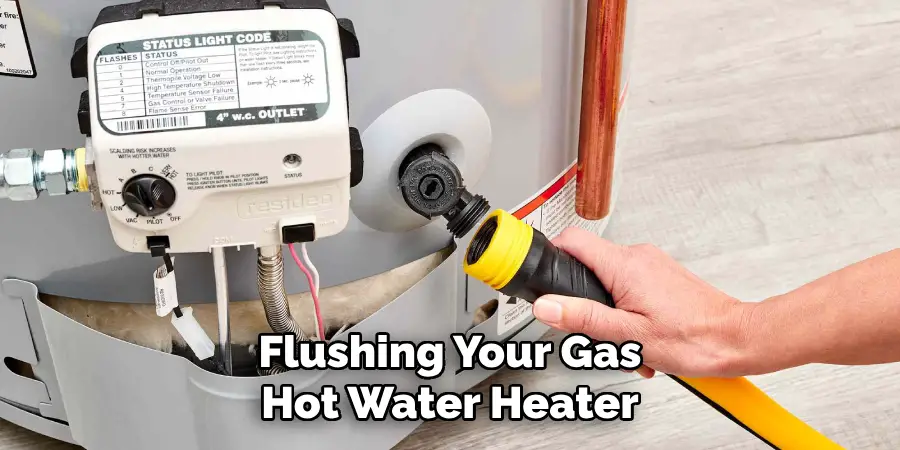
The drain valve is usually located near the bottom of the water heater. Attach one end of the garden hose to the drain valve and the other end to a floor drain or a nearby outdoor area where the water can safely drain.
The location of the drain valve may vary depending on the type and brand of water heater. For gas water heaters, the drain valve is typically located near the bottom of the tank on the side facing towards the gas burner. Electric water heaters may have their drain valve located on one of the top or bottom corners of the tank.
4. Turn Off the Cold Water Supply:
Locate the cold water supply valve usually located near the top of the water heater and turn it off. This prevents additional water from entering the tank while you’re flushing it. However, if you can’t locate the valve or it’s difficult to turn off, you can also turn off the main water supply valve for your entire house.
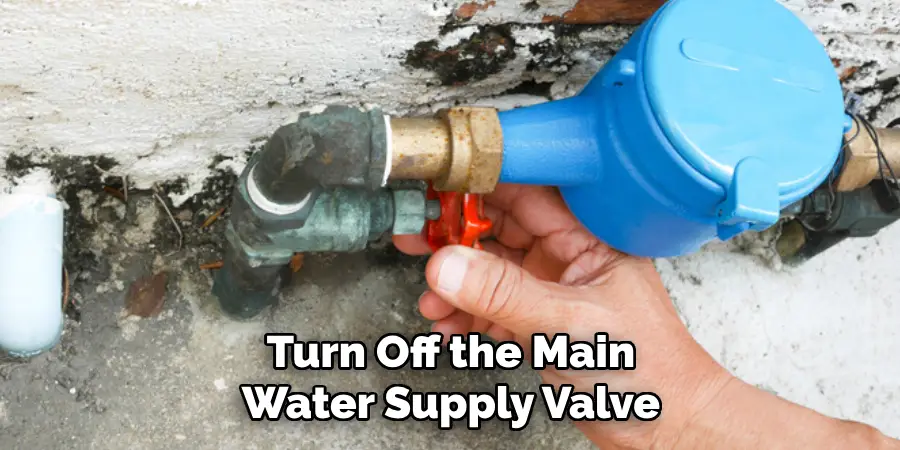
Once you have turned off the cold water supply, open a hot water faucet in a sink or tub to release any remaining pressure in the tank. This will also help with draining the tank faster.
5. Open a Hot Water Faucet:
Open a hot water faucet in your home to allow air into the system and facilitate the draining process. This step helps prevent a vacuum from forming inside the tank, which can impede water flow. Although it may seem insignificant, opening a hot water faucet can make a big difference in the overall draining process.
It is important to regularly drain your hot water tank to remove sediment buildup and maintain its efficiency. While some manufacturers recommend draining every six months, others suggest doing so once a year. Additionally, if you notice any unusual noises or fluctuations in water temperature, it may be a sign that your tank needs to be drained sooner.
6. Open the Drain Valve:
Using the adjustable wrench, slowly open the drain valve on the water heater. Be prepared for sediment-laden water to flow out. Direct the flow of water away from yourself and any electrical components.
It is also recommended to have a bucket or large container ready to catch the water. This will prevent any messes and allow for easy disposal of the sediment. Though it may seem like a tedious task, regularly draining your water heater is important for maintaining its efficiency and prolonging its lifespan.
7. Flush the Tank:
Allow the water to drain completely from the tank. Depending on the amount of sediment buildup, this may take some time. You can gently tap on the sides of the tank to help dislodge any stubborn sediment. Once the tank is empty, use a clean cloth or sponge to wipe down the inside walls of the tank. This will help remove any remaining residue or buildup.
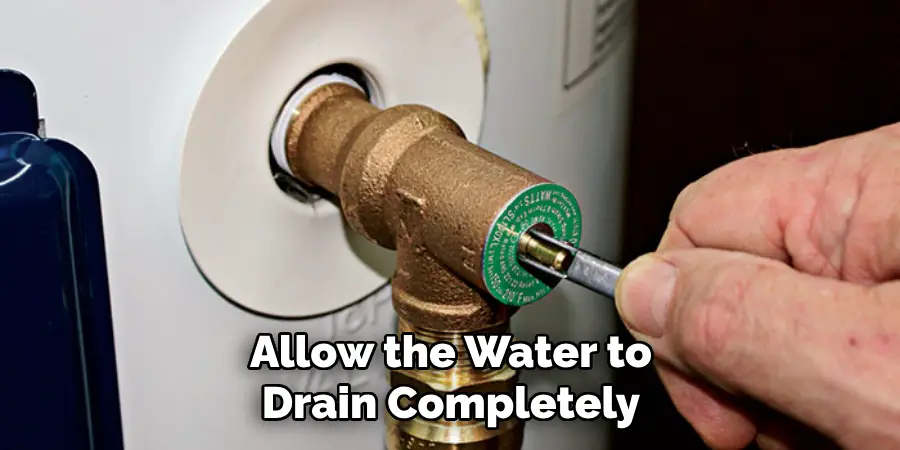
8. Inspect the Drain Valve:
While the tank is draining, inspect the drain valve for signs of leaks or corrosion. If necessary, replace the drain valve to ensure proper functionality and prevent future issues. It is important to regularly inspect the drain valve as it is a crucial component of the water heater and can cause problems if not properly maintained.
To inspect the drain valve, start by checking for any visible signs of leaks or corrosion. If there are no obvious issues, open the valve and allow any remaining water to fully drain out. Use a flashlight to check inside the valve for any buildup or debris that may be causing clogs. If you notice any blockages, use a wire brush or compressed air to remove them.
9. Refill and Flush Again (Optional):
Once the tank has drained completely, close the drain valve and remove the hose. Turn the cold water supply back on to refill the tank partially. Repeat the flushing process one or two more times if significant sediment buildup persists.
If you have an older toilet that is prone to clogs, it may be beneficial to refill and flush the tank a few additional times. This will help ensure that any remaining debris or sediment is flushed out of the system.
10. Perform Final Checks:
After completing the flushing process, perform final checks to ensure everything is in order. Tighten any connections that may have loosened during the process, including the drain valve and cold water supply valve. Check for leaks around the tank and connections. If you notice any leaks, tighten the connections or replace any damaged parts.
In addition to tightening connections and checking for leaks, it is also important to clean up any debris or sediment that may have been left behind during the flushing process. This can be done by wiping down the outside of the tank and using a hose to flush out any remaining sediment from inside the tank.
11. Restore Power and Gas Supply:
Once you’re satisfied with the flushing and checks, restore power to the water heater by turning on the gas supply or resetting the circuit breaker if it’s an electric heater. Monitor the heater for any unusual noises or behaviors in the following hours to ensure everything is functioning correctly.
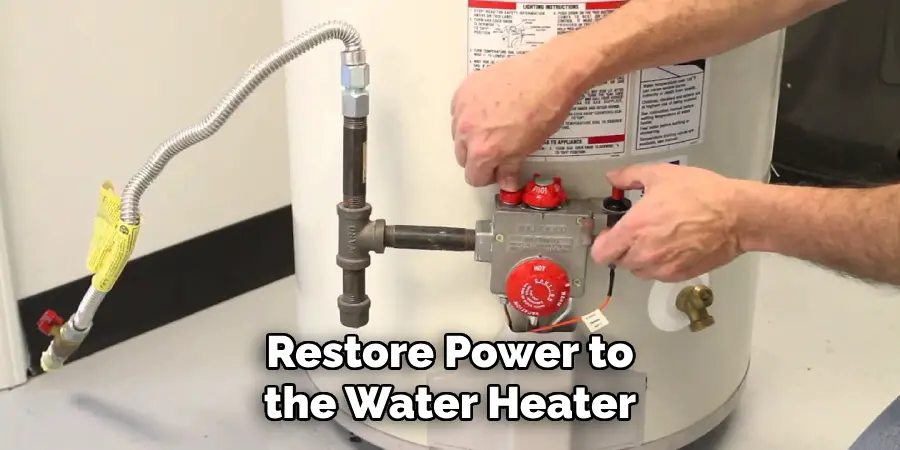
While waiting for the water to heat up, take this time to clean up any mess or spills from the flushing process. Additionally, you may want to check for any potential leaks or damage to the water heater before using it.
12. Schedule Regular Maintenance:
Flushing your gas hot water heater should be part of your regular maintenance routine. Aim to flush the heater at least once a year to prevent sediment buildup and maintain optimal performance.
However, if you notice any issues with your hot water heater, such as strange noises or a decrease in hot water supply, it may be necessary to flush the heater more frequently. Once you have flushed the heater, monitor its performance and adjust your maintenance schedule accordingly.
It is also recommended to schedule a professional inspection of your gas hot water heater every few years. A trained technician can check for any potential issues or areas that may need attention. This can help prevent costly repairs in the future and ensure that your hot water heater continues to run efficiently.
Conclusion
In conclusion, learning how to flush a gas hot water heater is a crucial aspect of home maintenance to ensure optimal performance and longevity of the appliance. By following the step-by-step guide outlined in this article, homeowners can effectively remove sediment buildup and prevent potential issues such as reduced efficiency and premature failure.
Regular flushing not only improves the heater’s efficiency but also helps maintain water quality and prolongs the lifespan of the unit. Additionally, adhering to safety precautions and manufacturer recommendations is essential to prevent accidents and ensure a successful flushing process. Thanks for reading, and we hope this has given you some inspiration on how to flush a gas hot water heater!

