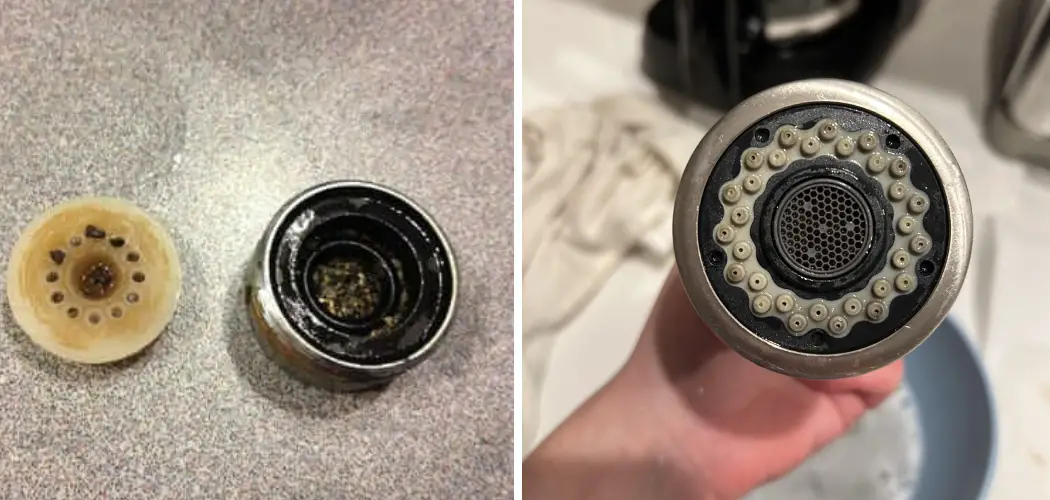
Black slime in faucets is often an unwelcome sight, indicating the presence of mold, bacteria, or mineral buildup that can impact both the aesthetics and functionality of your plumbing. This unsightly residue not only affects the quality of water dispensed but can also pose health risks if left untreated.
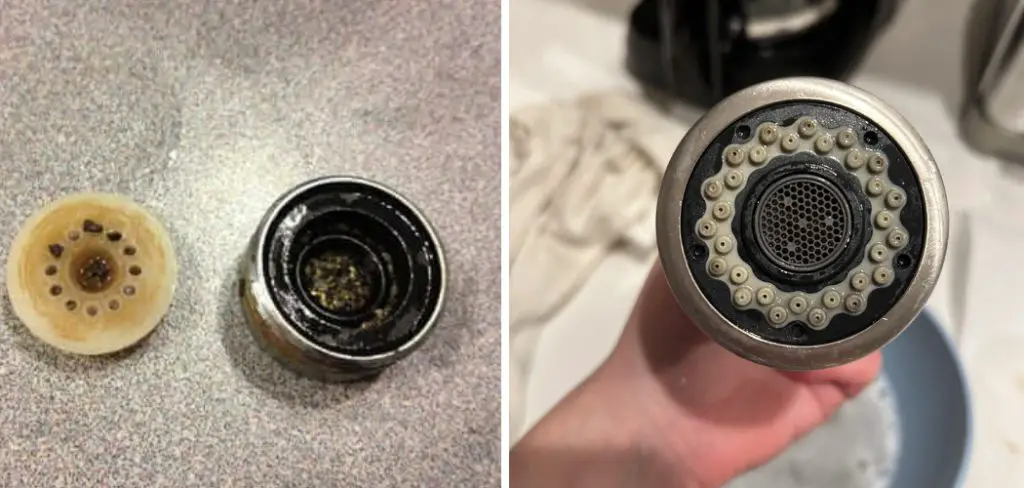
Understanding the causes of black slime and knowing effective methods for its removal are essential steps in maintaining a healthy and clean water supply. In this guide, we will explore various strategies on how to get rid of black slime in faucet, ensuring your water remains clear and safe for everyday use.
What is Black Slime in Faucets, and Why is it a Concern?
Black slime in faucets typically consists of a gelatinous substance formed by the growth of microbial organisms, particularly certain strains of bacteria and mold. This slime often thrives in damp environments where water stagnates, such as in faucet aerators or under sink drainage systems. The presence of black slime is concerning for several reasons.
Firstly, it can significantly affect the taste and odor of the water, making it unpalatable. Secondly, it serves as a breeding ground for harmful bacteria, potentially leading to health issues for anyone consuming the water.
Additionally, the accumulation of black slime can impair water flow, reducing the efficiency of your plumbing system. Addressing this issue promptly is crucial to ensure both the quality of your water and the overall health of your household.
Understanding the Causes of Black Slime
The formation of black slime in faucets can be attributed to several environmental factors that create ideal conditions for microbial growth. One primary cause is the presence of stagnant water, which can occur in areas like faucet aerators and pipes where water flow is minimal. When water remains still for extended periods, it allows microorganisms to proliferate. Additionally, high humidity levels and warm temperatures can further promote the growth of bacteria and mold, leading to the development of black slime.

Moreover, mineral deposits from hard water can serve as a nutrient source for these organisms, making it easier for them to thrive. Poor plumbing maintenance, such as infrequent cleaning and a lack of regular inspections, can also contribute to the accumulation of organic material, fostering an environment conducive to slime formation. Understanding these causes is essential for implementing effective prevention and removal strategies, ensuring a clean and healthy water supply.
10 Methods How to Get Rid of Black Slime in Faucet
1. Disassemble the Faucet
The first step in tackling black slime is to disassemble the faucet to access the affected areas. Start by turning off the water supply to the faucet, usually found under the sink. Once the water is turned off, use an appropriate tool, such as a screwdriver or Allen wrench, to remove the handle and any other components that may be harboring the slime.
Take care to keep track of all parts and their order for reassembly later. Disassembling the faucet allows you to thoroughly clean each component, ensuring that no slime is left behind.
2. Soak Components in Vinegar
White vinegar is a natural and effective cleaner for removing black slime due to its acidic properties. After disassembling the faucet, soak the affected components in a bowl or bucket of white vinegar.
Allow them to soak for at least 30 minutes to an hour. The vinegar will help dissolve mineral deposits, mold, and mildew, making it easier to scrub away the black slime. For stubborn slime, you may need to let the components soak overnight. After soaking, scrub the parts with a soft brush or sponge to remove any remaining residue.
3. Use Baking Soda and Vinegar Paste
For a more abrasive cleaning solution, you can create a paste using baking soda and vinegar. Mix equal parts of baking soda and white vinegar to form a thick paste. Apply this paste to the faucet components, focusing on areas with black slime buildup.

Allow the paste to sit for 15 to 20 minutes, giving it time to penetrate and break down the slime. Use a toothbrush or scrub brush to scrub the paste into the affected areas, then rinse thoroughly with water. This method is particularly effective for removing stubborn slime and mineral deposits.
4. Clean with Hydrogen Peroxide
Hydrogen peroxide is another effective cleaner that can help remove black slime. Its antibacterial properties make it useful for disinfecting and breaking down mold and mildew. Fill a spray bottle with hydrogen peroxide and spray it onto the faucet components and the area where the slime is present.
Allow it to sit for 10 to 15 minutes. The hydrogen peroxide will help kill bacteria and loosen the slime. Afterward, scrub the affected areas with a brush and rinse thoroughly with water. Ensure that all hydrogen peroxide residue is rinsed away to prevent any potential reactions with other cleaning agents.
5. Apply a Commercial Mold and Mildew Cleaner
If natural cleaning methods are not effective, you may need to use a commercial mold and mildew cleaner. These products are specifically designed to tackle tough mold and mildew problems and often contain stronger chemicals.
Follow the manufacturer’s instructions for application, typically involving spraying the cleaner onto the affected areas and allowing it to sit for a specified time. Use a scrub brush or sponge to remove the black slime, then rinse the faucet components thoroughly with water. Be sure to use gloves and work in a well-ventilated area when handling commercial cleaners.

6. Use a Toothbrush for Detail Cleaning
A toothbrush is a handy tool for cleaning small and intricate parts of a faucet, especially those with black slime buildup. After soaking the faucet components in vinegar or applying a cleaning paste, use a toothbrush to scrub the affected areas. The bristles can reach into crevices and around delicate parts that may be difficult to clean with larger brushes or sponges. Pay special attention to areas where the slime is most concentrated. Once you have scrubbed all the affected areas, rinse the components thoroughly to remove any remaining slime and cleaning residue.
7. Flush the Faucet with Boiling Water
Boiling water can help in dissolving and flushing out any remaining black slime or buildup. After cleaning the faucet components and reassembling the faucet, boil a pot of water and carefully pour it over the faucet and into the spout. The hot water will help loosen any residual slime and flush it out of the faucet system. Be cautious when handling boiling water to avoid burns or scalds. Repeat the flushing process if necessary until the water runs clear and free of slime.
8. Inspect and Replace O-Rings or Washers
During the faucet disassembly process, inspect the O-rings, washers, and other seals for signs of damage or deterioration. Black slime can sometimes accumulate around these components, and if they are damaged, it may lead to further problems.
Replace any worn or damaged O-rings or washers with new ones to ensure a proper seal and prevent future slime buildup. Most hardware stores carry replacement parts, and it’s important to choose components that are compatible with your faucet model.

9. Maintain Regular Cleaning
Prevention is key to managing black slime and maintaining a clean faucet. Establish a regular cleaning routine to prevent slime buildup. Wipe down the faucet and sink area with a disinfectant or cleaner on a weekly basis. Pay attention to areas prone to moisture and grime buildup, such as around the faucet base and handles. By keeping these areas clean and dry, you can reduce the likelihood of mold and mildew growth, preventing the recurrence of black slime.
10. Improve Ventilation
Improving ventilation in your kitchen or bathroom can help prevent black slime from forming in the first place. Excess moisture and poor air circulation contribute to the growth of mold and mildew. Ensure that your space is well-ventilated by using exhaust fans, opening windows, or using dehumidifiers. Regularly check for and address any sources of excess moisture, such as leaks or condensation. By creating a drier environment, you can minimize the conditions that lead to black slime and maintain a cleaner faucet.
Things to Consider When Cleaning Your Faucet
When cleaning your faucet, there are several important factors to keep in mind to ensure effective and safe results. First, assess the material of your faucet, as some types (like chrome or brass) may require specific cleaning agents to avoid damage. Always test a small, inconspicuous area before applying any cleaner widely.
Second, consider the water quality in your area; hard water can lead to mineral buildup, so employing preventive measures like regular cleaning can be beneficial. Additionally, be cautious with the use of abrasives, as these can scratch delicate finishes. Lastly, ensure you are wearing appropriate protective gear, such as gloves and goggles, especially when using commercial cleaners or strong chemicals, to protect your skin and eyes from potential irritants.
Conclusion
In conclusion, removing black slime from a faucet involves a combination of disassembly, thorough cleaning, and preventive measures. By following these detailed methods—ranging from natural solutions like vinegar and baking soda to the use of commercial cleaners and improving ventilation—you can effectively address and prevent black slime buildup. Thanks for reading, and we hope this has given you some inspiration on how to get rid of black slime in faucet!

