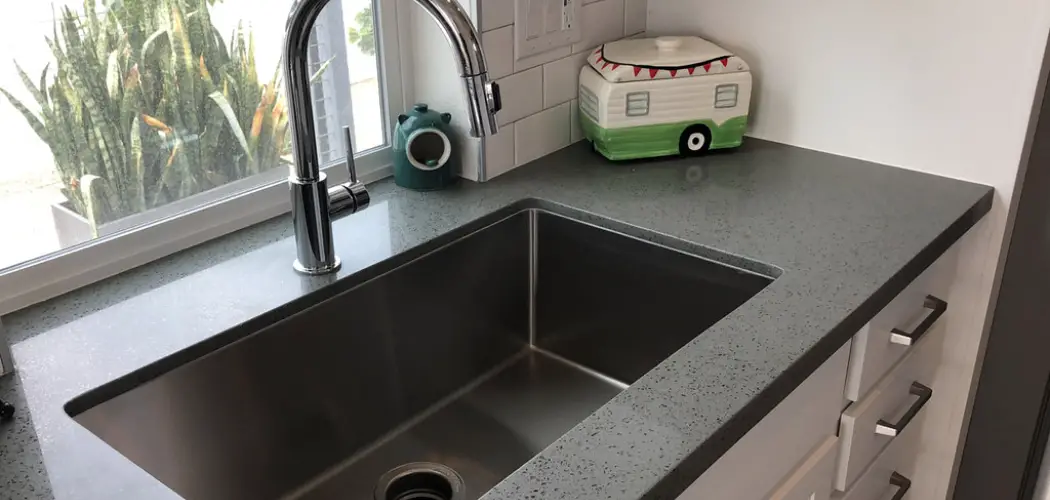
Are you looking to upgrade your kitchen with a stylish farm sink? Installing one may seem like a daunting task, but the truth is, it’s easier than you think! Not only does it bring an elegant charm to any kitchen design, but also adds functionality and an extra touch of class.
In this blog post on how to install a farm sink, we will discuss all the steps necessary for installing a farm sink in your home and provide tips on how to ensure everything goes smoothly. If you’re ready to take on this project (or hire a professional!), keep reading for all the dos and don’ts of installing a farm sink.
Needed Tools and Materials
Given below are all the tools and materials you will need for installing a farm sink.
- Tape Measure
- Pencil
- Screwdriver
- Pliers
- Stud Finder
- Putty Knife
- Level
- Silicone Caulk
- Farm Sink (With Mounting Clips, if Needed) and Faucets of Your Choice
11 Step-by-step Instructions on How to Install a Farm Sink
Step 1: Measure the Cabinet
First, measure the dimensions of your existing cabinet. Measure the width and depth of the opening, as well as the height from the bottom of the countertop to the cabinet’s interior wall. Write these measurements down for reference later.
It is important that the farm sink you choose fits into your existing cabinet. You may need to make slight adjustments for the installation to be successful. This is especially relevant if you are replacing an existing sink.
Step 2: Mark Your Cabinet Opening
Using a pencil and level, trace a rectangle on your kitchen cabinet that matches the measurements of your farm sink. This will be the opening for your new sink. But before you start cutting, double-check your measurements and make sure they are accurate. If everything looks good, you can proceed to the next step. You can also use a template for the perfect fitting.

Step 3: Prepare for Installation
Remove any drawers or shelves from the area where you plan to install your farm sink. Next, use a stud finder to locate and mark the studs in the walls surrounding your sink’s future location.
It’s also important to make sure all of the plumbing lines are in place and secure. But before you can do that, you’ll need to decide what type of plumbing system is best for your project. Depending on the layout of your kitchen, you may want to go with a single-bowl sink or a double-bowl sink.
Step 4: Cut the Opening in the Cabinet
Using a saw, cut out the rectangle you marked on your kitchen cabinet. Be sure to wear safety glasses while doing this! Also, make sure that your cuts are straight and precise so that the opening is even. But before you cut, double-check the measurements of your farm sink and make sure your opening is in line with them.
Step 5: Place Farm Sink Into the Cabinet
Carefully lift the farm sink into the cabinet, making sure to line up the holes in the sink with the mounting clips (if supplied). If your farm sink did not come with mounting clips, use screws and a screwdriver to secure it. You may also need to use a putty knife to pry the sink into the cabinet.

Step 6: Secure Your Sink
Once you’ve placed your sink into the cabinet, use a screwdriver to secure it. Use your level to make sure things are even and straighten out any unevenness with pliers or a putty knife. You can also use silicone caulk to fill any gaps between the sink and countertop. You can also use clips or screws to secure the sink in place.
Step 7: Attach Faucets
Attach the faucets of your choice to the farm sink using the appropriate hardware. Make sure that everything is secure and even. This may require a bit of adjusting, so take your time and be sure all the fittings are in place. But before you do this, make sure the faucets you choose match the look and style of your sink.
Step 8: Seal the Sink
Using a silicone caulk, seal around the sink to make sure there are no gaps between it and the countertop or cabinet. Allow this to dry before proceeding. It’s important to make sure your caulk is of good quality and that it will last as long as possible. You can also use a sealant to secure the edges of your sink.
Step 9: Install Water Supply Lines
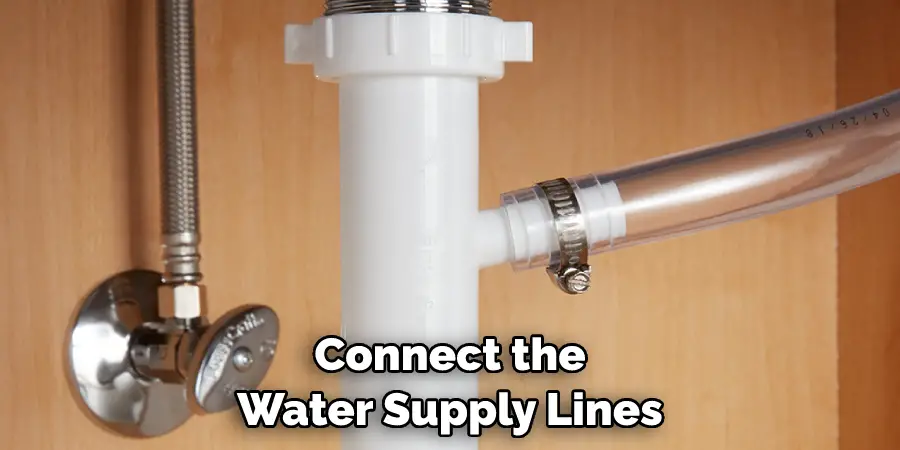
Connect the water supply lines from your sink to the water supply lines in your wall. Tighten these with a screwdriver or wrench, and then turn on the water to test for leaks. But before you do this, make sure the lines are secured and all of the parts fit tightly. Although it might seem intimidating, installing your farm sink is actually quite easy once you have all the tools and materials you need.
Step 10: Attach Drain Lines
Once everything is connected and secure, attach the drain lines from your sink to the drain line in your wall. Make sure that they are firmly attached and then turn on the water. However, if you’re replacing an existing sink, then the drain lines should already be in place. It’s also important to ensure that the drain line is angled correctly and securely attached.
Step 11: Enjoy Your New Farm Sink
Once everything is connected and secure, your farm sink should be ready to use. Congratulations! You’ve successfully installed a beautiful new farm sink in your home. Now you can enjoy all of its benefits for years to come. Always remember to keep up with regular maintenance and cleaning of your sink to ensure its long life.
With these simple steps on how to install a farm sink, you can easily install a farm sink in your home without any hassle. And, if you ever need help along the way, don’t hesitate to contact a professional for assistance. Good luck!
Safety Tips
When it comes to installing a farm sink, safety should always be top of mind. Be sure to wear safety glasses and gloves while working. Additionally, make sure that you’re not overworking yourself or rushing the process. Take your time and double check all connections before turning on the water supply.

Do You Need To Use a Professional?
Though it is possible to install a farm sink yourself, it’s always best to consult with a professional if you have any doubts or questions. The pros can help you find the right materials and tools, as well as provide guidance on how to properly install your sink. So if you’re feeling unsure about tackling this project alone, don’t hesitate to reach out to a professional for help.
Installing a farm sink can be a rewarding and fun project, as long as you take the necessary safety precautions. With these simple steps, you’ll be on your way to having an elegant and stylish farm sink in no time! Happy installing!
How Much Will It Cost?
The cost of installing a farm sink will depend on the type of sink you choose, as well as if you hire a professional for the job. Generally speaking, expect to spend anywhere from $400 – $1,000 for the materials and installation. It’s important to note that this cost could increase if you decide to do any additional upgrades or modifications. Be sure to factor these costs into your budget so you’re prepared for the project ahead.
Frequently Asked Questions
Q: Do I Need To Use a Professional For This Project?
A: It’s always best to consult with a professional if you have any doubts or questions. The pros can help you find the right materials and tools, as well as provide guidance on how to properly install your sink. So if you’re feeling unsure about tackling this project alone, don’t hesitate to reach out to a professional for help.
Q: What Is the Estimated Cost Of Installing a Farm Sink?
A: The cost of installing a farm sink will depend on the type of sink you choose, as well as if you hire a professional for the job. Generally speaking, expect to spend anywhere from $400 – $1,000 for the materials and installation. It’s important to note that this cost could increase if you decide to do any additional upgrades or modifications. Be sure to factor these costs into your budget so you’re prepared for the project ahead.
Q: Are There Any Safety Tips I Should Keep in Mind?
A: When it comes to installing a farm sink, safety should always be top of mind. Be sure to wear safety glasses and gloves while working. Additionally, make sure that you’re not overworking yourself or rushing the process. Take your time and double check all connections before turning on the water supply. With these simple tips, your project should go as smoothly as possible.
Q: Are There Any Tips For Maintaining My Farm Sink?
A: To keep your farm sink looking and functioning at its best, be sure to clean it regularly. Use a mild dish soap with warm water to wash away any dirt or debris. Additionally, make sure you’re not using any abrasive cleaners or sponges that could scratch the surface of your sink. With regular maintenance, you can keep your farm sink looking great for years to come!

Installing a farm sink is a great way to spruce up the look of your kitchen or bathroom. With these simple steps and safety tips, you’ll be able to complete the project with ease. Good luck!
Conclusion
Installing a farm sink in your home is an investment that will not only add beauty and character to your kitchen but also increase the value of your property and provide convenience for years to come. With these tips in mind, you can successfully install a farm sink without major hiccups or surprise expenses.
Before starting the job though, be sure to adjust the budgeting accordingly, double check measurements and ensure all materials are on hand for a seamless installation process.
With patience and organization, this project can be completed in no time! It’s amazing what you can do with just a few supplies and some elbow grease. As soon as your new farm sink is installed, you’ll be ready to start washing those dishes in style! Thanks for reading this article on how to install a farm sink.

