

Are you tired of cleaning your glassware by hand? Have you been looking for an easier and more efficient way to rinse your glasses? Look no further than a glass rinser!
Installing a glass rinser is a simple and practical way to enhance convenience in your kitchen or bar area. A glass rinser allows you to easily and efficiently clean cups, glasses, and bottles, making it a valuable addition to any sink setup.
By following a straightforward installation process, you can have a functional glass rinser in no time, helping to simplify your cleanup routine while maintaining hygiene.

This guide on how to install glass rinser will walk you through the necessary steps to install a glass rinser safely and effectively. Let’s get started!
What Are the Benefits of Installing a Glass Rinser?
Before we dive into the installation process, let’s first discuss why you should consider installing a glass rinser.
- Time-saving: A glass rinser can save you time by quickly and effectively rinsing your glasses, cups, or bottles. This means you can spend more time enjoying your drinks and less time cleaning up!
- Hygiene: A glass rinser helps maintain cleanliness and hygiene in your kitchen or bar area. It eliminates the need to handle dirty glasses with your hands, reducing the risk of cross-contamination.
- Water Efficiency: Glass rinsers use minimal water compared to hand washing, making them an environmentally friendly option for cleaning glassware.
- Space-saving: Glass rinsers are compact and can be installed directly on or next to your sink, saving valuable counter space.
What Will You Need?
- Glass Rinser Kit: This can be purchased from a kitchen, bar supply store, or online.
- Drill
- Drill bit suitable for the material of your sink (usually 1/2 inch)
- Wrench or pliers
- Mounting bolts and nuts
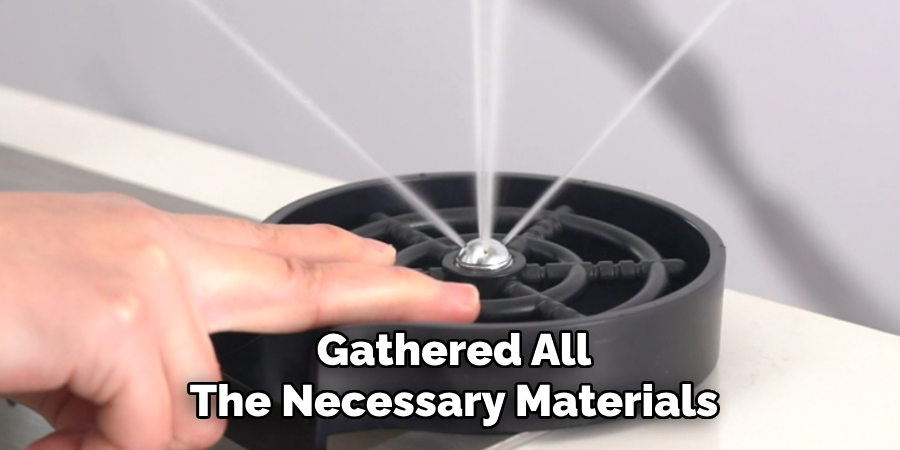
Once you have gathered all the necessary materials, it’s time to start the installation process.
8 Easy Steps on How to Install Glass Rinser
Step 1: Prepare Your Sink
Before beginning the installation process, ensure that your sink area is clean and free of any items that may obstruct your work. Remove dish racks or items around the sink to give you adequate space to work comfortably. If your sink is made of stainless steel, porcelain, or another specific material, identify the best location to install the glass rinser.
Typically, glass rinsers are installed near the corner or edge of the sink to maximize functionality without obstruction. Mark the desired location on the sink using a marker or tape, ensuring enough clearance for the rinser to operate without interference.
Double-check the alignment with surrounding fixtures, such as your faucet or soap dispenser, to maintain a clean and balanced setup. Proper preparation is key to a successful and hassle-free installation process.
Step 2: Gather the Necessary Tools and Materials
Before you proceed, gather all the tools and materials required for installation. Typically, you’ll need a drill with the appropriate drill bit, a wrench, a plumber’s tape, a screwdriver, and the installation kit with your glass rinser.
Double-check the instructions with your rinser to ensure you have any specific items or components listed. Preparing everything in advance will save time and help the installation run smoothly without interruptions.
Step 3: Drill the Hole in the Sink
With your tools and materials ready, it’s time to drill the hole for the glass rinser. Use the drill bit specified in the rinser’s instructions, ensuring it is suitable for the material of your sink—whether stainless steel, porcelain, or another type.
Carefully drill at the marked location, applying steady pressure to create a clean and precise hole. Once the hole is complete, use a file or sandpaper to smooth out any rough edges, preventing potential damage during installation. Clean the area thoroughly before proceeding to the next step.
Step 4: Install the Glass Rinser Assembly
Insert the glass rinser’s main assembly into the hole you drilled, ensuring it fits snugly and aligns properly with the sink. Depending on the design of your glass rinser, you may need to use the rubber gasket or washer provided in the installation kit to create a watertight seal.
Secure the assembly from underneath the sink by threading the mounting nut onto the exposed end of the rinser. Tighten it firmly using a wrench, but avoid over-tightening to prevent damage. Once properly secured, ensure the rinser is stable and correctly positioned before moving on.

Step 5: Connect the Water Supply
Locate the water supply line provided with your glass rinser and attach it to the rinser’s inlet. Ensure the connection is tight and secure to avoid any leaks. If the rinser is designed to work with both hot and cold water, connect the lines accordingly, following the manufacturer’s instructions.
Use the plumber’s tape on the threaded connections, if necessary, to create a better seal. Once all connections are made, slowly turn on the water supply and check for leaks. Tighten the connections and test again if any are found before finalizing the installation.
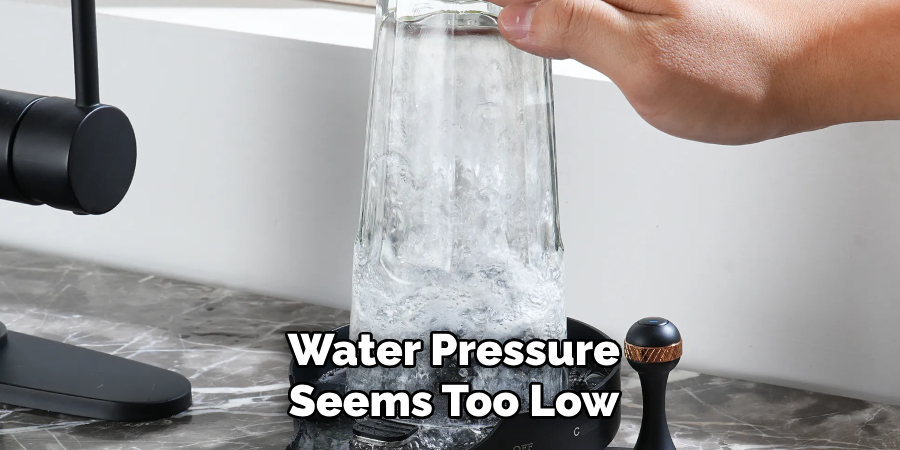
Step 6: Test the Glass Rinser
With the water supply connected and no visible leaks, test the functionality of the glass rinser. Place a glass or cup upside down on the rinser and gently press down to activate the spray. The water should flow evenly and with sufficient pressure to clean the glass efficiently.
Rotate the glass slightly to ensure all sides are rinsed thoroughly. If the spray is weak or uneven, check the water supply connections and ensure no blockages are in the rinser’s spray mechanism. Once satisfied with the performance, the installation is complete, and your glass rinser is ready for use.
Step 7: Maintenance Tips for the Glass Rinser
Regular maintenance is recommended to ensure the glass rinser continues to function optimally. Clean the rinser’s spray mechanism periodically to remove any buildup of debris or mineral deposits that could affect water flow. Use a small brush or a pin to clear any clogged nozzles carefully.
Additionally, inspect the water connections for any signs of wear or leaks and address them promptly. Consider using a water softener or descaling solution for areas with hard water to prevent limescale buildup. By performing these simple upkeep tasks, you can extend the lifespan of your glass rinser and maintain its performance.
Step 8: Troubleshooting Common Issues
If you encounter problems with your glass rinser, there are a few common issues to check before seeking professional assistance. First, if the rinser is not spraying water, ensure the water supply is turned on and the connections are secure. Check for any blockages in the spray mechanism and clear them if necessary.
If the water pressure seems too low, inspect the water line for kinks or leaks that might restrict the flow. For persistent performance issues, consider disassembling and cleaning the rinser to remove any hidden debris. Addressing these potential problems directly can often resolve the issue and restore proper functioning.
By following these steps and tips, you can successfully install a glass rinser in your kitchen sink and maintain its performance for years.
5 Things You Should Avoid
- Skipping the Instructions: Always read the manufacturer’s manual thoroughly before installing. Failing to do so can lead to improper installation and potential damage.
- Ignoring Plumbing Requirements: Ensure you understand the water supply and drainage setup. Neglecting to check compatibility with your plumbing system can result in leaks or malfunction.
- Using Incorrect Tools: Avoid using makeshift tools or improper equipment. Using the right tools ensures precision and reduces the risk of damaging the rinser or surrounding fixtures.
- Over-Tightening Connections: Be cautious not to over-tighten water connections, as this can strip threads, cause cracks, or lead to leaks over time.
- Skipping Leak Testing: Always test for leaks by running water through the system once installed. Skipping this step can result in unnoticed issues that may cause long-term damage to your counter or cabinet space.
By avoiding these mistakes, you can ensure a successful and long-lasting installation of your glass rinser. Proper care and maintenance will continue to enhance your kitchen experience for years to come.
Where Should a Glass Rinser Be Installed?
A glass rinser can be installed in any kitchen sink, whether at home or in a commercial setting. It is often placed next to the main faucet for convenience. Still, it can also be installed on the other side of the sink, depending on personal preference and space availability. Ensure ample room to activate the spray and clean the glasses without obstruction.

Additionally, consider installing a glass rinser near your dishwasher if you frequently wash delicate glasses that cannot withstand high water pressure. This allows for separate rinsing and washing areas and reduces the risk of damaging fragile glassware.
Conclusion
How to install glass rinser requires careful attention to detail and adherence to the instructions provided to ensure a successful setup.
You can ensure a seamless installation process by avoiding common mistakes such as skipping the manual, ignoring plumbing requirements, or over-tightening connections. Always use the correct tools and remember to test for leaks to confirm everything is functioning correctly.
Following these guidelines will result in a securely installed glass rinser that is efficient and durable for everyday use.