Are you tired of that leaky, outdated faucet on your pedestal sink? Replacing it may seem daunting, but with a little knowledge and the right tools, you can easily replace it yourself.

How to replace a faucet on a pedestal sink can seem like a daunting task, but with the right tools and a bit of guidance, it can be a straightforward DIY project. This guide will walk you through the necessary steps to successfully replace your old faucet, helping you refresh the look of your bathroom while improving functionality. Whether you’re dealing with a leaky faucet or simply want to upgrade to a more modern design, understanding the process will empower you to confidently tackle this job.
Following our detailed instructions ensures that the job is done safely and effectively, leaving you with a beautifully functioning sink.
What Will You Need?
Before replacing your faucet, ensure you have all the necessary tools and supplies. Here’s a list of items that will come in handy:
- Adjustable wrench
- Pliers
- Screwdriver (both flathead and Phillips head)
- Plumber’s tape
- A bucket or bowl to catch any water from the old faucet
- New replacement faucet kit.
Once you have all these items gathered and ready, you’re ready to begin replacing your faucet.
10 Easy Steps on How to Replace a Faucet on a Pedestal Sink
Step 1: Turn Off the Water Supply
Before you start any plumbing project, the first and most crucial step is to turn off the water supply. Typically, this can be done by locating the shut-off valves under the sink. Turn the valves clockwise until they are tightly closed to prevent any water from flowing. If your sink doesn’t have individual shut-off valves, you may need to turn off your home’s main water supply.

Once you’ve ensured that the water supply is off, it’s a good idea to turn on the faucet to release any remaining pressure and confirm that no water is coming out. Having the water supply off will not only keep your work area dry but will also protect you from unexpected leaks while you’re replacing the faucet. After completing this step, you can confidently move forward, knowing you are prepared for the installation process.
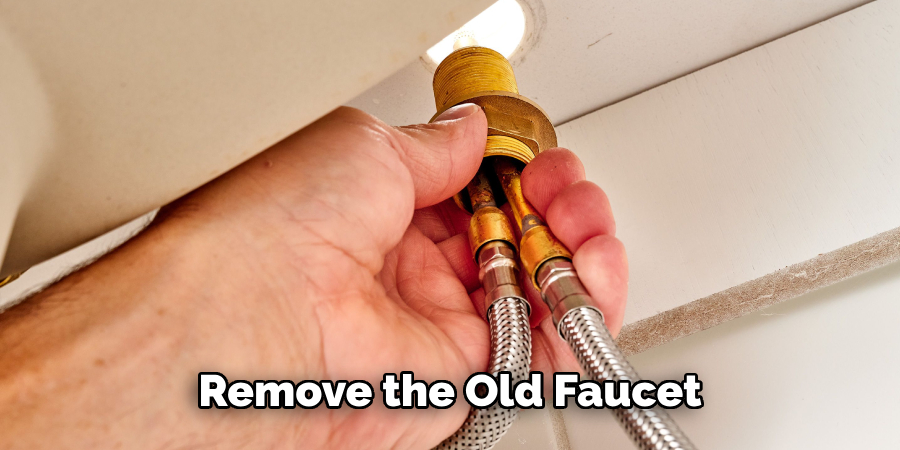
Step 2: Remove the Old Faucet
With the water supply securely turned off, it’s time to remove the old faucet. First, you’ll want to disconnect the water supply lines from the faucet. Carefully loosen the nuts connecting the supply lines to the faucet using the adjustable wrench. Remember to have your bucket or bowl handy to catch any residual water that may escape during this process.
Once the water lines are detached, locate the mounting nuts holding the faucet. These are typically found underneath the sink. Using your pliers or wrench, loosen and remove these nuts. After everything is disconnected, lift the old faucet out of the sink. Take a moment to clean the area where the new faucet will be installed, removing any debris or old plumber’s tape.

Step 3: Install the New Faucet
Now that you have removed the old faucet, it’s time to install the new one. Begin by placing the new faucet into the mounting hole on the sink. If applicable, ensure it is positioned correctly and aligned with any pre-drilled holes for handles. From underneath the sink, secure the faucet by tightening the mounting nuts. It’s essential to do this evenly to avoid any misalignment. Use your pliers or wrench to ensure the nuts are snug, but be cautious not to overtighten, as this can damage the sink or faucet.
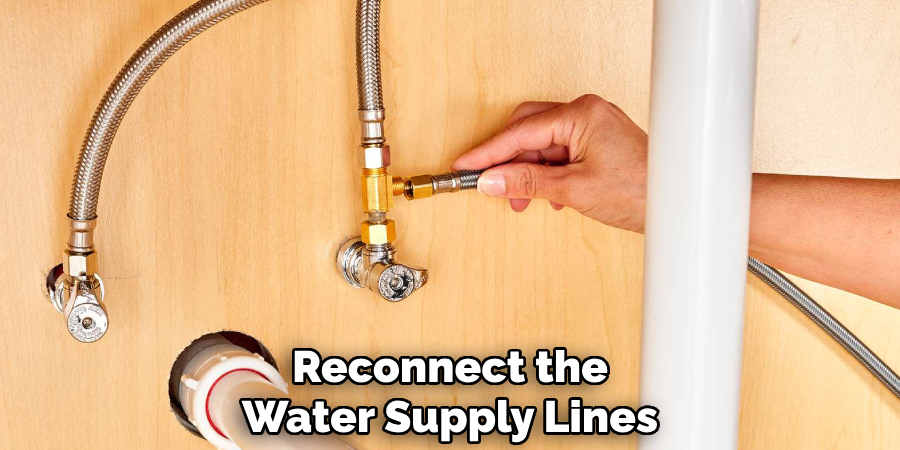
Step 4: Reconnect the Water Supply Lines
With the new faucet in position, the next step is to reconnect the water supply lines. Take the supply lines that were detached earlier and align them with the connectors on the new faucet. Hand-tighten the nuts to secure them in place initially, then use the adjustable wrench to tighten them further, ensuring a snug fit. Again, take care not to overtighten. Once connected, check for any signs of damage to the lines before proceeding.
Step 5: Apply Plumber’s Tape
Before making the final connections, ensuring a watertight seal between the threaded connectors is essential to prevent leaks. Begin by taking your plumber’s tape and wrapping it around the threads of the water supply lines. Make sure to wrap the tape in a clockwise direction, as this will allow it to stay in place once you screw the lines onto the faucet.

Typically, two to three layers of tape are sufficient to create a secure seal. This step is crucial because it fills any gaps between the threads, reducing the risk of leaks once the water supply is turned back on. After applying the tape, scrutinize the connections to ensure they are clean and free from debris, which could interfere with the seal.
Step 6: Turn On the Water Supply
It’s time to turn the water supply back on after ensuring everything is securely connected, and all the necessary adjustments have been made. Begin by locating the shut-off valves under the sink. Gently turn the valves counterclockwise to restore water flow. During this process, it’s wise to keep the faucet in the “off” position to prevent any unexpected water surges.
Once the water is turned on, slowly open the faucet to allow any trapped air in the system to escape. Watch for any leaks around the connections as water begins to flow through. If you see any signs of leaking, immediately turn off the water supply and tighten the connections as needed.
Step 7: Check for Leaks
Once the water supply is restored and the faucet is flowing without issues, performing a thorough leak check is crucial. Slowly inspect all your connections, looking for any signs of water pooling or dripping. Pay special attention to the areas where the supply lines connect to the faucet and the mounting nuts underneath the sink. If you notice any leaks, immediately turn off the water supply and tighten the affected connections until the leaks cease.
It’s best to conduct this check while the water is running, as it allows you to identify even the most minor leaks that may not be visible when the faucet is off. Ensuring everything is leak-free will provide peace of mind and a smooth operation for your new faucet.

Step 8: Finalise the Installation
After confirming that there are no leaks and everything is functioning correctly, it’s time to finalize the installation. Begin by cleaning the area around the sink and faucet to remove any dust or debris that may have accumulated during the process.
Depending on your sink type, you might also choose to apply a silicone sealant around the base of the faucet to create a watertight barrier and enhance the overall appearance. Ensure to follow manufacturer instructions for the sealant application, allowing adequate time to cure. Lastly, take a moment to test all the faucet’s functions, including both hot and cold water, ensuring everything is working smoothly.
Step 9: Dispose of the Old Faucet
Once the new faucet installation is complete and everything is functioning correctly, it’s important to dispose of the old faucet responsibly. Check if your local waste management guidelines offer specific instructions for the disposal of plumbing fixtures. If the faucet is still usable, consider donating it to a local charity or asking friends or family if they could use it.
If the faucet is broken or no longer functional, wrap it in newspaper or similar material to prevent injury and place it in your regular trash. Always ensure that any metal components are recycled whenever possible, contributing to environmental sustainability. After disposing of the old faucet, take a moment to review your work area, making sure it’s clean and free from any tools or materials left behind.
Step 10: Maintenance Tips
To ensure the longevity and smooth operation of your new faucet, it’s important to implement regular maintenance practices. Start by routinely checking for any signs of leaks or drips, as early detection can prevent more significant issues later on. Clean the faucet regularly using a mild, non-abrasive cleaner to remove mineral buildup or stains, especially if you live in an area with hard water.
Additionally, periodically inspect the aerator for clogs and clean or replace it as necessary to maintain optimal water flow. Lastly, regularly consider tightening the connections beneath the sink to ensure they remain secure.
By following these steps and tips, you can successfully install and maintain a new kitchen faucet for years to come.
Conclusion
Replacing a faucet on a pedestal sink can seem daunting, but following the outlined steps methodically can complete the process efficiently and effectively. Each stage is crucial in delivering a successful installation, from gathering the necessary tools and materials to ensuring all connections are secure and leak-free.
Regular maintenance and checks will keep your new faucet functioning optimally, enhancing your bathroom’s aesthetics and functionality. With patience and care, you can enjoy the benefits of your new faucet and take pride in your DIY skills.
Hopefully, the article on how to replace a faucet on a pedestal sink has provided you with the necessary guidance and confidence to tackle this project on your own. Happy fixing!

