A functioning thermostat is crucial in regulating the water temperature in your hot water heater, ensuring it remains consistent and efficient. Without a properly working thermostat, you may experience fluctuating water temperatures, leading to discomfort and inefficient energy usage. An inefficient thermostat can also strain the heater’s components, potentially causing more significant issues over time.
The purpose of this guide is to provide you with a detailed, step-by-step process on how to replace a thermostat on a hot water heater. By following these instructions, you can safely and effectively install a new thermostat, restoring your water heater’s performance and ensuring a steady hot water supply. This comprehensive guide aims to empower you to handle this common repair task confidently, enhancing your water heater’s longevity and efficiency.
Understanding Your Water Heater
Types of Water Heaters:
Electric Water Heaters:
Electric water heaters use electric heating elements inside the tank to heat the water. The thermostat in an electric water heater plays a pivotal role in maintaining the desired water temperature. It also ensures that the heating elements only engage as needed, which optimizes energy usage and prevents the water from getting too hot. Electric water heaters typically have one or two thermostats, depending on whether the unit has a single or dual-element design.
Gas Water Heaters:
This guide specifically focuses on electric water heaters since gas water heaters employ a different heating mechanism. They use a gas burner located at the bottom of the tank to heat the water. These units usually have a gas control valve and thermostat system that is quite different from the electric ones covered here.
Thermostat Functionality:
Location:
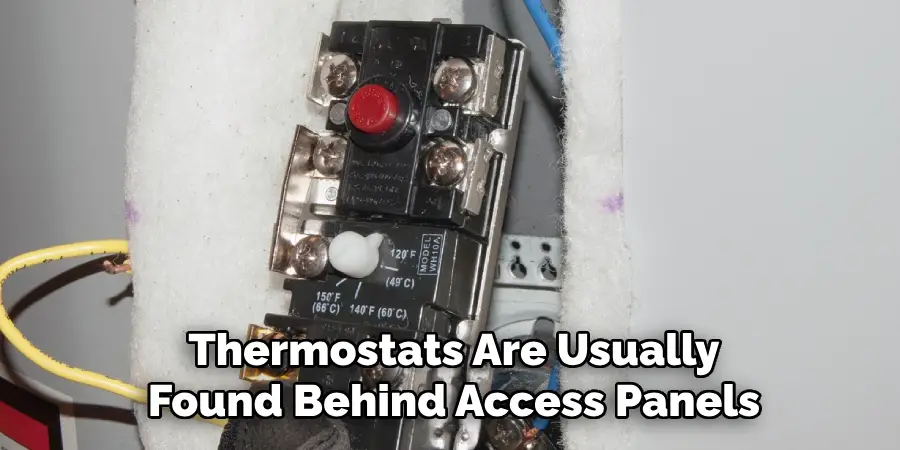
On an electric water heater, thermostats are usually found behind access panels on the side of the tank. If the unit has two heating elements, there will be two thermostats near the top and closer to the bottom. These thermostats are often accompanied by insulation material, which you’ll need to remove carefully during the replacement process.
Signs of a Faulty Thermostat:
Several symptoms may indicate a problematic thermostat. These include inconsistent water temperature, where the water might be too hot one moment and cold the next. Another sign could be a complete lack of hot water, indicating that the thermostat fails to activate the heating elements. Conversely, water that is excessively hot can also be a sign of a thermostat set too high or malfunctioning. Recognizing these symptoms early can help you address the issue promptly and efficiently.
Safety Precautions
Turning Off Power:
Electric Heaters:
Before beginning any repair work on your electric water heater, it is imperative to turn off the power at the circuit breaker to avoid the risk of electric shock. Locate the appropriate circuit breaker for your hot water heater in your electrical panel, usually labeled clearly. Switch it to the “OFF” position to cut the power supply to the heater. It’s essential to inform everyone in the household about your work to ensure no one accidentally turns the power back on during the process.
Using a Voltage Tester:
Ensuring Safety:
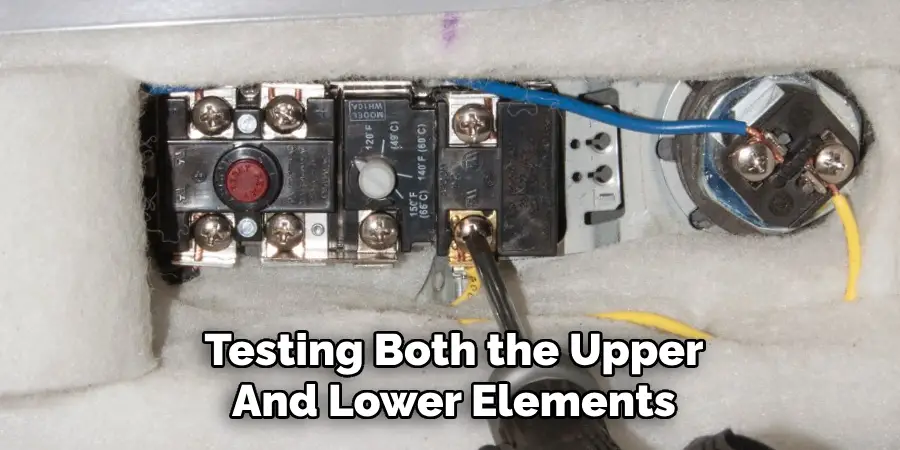
To ensure the power is completely off, use a voltage tester. Remove the access panels and the insulation to expose the thermostat and wiring. Hold the voltage tester near the wires connected to the thermostat. If the tester detects voltage, the circuit is still live and unsafe to work on. Confirm again by testing both the upper and lower elements if your unit has two thermostats. Only proceed with the repair once you are certain that the power is off.
Additional Safety Measures:
Gloves and Protective Gear:
Wearing protective gear is crucial for personal safety. Use insulated gloves to prevent electrical shock and protect your hands from sharp edges and hot surfaces. Safety goggles are also recommended to shield your eyes from any debris or splashes that may occur during the replacement process. By adhering to these safety measures, you can ensure a safer and more effective repair.
Tools and Materials Needed
List of Tools:
- Screwdrivers (Flathead and Phillips): These are essential for removing and reattaching access panels and screws securing the thermostat and electrical components.
- Voltage Tester: This is necessary to ensure that the power is completely off before you start working on the electrical components of your water heater, to prevent any risk of electric shock.
- Needle-nose Pliers: Useful for handling small hardware and electrical wires, ensuring a secure and precise removal and installation process.
Materials:
- Replacement Thermostat: It’s crucial to have a new thermostat that matches the model and specifications of your water heater. Check the manufacturer’s guidelines or consult with a professional to ensure compatibility.
- Insulation Material (If Needed): When replacing the thermostat, you might need new insulation material to replace any damaged material. Proper insulation helps maintain the efficiency of your water heater and protects the internal components.
How to Replace a Thermostat on A Hot Water Heater: Accessing the Thermostat
Removing the Access Panel:
Steps to Unscrew:
To begin accessing the thermostat in your electric water heater, you need to locate and remove the access panel(s). These panels are typically found on the side of the unit, and there may be one or two panels depending on whether your water heater has a single or dual-element design. Using a flathead or Phillips screwdriver, carefully unscrew the screws holding the access panel in place. Set the screws aside in a safe location for reassembly later. Gently remove the panel to expose the insulation and the thermostat behind it.
Locating the Thermostat:
Identification:
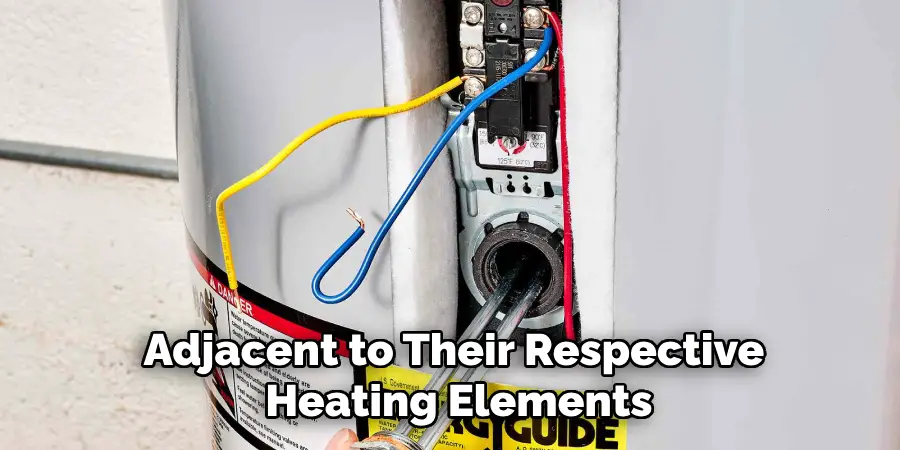
In a dual-element electric water heater, you will find two thermostats: an upper thermostat controlling the upper heating element and a lower thermostat managing the lower element. The upper thermostat is generally located behind the upper access panel, while the lower thermostat is behind the lower access panel. Identifying these components is crucial as each thermostat fulfills a specific role in maintaining your water heater’s functionality. The thermostats will be positioned adjacent to their respective heating elements, typically mounted against the tank’s surface and connected to wiring that facilitates temperature regulation.
Removing Insulation:
Careful Removal:
Once you remove the access panel, you’ll notice insulation material covering the thermostat and heating elements. This insulation is essential for maintaining energy efficiency and protecting the water heater’s internal components. Carefully lift and remove the insulation to avoid tearing or damaging it. If the insulation is in good condition, set it aside for reuse.
However, if it’s worn or damaged, you may need to replace it with new insulation material during reassembly. Using needle-nose pliers can help in maneuvering the insulation without causing harm. Take your time during this process to ensure the thermostat and surrounding components are fully exposed and accessible for the next steps in the replacement procedure.
How to Replace a Thermostat on A Hot Water Heater: Testing the Thermostat
Using a Multimeter:
Setting Up the Multimeter:
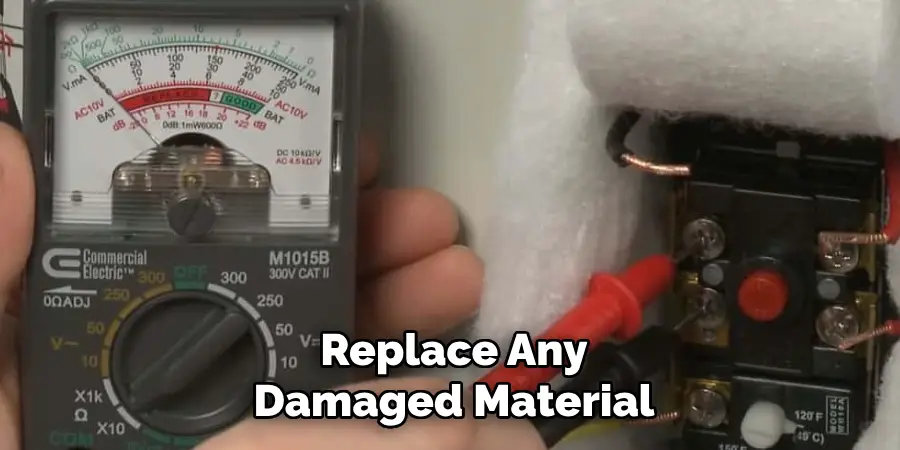
To test the thermostat of your electric water heater, you will need a multimeter. Start by setting your multimeter to the correct ohms setting, which is typically indicated by the symbol “Ω”. For accuracy in testing continuity, set the multimeter to either the lowest resistance range or the continuity setting if your device has one. This ensures the multimeter can detect if the electric current can pass through the thermostat uninterrupted.
Testing Procedure:
Begin by placing the multimeter probes on the thermostat terminals. Ensure the water heater is still powered off to avoid the risk of electrical shock. There are two methods for positioning the probes based on your thermostat type: horizontal and vertical. For horizontal thermostats, position one probe on the left terminal and the other on the right terminal. For vertical thermostats, position one probe on the top terminal and the other on the bottom terminal.
In each case, listen for a beeping sound or look for a reading on the multimeter display. A sound or a reading that is close to zero ohms indicates continuity, meaning the thermostat is functioning correctly. Repeat this process for both the upper and lower thermostats if your unit has dual elements.
Interpreting Results:
Understanding Readings:
Evaluating the readings from your multimeter is crucial to determine the functionality of your thermostat. A reading of zero ohms (or a consistent beep in continuity mode) indicates that the thermostat is allowing current to pass through, meaning it is likely functioning properly. On the other hand, if the multimeter displays a very high reading or ‘OL’ (open line), it signifies a lack of continuity, indicating that the thermostat is faulty and needs replacement. Interpreting these results accurately helps ensure your water heater operates efficiently and safely. Replace any faulty thermostats identified during this process before reassembling the unit to restore its proper functioning.
Removing the Faulty Thermostat
Disconnecting Wires:
Labeling Wires:
Before disconnecting any wires from the thermostat, it is crucial to label them to ensure correct reinstallation later. Use masking tape or small labels and a marker to tag each wire with a corresponding letter or number that matches the connection on the thermostat. This step helps prevent any confusion or mistakes during the reassembly process, ultimately simplifying the task and ensuring the water heater functions correctly after installing the new thermostat.
Using Pliers:
Needle-nose pliers are an essential tool for safely disconnecting the wires from the faulty thermostat. Carefully grip each wire connector with the pliers and gently pull it away from the thermostat terminal. Be cautious not to pull too hard or twist the wires, as this could damage them or the surrounding components. Work methodically, disconnecting each wire one by one and placing them aside in a manner that preserves their identification labels.
Removing the Thermostat:
Unscrewing:
After disconnecting the wires, the next step is to remove the screws or clips that hold the faulty thermostat in place. Using a suitable screwdriver, carefully unscrew or unclip the fasteners securing the thermostat to the water heater. Be sure to keep the screws or clips in a safe location for use when installing the new thermostat. Gently lift the thermostat away from the mounting bracket once all fasteners are removed.
Handling the Old Thermostat:
Once the faulty thermostat is removed, handling it properly for disposal or recycling is important. Many thermostats contain materials that must be disposed of according to specific guidelines to prevent environmental harm. Check with your local waste management service or recycling center for information on properly recycling or disposing of the old thermostat. Ensure the old component is stored safely until it can be taken to the appropriate facility.
By carefully following these steps, you will ensure that the faulty thermostat is safely and efficiently removed from your water heater, making the system ready to install a new, functional thermostat.
Installing the New Thermostat
Positioning the New Thermostat:
Alignment:
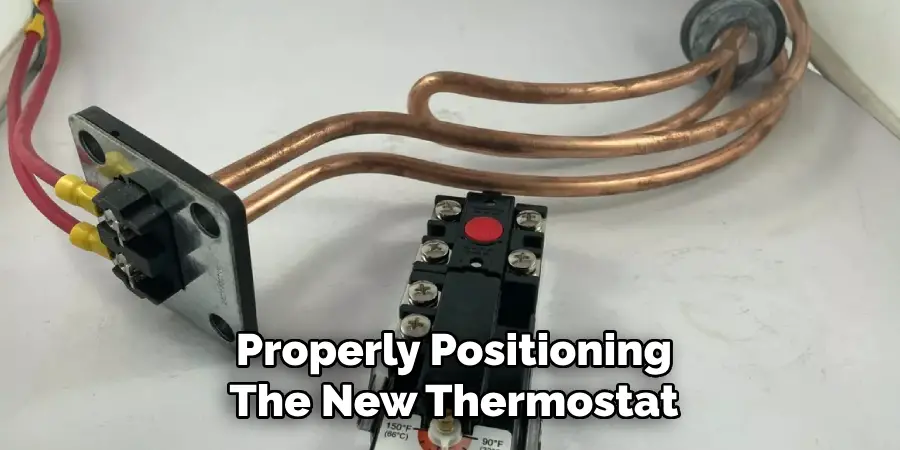
Properly positioning the new thermostat in the designated spot is essential for the optimal functioning of your water heater. Begin by comparing your new thermostat with the old one to ensure compatibility and correct orientation. Align the thermostat so that its terminals match the positions of the labeled wires and mounting points on the water heater. Carefully slide the thermostat into the mounting bracket, making sure it sits flush against the surface and that the screw holes or clip points are perfectly aligned. This step ensures the thermostat will fit securely and operate effectively without any risk of misalignment or malfunction.
Securing the Thermostat:
Screwing or Clipping:
Once the new thermostat is properly positioned, the next step is securing it in place using screws or clips. If your thermostat uses screws, select the appropriate screwdriver for the screw type and carefully fasten the screws into the holes, ensuring they are tight but not overly tightened, which could damage the thermostat or mounting bracket. If your thermostat uses clips, press them firmly until they snap into place, ensuring they hold the thermostat securely against the water heater. Re-examine the alignment after fastening to confirm the thermostat is correctly and securely mounted.
Reconnecting Wires:
Following Labels:
Reconnecting the wires is a critical step that requires meticulous attention to detail to ensure each wire is connected to the correct terminal. Refer to the labels you placed on each wire during the disconnection process. Match the label to the corresponding terminal on the new thermostat, starting with the first wire. Synchronously, repeat this process for all the remaining wires, ensuring each connection is made according to the labels. This careful methodology prevents wiring errors that could impact the water heater’s performance or cause safety issues.
Tightening Connections:
After ensuring all the wires are correctly matched to their respective terminals, it is important to ensure each connection is tight and secure. Use needle-nose pliers to gently press down on each wire connector, ensuring it is firmly attached to the terminal. Be cautious to avoid over-tightening, which could damage the wire or the thermostat terminal. A proper connection should feel snug when gently tugging on the wires without any loose movement. Once all the connections are secured, double-check each one for correct placement and tightness to ensure a reliable installation.
By meticulously following these steps, you ensure the new thermostat is precisely positioned, securely fastened, and correctly wired, setting the stage for optimal performance. Taking the time to perform each step with care will help prevent future issues and extend the lifespan of your water heater, thereby ensuring consistent operation and energy efficiency.
Reassembling and Testing
Replacing Insulation:
Proper Placement:
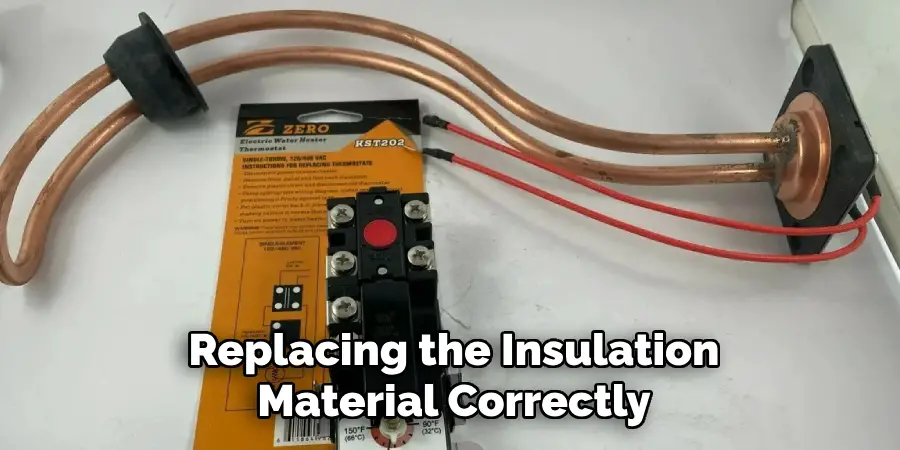
To ensure your water heater operates efficiently, replacing the insulation material correctly is crucial. Start by gathering the insulation that was removed earlier. Carefully position it back around the newly installed thermostat, ensuring it fully covers its body without obstructing any wires or terminals. The insulation should fit snugly, filling any gaps to retain heat and enhance energy efficiency. Recheck the alignment to confirm that the insulation is secure and won’t shift out of place.
Reattaching the Access Panel:
Securing Screws:
Once the insulation is properly positioned, proceed to reattach the access panel. Place the panel over the thermostat and align it with the screw holes. Using the screws removed earlier, carefully fasten the panel to the water heater. Ensure each screw is tightened securely but not overly tightened to avoid damaging the panel or stripping the screws. A firmly secured access panel helps protect the internal components from dust, moisture, and other external factors.
Restoring Power:
Turning On the Circuit Breaker:
With the access panel securely in place, the next step is to restore power to the water heater. Go to your home’s electrical panel and locate the circuit breaker designated for the water heater. Carefully flip the breaker switch to the “ON” position. To prevent electrical hazards, it is essential to ensure that your hands are dry and you are not standing in water. Restoring power to the heater will energize the newly installed thermostat and allow it to begin operation.
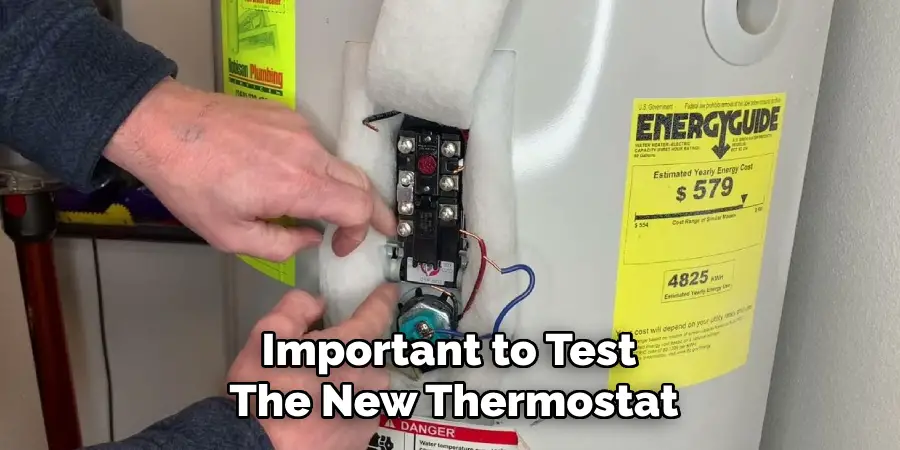
Testing the New Thermostat:
Monitoring Water Temperature:
After restoring power, it is important to test the new thermostat to ensure it is functioning correctly. Wait briefly to allow the water heater to come up to temperature. Then, check the water temperature at a nearby faucet. Use a thermometer to measure the water output, ensuring it reaches the set temperature on the thermostat. If the water temperature matches the thermostat setting and remains consistent, it indicates that the new thermostat is operating properly. Adjust the thermostat if necessary and observe its response to confirm correct functionality. Making these checks ensures your water heater provides reliable and efficient service.
Conclusion
Replacing a thermostat on a hot water heater involves several crucial steps. First, ensure the power is off before beginning any work. Remove the access panels, disconnect the wires, and take out the old thermostat. Install the new thermostat by connecting the wires and securing it in place. Finally, test the unit to confirm proper operation.
Throughout the process of how to replace a thermostat on a hot water heater, safety cannot be overstated. Always double-check that the power is completely off to avoid any risk of electrical shock. If gas issues arise or you notice leaks, contact a professional immediately to mitigate potential dangers.
Regular maintenance and prompt replacement of faulty components are key to your water heater’s efficient operation. Performing routine checks and following safety guidelines will ensure your system runs smoothly and remains reliable over time. Taking these proactive steps will protect your investment and maintain optimal performance.

