Replacing an overflow tube in a toilet is an important maintenance task that can prevent leaks and improve the overall functionality of your plumbing system. The overflow tube is designed to direct excess water back into the tank if the water level gets too high, preventing potential flooding. Over time, this component can wear out, leading to inefficient operation and water waste. In this guide, we will walk you through how to replace an overflow tube in a toilet, ensuring your toilet operates smoothly and efficiently once again.
What is an Overflow Tube?
An overflow tube is a crucial component within a toilet tank that acts as a safety mechanism to prevent overflow and potential flooding. It is a vertical pipe that extends from the tank’s overflow system down into the tank itself. Its primary function is to redirect excess water back into the tank when the water level exceeds its designated height, which typically occurs during a malfunction in the fill valve. By maintaining the proper water level, the overflow tube helps ensure that the toilet operates efficiently and reduces the risk of costly water damage to your home. Understanding the importance of this component can aid in timely maintenance and repairs, ensuring the longevity and effectiveness of your toilet system.
Tools and Materials Needed
To successfully replace an overflow tube in your toilet, gather the following tools and materials:
- Adjustable Wrench: For loosening and tightening plumbing fittings.
- Screwdriver: Either flathead or Phillips, depending on the screws in your toilet tank.
- Replacement Overflow Tube: Ensure it’s compatible with your specific toilet model.
- Teflon Tape: To create watertight seals on threaded plumbing connections.
- Bucket or Towel: To catch any excess water during the replacement process.
- Safety Gloves: To protect your hands from dirt and sharp edges.
Having these items on hand will streamline the replacement process and help you effectively complete the task.
10 Methods How to Replace an Overflow Tube in a Toilet
1. Turn Off the Water Supply
Before beginning any repair work on your toilet, the first step is always to turn off the water supply. Locate the water shut-off valve, typically found on the wall near the base of the toilet. Turn the valve clockwise until it is fully closed. This will stop water from flowing into the tank during the replacement process. Once the water is shut off, flush the toilet to drain as much water as possible from the tank and bowl. If there is still water remaining in the tank, use a sponge or towel to soak up the excess.
2. Remove the Tank Lid and Inspect the Overflow Tube
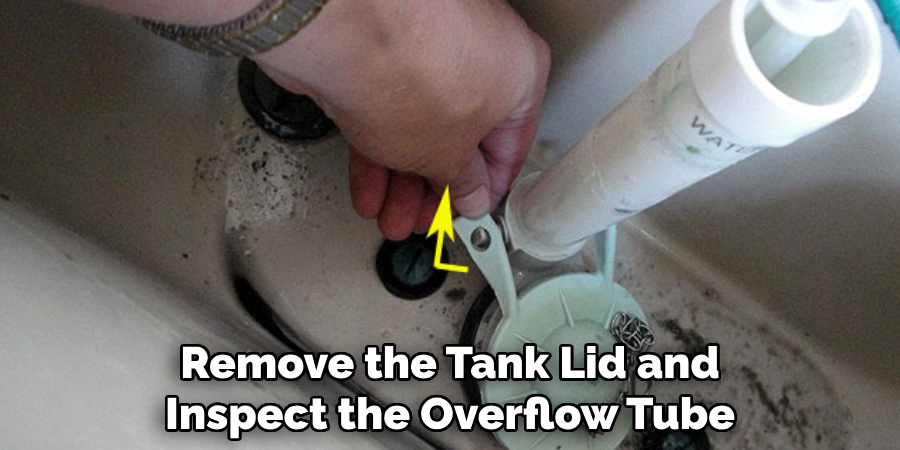
Once the water is off, carefully remove the tank lid and set it aside in a safe place. The overflow tube is located in the center of the toilet tank and connects the flush valve to the overflow pipe. Before removing anything, take a moment to inspect the overflow tube for cracks, breaks, or wear. Ensure that the tube is the root of the issue and that it needs replacement. Understanding the current condition of the overflow tube will help guide the repair process.
3. Disconnect the Refill Tube from the Overflow Tube
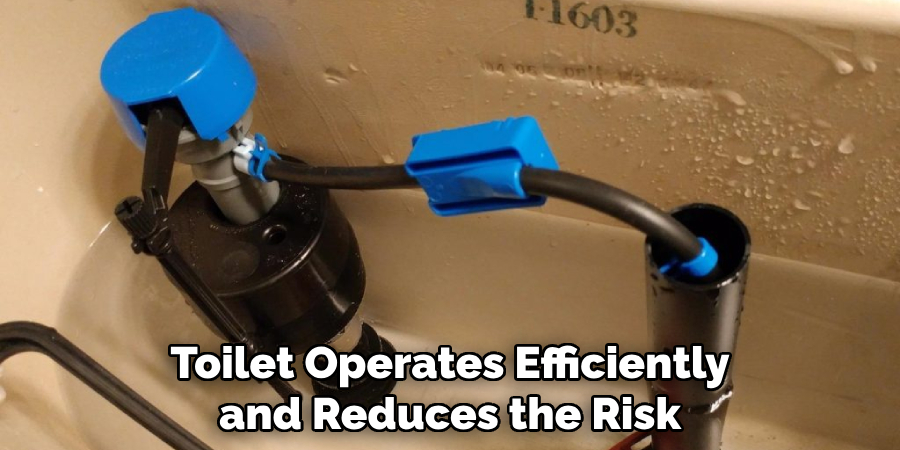
The refill tube, a smaller tube that supplies water to refill the toilet bowl after flushing, is attached to the overflow tube. To replace the overflow tube, you’ll need to disconnect the refill tube first. Gently pull the refill tube out of the overflow tube and set it aside. Be cautious not to damage the refill tube, as it will need to be reattached to the new overflow tube later in the process. This step allows you to work on the overflow tube without interference.
4. Loosen the Flapper Chain
The flapper chain is connected to the toilet handle and controls the opening and closing of the flapper, which releases water into the bowl. To access the overflow tube, you’ll need to temporarily loosen or disconnect the chain. Unhook the chain from the handle lever or flapper itself. This will allow you to move the flapper aside and work on the overflow tube more easily. Be sure to keep track of the chain and ensure that it is not tangled or damaged during the repair.
5. Remove the Old Overflow Tube and Flush Valve
To replace the overflow tube, you’ll need to remove the flush valve assembly, which houses the overflow tube. This step typically involves unscrewing the locknut located underneath the tank, which holds the flush valve in place. You may need to use a wrench or adjustable pliers to loosen the nut. Once the nut is removed, lift the entire flush valve and overflow tube assembly out of the tank. Set the old parts aside for disposal. Removing the flush valve gives you full access to the overflow tube, making it easier to install the new one.
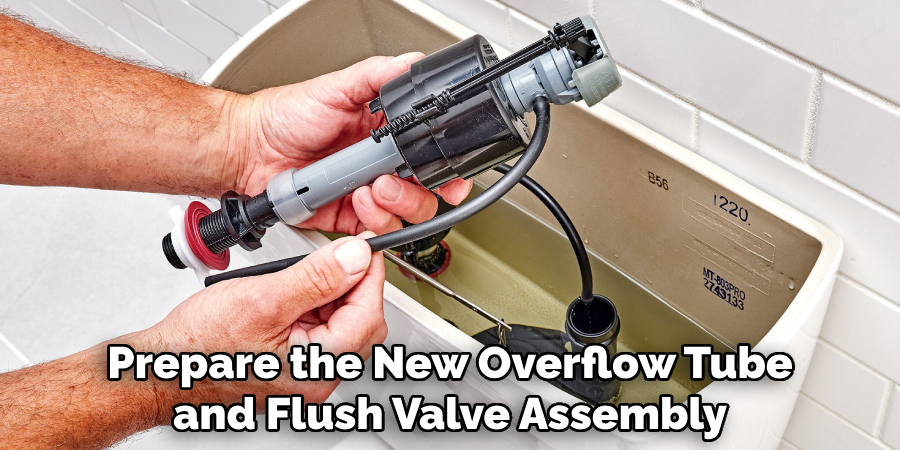
6. Prepare the New Overflow Tube and Flush Valve Assembly
Once the old overflow tube and flush valve assembly have been removed, it’s time to prepare the new parts for installation. Make sure you have purchased a replacement overflow tube and flush valve assembly that is compatible with your toilet model. Some replacement kits come with adjustable overflow tubes that can be customized to the height of your toilet tank. Assemble the new parts according to the manufacturer’s instructions, ensuring that all seals and gaskets are properly in place. This preparation is key to ensuring a smooth and leak-free installation.
7. Install the New Flush Valve and Overflow Tube
With the new overflow tube and flush valve assembly prepared, it’s time to install them in the toilet tank. Carefully lower the new assembly into the tank, aligning the overflow tube with the hole in the bottom of the tank. Once the assembly is in place, secure it by tightening the locknut underneath the tank. Be sure to tighten the locknut snugly, but avoid overtightening, as this could crack the porcelain tank or damage the valve. Check that the overflow tube is properly aligned and stable before proceeding.
8. Reconnect the Flapper Chain and Refill Tube
After installing the new overflow tube, it’s time to reconnect the components you previously disconnected. First, reattach the flapper chain to the handle lever or flapper. Ensure that the chain has enough slack for the flapper to open and close freely but not so much that it gets tangled. Next, reconnect the refill tube by inserting it into the top of the new overflow tube. Make sure the refill tube is securely positioned, as it is responsible for refilling the toilet bowl after each flush.
9. Turn the Water Supply Back On
With the new overflow tube and flush valve installed and all connections restored, you’re ready to turn the water supply back on. Slowly turn the shut-off valve counterclockwise to restore water flow to the tank. As the tank fills, watch carefully for any signs of leaks around the base of the flush valve or the connections to the overflow tube. If you notice any leaks, you may need to tighten the locknut or adjust the position of the seals and gaskets. Allow the tank to fill completely and ensure the water level is at the proper height, typically about one inch below the top of the overflow tube.
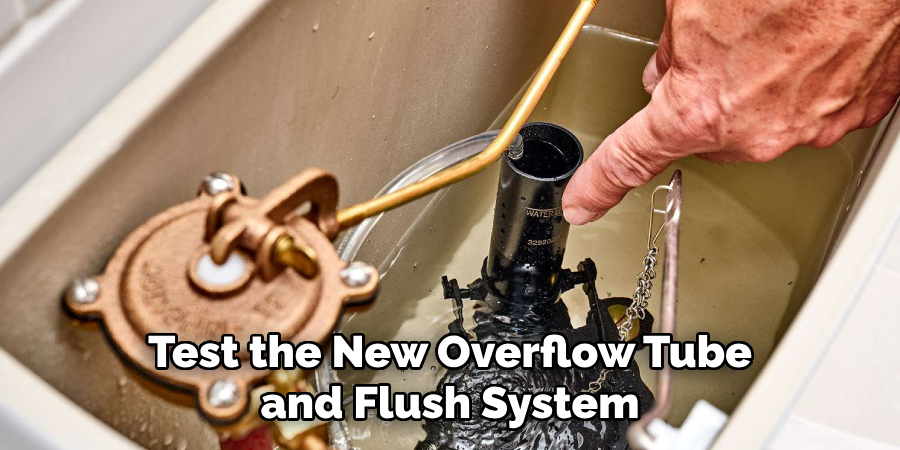
10. Test the New Overflow Tube and Flush System
Once the water is back on and the tank is full, it’s time to test the functionality of the new overflow tube. Flush the toilet and observe the entire process. Pay attention to how the water flows through the tank and into the bowl, ensuring that the overflow tube is redirecting excess water as designed. Check that the refill tube is properly refilling the bowl and that the flapper opens and closes smoothly. Finally, verify that the water level in the tank remains consistent and that there are no leaks or other issues. If everything works correctly, the replacement is complete, and your toilet should now function efficiently.
Common Mistakes to Avoid
When replacing an overflow tube and flush valve, several common mistakes can lead to complications or further issues. One key mistake is not turning off the water supply before starting the repair, which can result in unexpected flooding. Another frequent error is failing to carefully check compatibility when purchasing replacement parts; using the wrong size or model can cause improper functioning.
Additionally, neglecting to ensure all seals and gaskets are correctly positioned can lead to leaks, so it’s essential to take your time during installation. Lastly, some users may overtighten the locknut, risking damage to the toilet tank. Taking these considerations into account can help ensure a successful and trouble-free installation process.
Conclusion
Replacing an overflow tube in a toilet may seem like a complex task, but by following these ten detailed methods, it becomes manageable for even novice DIYers. From turning off the water supply to testing the new tube, each step is essential for ensuring a successful installation. Whether you’re dealing with an overflow tube that has cracked or worn down over time, this process will help restore your toilet’s functionality and prevent future problems like water overflow or inefficient flushing. Thanks for reading, and we hope this has given you some inspiration on how to replace an overflow tube in a toilet!

