

Are you tired of your old and leaky GROHE shower cartridge? Don’t worry. Replacing it is easier than you think. Many people tend to call a plumber for this job, but with the right tools and knowledge, you can easily do it yourself.
How to replace GROHE shower cartridge may seem like a daunting task, but with the right tools and guidance, it can be a straightforward process.
Over time, shower cartridges can wear out, leading to issues like leaks, inconsistent water temperatures, or reduced water flow. Replacing the cartridge can restore your shower’s performance, ensuring a smooth and enjoyable experience.
This guide will walk you through the steps necessary to replace your GROHE shower cartridge safely and efficiently, even if you don’t have prior plumbing experience.
What Are the Causes of a Faulty GROHE Shower Cartridge?
Before we dive into the replacement process, it’s essential to understand what causes a faulty GROHE shower cartridge. One of the main reasons is mineral buildup or debris that can accumulate over time and affect the cartridge’s functionality. Hard water can be particularly problematic, as it contains high minerals that can clog and damage the cartridge.
Another common cause is wear and tear from frequent use. As with any other mechanical part, shower cartridges can wear out over time, leading to leaks or reduced performance.
Pay attention to any changes in your shower’s behavior, such as sudden temperature changes, decreased water flow, or unusual noises, as these may indicate a faulty cartridge.
What Will You Need?
Before you start the replacement process, ensure you have all the necessary tools and materials. Here’s a list of items that will come in handy:
- Screwdriver
- Adjustable wrench
- Replacement GROHE shower cartridge
- Plumber’s tape
- A rag or towel for cleaning up any water spills
Once you have all these items, you’re ready to start the replacement process. Before starting, it’s also a good idea to watch some tutorial videos or read through the manufacturer’s instructions for your specific GROHE shower model.
10 Easy Steps on How to Replace Grohe Shower Cartridge
Step 1: Turn Off the Water Supply
Before starting the replacement, locate and turn off the water supply to your shower. This step is critical to prevent water from leaking or spraying while you work. Typically, you can find the shut-off valve near your bathroom or in a nearby utility area. Once the water supply is off, turn on the shower to release any remaining water pressure in the pipes.
Step 2: Remove the Shower Handle
Carefully examine your shower handle to identify how it is attached. Most shower handles are secured with either a screw on the underside, a cap covering the screw, or a set screw on the side. If there is a cap, gently pry it off using a small flat-head screwdriver, ensuring you don’t scratch the surface.
Once exposed, use the appropriate screwdriver or Allen wrench to loosen and remove the screw holding the handle in place. Once the screw is removed, carefully pull the handle straight off the cartridge stem.
If the handle feels stuck, gently wiggle it or use a handle puller tool for assistance. Set the handle aside, taking care to keep screws and caps in a safe place to avoid losing them.
Step 3: Detach the Trim Plate
To detach the trim plate, locate the screws securing it to the wall. Typically, these screws are visible on the face of the plate, but in some cases, they may be concealed under decorative caps. If caps are present, gently pry them off using a flat-head screwdriver, taking care not to damage the finish.
Once exposed, use a screwdriver to unscrew the trim plate screws in a counterclockwise motion. After removing all screws, carefully pull the trim plate away from the wall. It may be sealed with caulk or adhesive to prevent water leakage, so use a utility knife to cut along the edges if necessary.
Be cautious not to scratch the wall or surrounding surfaces. Inspect the area behind the trim plate for any signs of water damage or mold, which should be addressed before proceeding with the repair or installation.
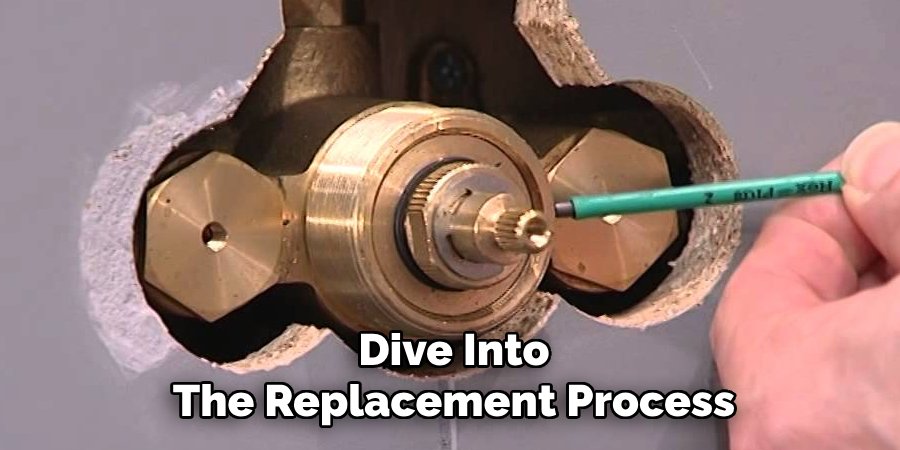
Step 4: Remove the Old Cartridge
Using pliers or a cartridge removal tool, carefully grip the old cartridge and pull it straight out of the valve. Take note of the orientation of the cartridge before removal, as the new cartridge will need to be inserted in the same way. If the cartridge is stuck due to mineral buildup, apply a few drops of lubricant or gently wiggle it to loosen it. Be cautious not to damage the surrounding valve or piping during this process.
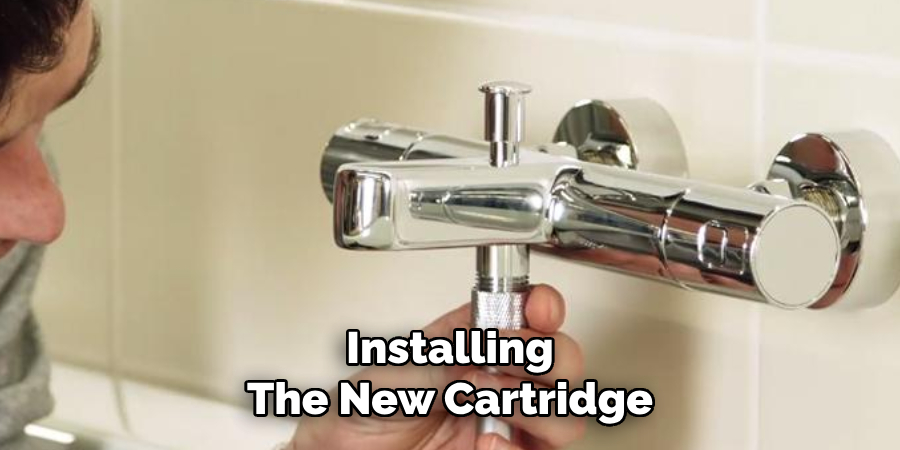
Step 5: Install the New Cartridge
Before installing the new cartridge, compare it to the old one to ensure it matches in size and design. Apply a small amount of plumber’s grease to the O-rings on the new cartridge to create a secure seal and ease insertion.
Carefully align the new cartridge in the same orientation as the old one and insert it into the valve. Press it firmly into place until it is fully seated. Ensure the cartridge is aligned correctly to avoid leaks or operational issues after reassembly.
Step 6: Reassemble the Faucet
Once the new cartridge is installed, begin reassembling the faucet. Start by reattaching the retaining clip or nut to secure the cartridge in place, ensuring it is adequately tightened but not over-tightened to avoid damage.
Next, reinstall the handle by aligning it with the cartridge stem and securing it with the screw removed earlier. Finally, reattach any decorative caps or covers to restore the faucet’s appearance. Double-check that all components are securely in place before proceeding to test the faucet.
Step 7: Test the Faucet
Once the faucet has been reassembled, turn the water supply back on. Slowly open the hot and cold water valves to check for leaks around the newly installed cartridge and other reassembled components. Test the faucet by turning it on and off and adjusting between hot and cold water to ensure smooth operation.
Pay attention to the water flow and temperature control to confirm proper functionality. If any issues are detected, turn off the water supply again and inspect the assembly for potential misalignment or loose parts.
Step 8: Clean Up and Final Inspection
After confirming that the faucet is functioning correctly without any leaks, take a few minutes to clean up your workspace. Remove any tools, towels, or debris from the area.
Gently wipe down the faucet and surrounding surfaces to ensure everything is clean and as good as new. Perform a final faucet inspection, checking for any visible issues or loose components. With the task complete, you can now enjoy a fully functional and leak-free faucet.
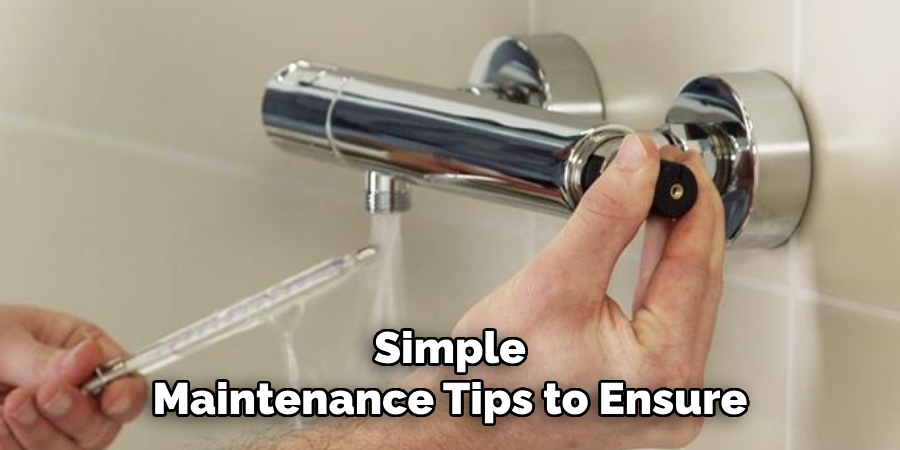
Step 9: Maintenance Tips
Follow a few simple maintenance tips to ensure your faucet remains in excellent condition. Regularly clean the faucet with a non-abrasive cleaner to prevent the buildup of grime or mineral deposits. Periodically check for any signs of wear, such as dripping or reduced water pressure, which may indicate it’s time to replace parts like washers or cartridges.
If you live in an area with hard water, installing a water softener can help minimize mineral buildup and extend the life of your faucet. Consistent upkeep will ensure your faucet continues to function smoothly for years to come.
Step 10: When to Call a Professional
While many faucet-related repairs and maintenance tasks can be handled on your own, there are times when calling a professional plumber is the best course of action. It may require expert attention if you notice persistent leaks despite replacing parts, significant corrosion, or damage to the faucet body.
Additionally, a professional’s expertise can prevent further complications if you are unsure about handling more complex issues, such as fixing connections within the plumbing system. Knowing when to seek help ensures your faucet remains in optimal working condition without risking extensive damage.
By following these steps and tips, you can confidently repair or replace a cartridge in your faucet.
5 Things You Should Avoid
- Using Excessive Force: Avoid applying too much force when removing or installing the cartridge. Excessive force can damage the cartridge, the faucet body, or other internal components, making the repair more complicated and expensive.
- Skipping the Water Shut-Off Step: Always turn off the water supply before starting the replacement process. Skipping this step can result in water spraying uncontrollably, leading to a mess and potential water damage.
- Neglecting to Inspect for Debris: Before installing the new cartridge, it is essential to inspect and clean the faucet housing for any dirt, mineral buildup, or debris. Failing to do so can compromise the performance of the new cartridge and reduce its lifespan.
- Using Non-Compatible Parts: Ensure you use the correct GROHE cartridge model for your shower. Using incompatible parts might fail to fix the issue and damage the entire faucet assembly.
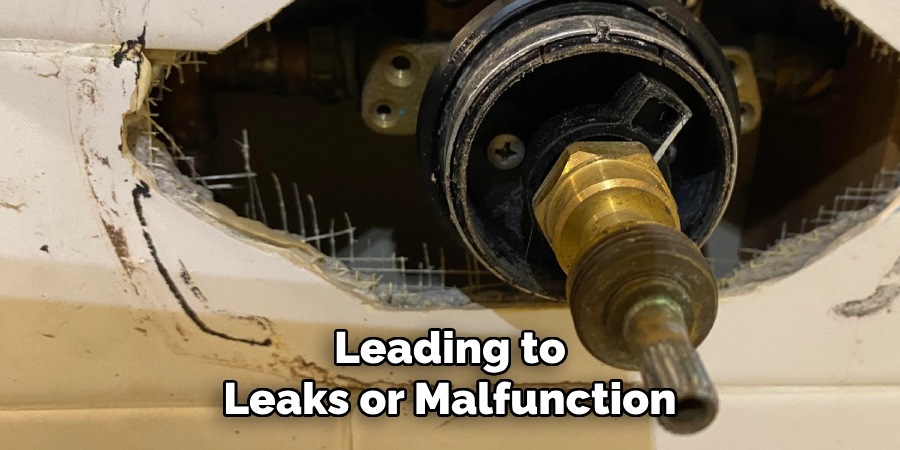
- Overlooking the Manufacturer’s Instructions: GROHE cartridges come with specific installation instructions. Ignoring these guidelines may result in improper installation, leading to leaks or malfunction. Always refer to the provided manual to ensure a smooth and successful replacement.
Conclusion
How to replace GROHE shower cartridge can seem challenging at first, but with careful preparation and attention to detail, the process can be straightforward.
You can ensure a hassle-free installation by avoiding common mistakes, such as neglecting to shut off the water supply or skipping the inspection for debris. Always double-check that you have the correct cartridge model and follow the manufacturer’s instructions closely. Taking these steps will restore your shower’s optimal functionality and extend the life of your faucet assembly.
With the right approach, your GROHE shower will return to delivering comfort and performance in no time.