Replacing a toilet chain might seem like a daunting task, but it’s actually a simple and cost-effective way to fix a common issue with your toilet.
A broken or damaged chain can cause problems such as a continuously running toilet or difficulty flushing. With just a few tools and a bit of time, you can easily replace the chain and restore your toilet’s proper functionality.
This guide on how to replace toilet chain will walk you through the process step by step, ensuring a smooth and stress-free repair.
Why is the Toilet Chain Important?
The toilet chain is an integral part of a toilet’s flushing mechanism. It connects the flush lever to the flapper, which controls the water flow into the bowl when you flush.
When you push down on the flush lever, it lifts up on the flapper via the chain, allowing water to rush from the tank into the bowl and carry away waste. Once you release pressure on the lever, gravity causes it to fall back into place and seal off any leftover water in the tank.
Without a properly functioning chain, this process can’t happen smoothly. A broken or loose chain can result in a weak or incomplete flush, leading to clogs and potential damage to your toilet.
Needed Materials:
Replacement Chain:
A replacement chain can be purchased at most hardware stores or home improvement centers. Be sure to choose one that is the same length and thickness as your current chain.
Pliers:
Pliers will be needed to grip and manipulate the small components of the toilet flush system, such as the chain and flapper. A pair of needle-nose pliers may also be helpful for harder-to-reach areas.
11 Step-by-Step Guidelines on How to Replace Toilet Chain
Step 1: Turn Off the Water Supply
Locate the shut-off valve, usually positioned on the wall behind or near the base of the toilet. Turn the valve clockwise completely to stop the flow of water into the toilet tank. This step prevents any water from entering the tank while you work, minimizing mess and making the process easier.
After turning off the water supply, flush the toilet to drain the tank. Use a towel or sponge to soak up any remaining water for a dry workspace.
Step 2: Remove the Tank Lid
Carefully lift the tank lid off the toilet and set it aside in a safe location to prevent it from accidentally cracking or breaking.
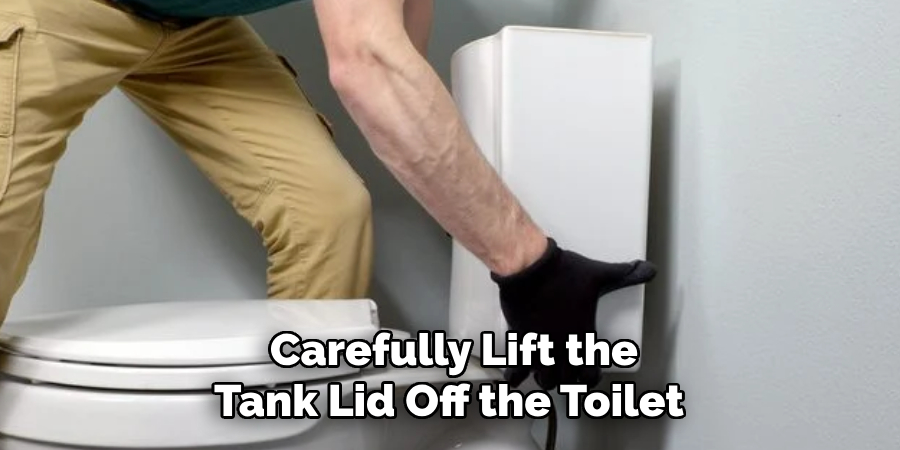
The tank lid is usually made of ceramic, so handle it gently. Once removed, you’ll have clear access to the internal components of the toilet tank, including the chain, flapper, and fill valve. Take a moment to inspect the inside of the tank for any visible damage or debris that may interfere with the replacement process.
Step 3: Locate the Chain
Inside the toilet tank, find the chain that connects the toilet handle lever to the flapper at the bottom of the tank. The chain plays a crucial role in lifting the flapper to allow water to flush out of the tank and into the bowl.
Ensure the chain is intact and note how it is attached to both the lever and the flapper, as this will be important during the replacement process. If the chain is tangled or appears to be damaged, gently untangle it or prepare to replace it as necessary.
Step 4: Disconnect the Old Chain
To begin removing the old chain, carefully unhook it from the lever arm attached to the toilet handle. This is typically a simple process of sliding the chain off a small hook or loop. Next, detach the other end of the chain from the flapper at the bottom of the tank.
Be cautious not to damage the flapper during this step, as it is vital for a proper seal and effective flushing. Set the old chain aside and inspect the flapper for any signs of wear before attaching the replacement chain.
Step 5: Determine the Length of the New Chain
Before attaching the new chain, measure and adjust its length to ensure proper operation. Start by hooking one end of the chain to the lever arm attached to the toilet handle. Then, connect the other end to the flapper, leaving just enough slack for the flapper to seal the tank securely when closed.
The chain should not be overly tight, as this may prevent the flapper from sealing properly, nor too loose, which could interfere with flushing. Test the length by operating the toilet handle to confirm smooth and effective movement. Adjust the chain as needed before proceeding.
Step 6: Cut New Chain
Once you have determined the appropriate length of the chain, use a pair of wire cutters to trim any excess links. Ensure the chain is not too short, as this could prevent the flapper from sealing the tank properly. Leave just enough length to allow for smooth operation of the handle and optimal movement of the flapper.
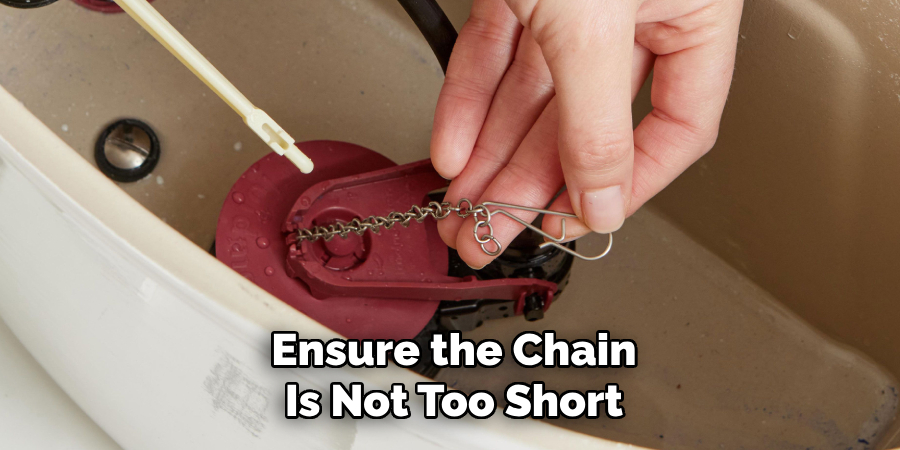
Discard the cut portion of the chain safely, and double-check that the remaining chain is securely attached to both the lever arm and the flapper before proceeding to the next steps.
Step 7: Attach New Chain
To attach the new chain, connect one end of the chain to the handle lever arm. Most lever arms have a hole or hook where the chain can be fastened securely. Next, attach the other end of the chain to the flapper using the hook or clip provided.
Make sure the chain is taut enough to allow the flapper to open and close properly, but not so tight that it prevents the flapper from sealing the tank. Test the movement of the handle and observe the flapper’s operation to ensure the chain is correctly adjusted before moving to the next step.
Step 8: Test Flush
Once the chain is properly adjusted, it’s time to test the flush. Press the handle to initiate a flush and observe the process. Ensure that the flapper lifts fully to allow water to leave the tank and then reseals completely as the tank refills.
Check for any leaks around the flapper or other components. If the flush does not operate smoothly, recheck the chain’s length or inspect the connections to ensure everything is secure. Repeat the test until the flush works efficiently and without issues.
Step 9: Reattach Lid
Once you have confirmed that the flush operates smoothly and there are no leaks, it’s time to reattach the tank lid. Carefully place the lid back on top of the tank, ensuring it sits evenly and securely. Avoid dropping or sliding the lid, as this could damage the porcelain.
With the lid in place, your toilet repair is complete, and the system should now be functioning properly. Remember to periodically check for any signs of wear or leaks to maintain optimal performance.
Step 10: Dispose of Old Chain
Properly disposing of the old chain is an important final step. If the chain is in good condition and reusable, consider keeping it as a spare. However, if it is rusted, broken, or otherwise unusable, dispose of it responsibly.
Check your local waste management guidelines for metal disposal or recycling options. By ensuring proper disposal, you contribute to minimizing environmental waste and keeping your workspace tidy.
Step 11: Maintenance Tips
To prevent future problems with your toilet chain, periodically check for signs of wear and tear. If you notice any issues, such as rust or fraying, replace the chain before it breaks completely. Additionally, make sure to clean around the flapper valve and handle/lever regularly to remove any buildup that may affect its functionality.
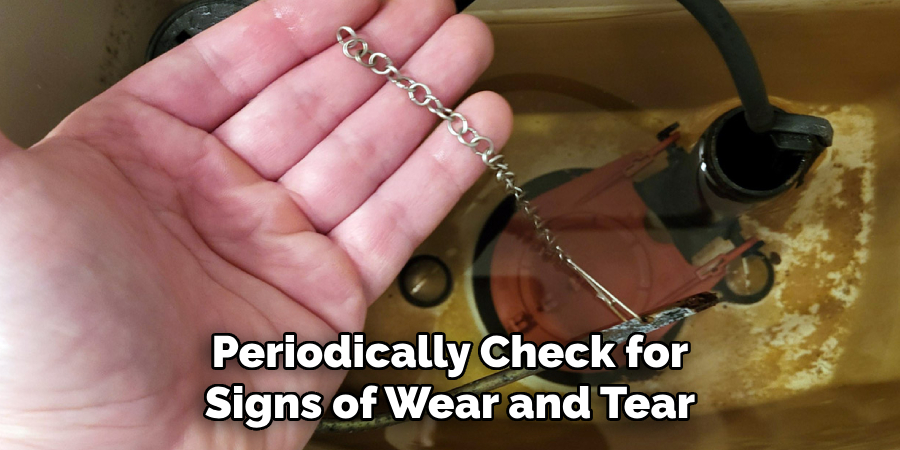
It’s also important to keep an eye on the length of your new chain. Over time, it may stretch due to frequent use.
Following these steps on how to replace toilet chain will help ensure that your toilet operates smoothly and efficiently, without any unexpected malfunctions. However, if you do encounter persistent issues even after replacing the chain, it may be a sign of a larger problem and you may need to call a plumber for further assistance.
Frequently Asked Questions
Q1: How Often Should I Replace the Toilet Chain?
A: It is recommended to check the condition of your toilet chain every 6-12 months and replace it if necessary. However, if you notice any signs of wear or damage, such as rust or breakage, it’s best to replace it immediately.
Q2: Can I Use Any Type of Chain for My Toilet?
A: It is important to use a specifically designed toilet chain for your toilet instead of using any random household chain. Toilet chains are made with materials that are resistant to water and corrosion, which ensures their durability in a moist environment.
Q3: What Other Parts Should I Check While Replacing the Toilet Chain?
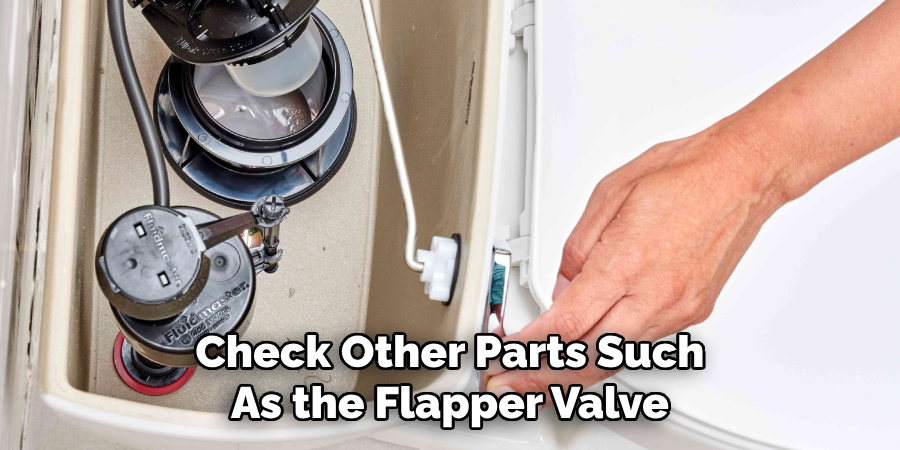
A: While replacing the toilet chain, it is a good idea to also check other parts such as the flapper valve and fill valve. These components work together to control the water flow in your toilet, so if they are worn or damaged, it can affect the overall function of your toilet. It’s also recommended to clean any buildup or debris from these parts for optimal performance.
Conclusion
Proper maintenance of your toilet’s internal components, including the chain, flapper valve, and fill valve, is essential for ensuring smooth operation and preventing leaks or other issues. By routinely inspecting and addressing any wear or buildup, you can extend the life of your toilet and enhance its performance. A little proactive care can save time, money, and frustration in the long run. Thanks for reading this article on how to replace toilet chain.

