Testing your water for hardness is an essential step in understanding its composition and potential effects on your home and health. Hard water contains high levels of dissolved minerals, primarily calcium and magnesium, which can lead to a variety of issues, including scale buildup in pipes and appliances.

By assessing the hardness of your water, you can make informed decisions about water treatment options, ensuring optimal performance of appliances and enhancing the quality of drinking water. In this guide on how to test your water for hardness, we will explore the methods and tools needed to accurately test your water hardness, as well as interpret the results to better manage water quality in your home.
Why Test for Water Hardness?
Testing for water hardness is crucial for several reasons. First and foremost, hard water can impact the efficiency and lifespan of household appliances, such as dishwashers and water heaters, by causing scale buildup that can lead to costly repairs and reduced performance. Moreover, hard water can affect the effectiveness of soaps and detergents, resulting in more soap residues and less lather, which in turn can leave dishes and laundry feeling less clean.
Additionally, understanding your water hardness can inform decisions about water softeners or conditioning systems, helping to enhance water quality for drinking and daily use. Lastly, by being aware of water hardness levels, homeowners can also engage in proactive maintenance strategies that safeguard plumbing fixtures and improve overall water quality.
Needed Materials
Before starting the testing process, you will need a few materials to ensure accurate results. These include:
A Clean and Sterilized Plastic Bottle or Glass Jar With Lid:
It is essential to use a clean and sterilized container when collecting your water sample to avoid contamination that could alter the results. A plastic bottle or glass jar with a tight-fitting lid works best for this purpose.

Test Strips or a Water Hardness Testing Kit:
Test strips are a quick and straightforward way to test water hardness levels, providing immediate results without the need for laboratory analysis. However, if you prefer a more accurate reading, you can opt for a water hardness testing kit that uses titration methods.
Distilled or Softened Water:
Using distilled or softened water as a control sample can help determine the accuracy of your results. Using untreated tap water may contain impurities that could affect the outcome.
8 Steps on How to Test Your Water for Hardness
Step 1: Collect a Water Sample
Begin by collecting a representative water sample from the source you wish to test, whether it be your kitchen sink, bathroom faucet, or another water outlet. To do this, rinse the clean and sterilized plastic bottle or glass jar with the water you plan to test, then fill it to about three-quarters full, leaving some air space at the top.
Secure the lid tightly to prevent any contamination or evaporation of the sample prior to testing. It’s best to take the sample during a time of normal water use, as this ensures that the results will accurately reflect the hardness levels you usually encounter in your daily activities.
Step 2: Prepare the Test Strip or Testing Kit
Once you have collected your water sample, the next step is to prepare the test strip or testing kit for use. If you are using test strips, take one strip from the package and ensure that your hands are dry and clean to avoid any contamination. Hold the strip by the end, avoiding the reactive pads, and immerse it into the water sample for the amount of time specified by the manufacturer, usually a few seconds.
For a water hardness testing kit, follow the specific instructions provided. This often involves adding a defined volume of your water sample to a test vial and then adding reagents to initiate the testing process. It is vital to carefully measure and observe the timing as specified, as deviations can lead to inaccurate results. After preparing either method, ensure that the process is completed promptly to maintain the integrity of the testing procedure.

Step 3: Wait for the Results
After preparing your test strip or testing kit, it’s essential to allow the necessary reaction time for accurate results. For test strips, refer to the manufacturer’s instructions, as they typically recommend waiting for a specific duration—usually between 30 seconds and two minutes—before removing the strip from the water sample. If you’re using a water hardness testing kit, similarly, adhere to the recommended waiting period indicated in the instructions.
During this time, avoid moving the test strip or vial to ensure that the reactions occur properly. Once the designated time has elapsed, you can proceed to the next step, which involves interpreting the results to understand the hardness of your water.
Step 4: Read and Record the Test Strip or Testing Kit Results
The test strip will change color, and a chart provided with the kit will help you understand what it means for your water hardness level. Depending on the type of test strip used, some may indicate a numerical value while others may show the level of hardness as soft, moderate, hard, or very hard. For testing kits, you will need to compare the color-coded results on your vial with those indicated in the instructions.
Record your results by either writing down the number or level of hardness indicated by your test strip or marking the corresponding color on a sheet of paper using a pen or pencil. This record will help you compare results over time and determine if your water hardness levels are changing.
Step 5: Repeat the Test for Accuracy
To ensure the reliability of your results, it is important to repeat the test multiple times. Begin by gathering a new water sample using the same method outlined in Step 1. After that, prepare the test strip or testing kit as described in Step 2, making sure to follow the same procedures to maintain consistency.
After waiting for the appropriate reaction time, read and record the results once again, as detailed in Step 4. By conducting at least two to three tests, you can compare the outcomes to each other. If the readings are consistent, you can be more confident in the accuracy of your water hardness measurement. However, if there are significant discrepancies, consider testing again or verifying the accuracy of your testing materials. This process not only strengthens the validity of your data but also provides a clearer assessment of your water quality.

Step 6: Interpret and Understand Your Results
After recording your results, it is time to interpret and understand what they mean for your water hardness level. The general scale for water hardness ranges from 0-70 ppm (parts per million), with the following classifications:
- Soft: 0 – 60 ppm
- Moderately Hard: 61 – 120 ppm
- Hard: 121 – 180 ppm
- Very Hard: >180 ppm
Based on this scale, you can determine if your water falls within the soft, moderately hard, hard, or very hard category. You can also use this information to decide if you need to take action to address high levels of hardness in your water.
Step 7: Take Action if Necessary
Suppose your results indicate that your waterfalls are within the hard or very hard core; it may be necessary to take action to address this issue. Some potential solutions include installing a water softener, using a filter specifically designed for hard water, or seeking alternative sources of water. Consult with a professional or do further research to determine the best course of action for your specific situation and needs.
It is essential to regularly test and monitor your water hardness levels, as they can change over time due to factors such as changes in water sources or plumbing systems. By following these steps, you can be more informed about the quality of your water and take appropriate action if needed. Remember, having a reliable source of clean and safe water is crucial for maintaining good health, so don’t neglect this important aspect of household care.
Step 8: Repeat Testing Periodically
To ensure that you have up-to-date information about your water hardness, it is crucial to incorporate periodic testing into your routine. Depending on changes in your water source, plumbing conditions, or any treatments you’ve implemented, it’s advisable to test your water every three to six months. If you experience significant weather changes, such as heavy rain or drought, or if you make alterations to your water system, consider conducting a test sooner.

Regular testing not only allows you to track any fluctuations in water hardness levels but also helps you evaluate the effectiveness of any measures you may have taken to mitigate hardness. By staying informed, you can ensure that your water quality remains optimal for your household’s needs.
Frequently Asked Questions
Q1: Can I Test Water Hardness Without Using Test Strips or Testing Kits?
A: While test strips and testing kits provide a more accurate measurement of water hardness, you can also get a rough estimate by examining the mineral buildup in your home’s appliances and plumbing fixtures.
Q2: Can I Use the Same Test Strip or Testing Kit for Different Water Sources?
A: It is not recommended to use the same test strip or testing kit for multiple water sources, as each source may have different levels of hardness. To ensure accurate results, it is best to use a new test strip or testing kit for each water source.
Q3: Is There a Way to Reduce Water Hardness Without Installing a Water Softener?
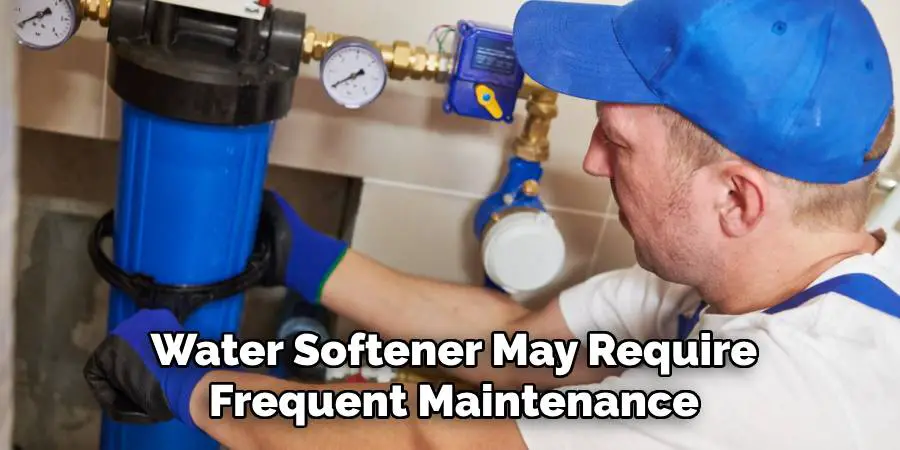
A: Yes, there are alternative methods such as using citric acid, vinegar, or specialized filters designed for hard water. However, these methods may not be as effective as a water softener and may require more frequent maintenance. It is best to consult with a professional for the most suitable solution for your specific situation.

With these FAQs and the detailed steps on how to test your water for hardness outlined above, you should now have a better understanding of water hardness and how to test for it. Remember, regular testing is key in ensuring optimal water quality for your household. Keep track of your results and take action if necessary to maintain a healthy and functional home. Happy testing!
Conclusion
In summary, understanding and managing water hardness is essential for maintaining a safe and healthy household. By following the outlined steps on how to test your water for hardness by testing, recording, and interpreting your water hardness levels, you can gain valuable insights into your water quality. Regularly monitoring these levels not only aids in identifying any changes over time but also empowers you to take appropriate action when necessary.
Whether that involves using water softeners, filters, or other solutions, being proactive about your water quality will ultimately enhance your home environment and contribute to better health for you and your family. Stay informed and take charge of your water quality to ensure a more comfortable and sustainable lifestyle.

