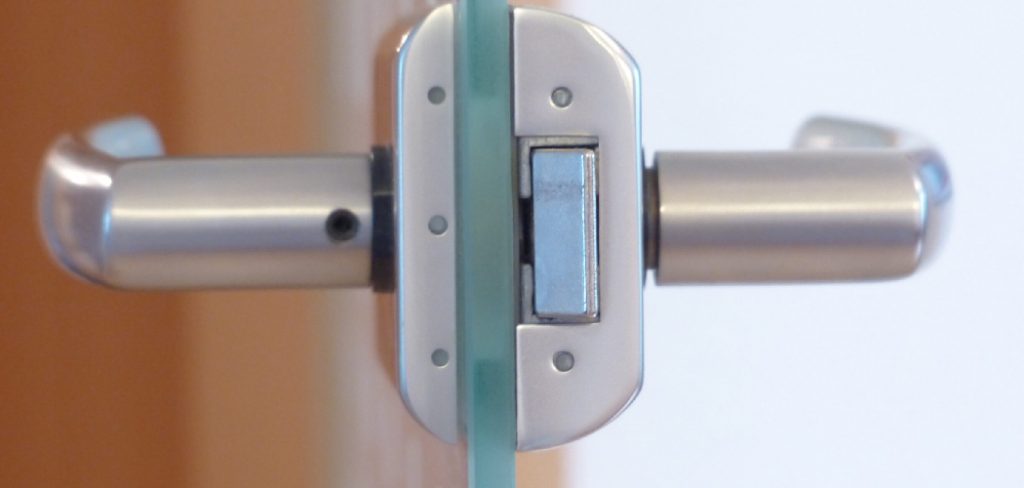
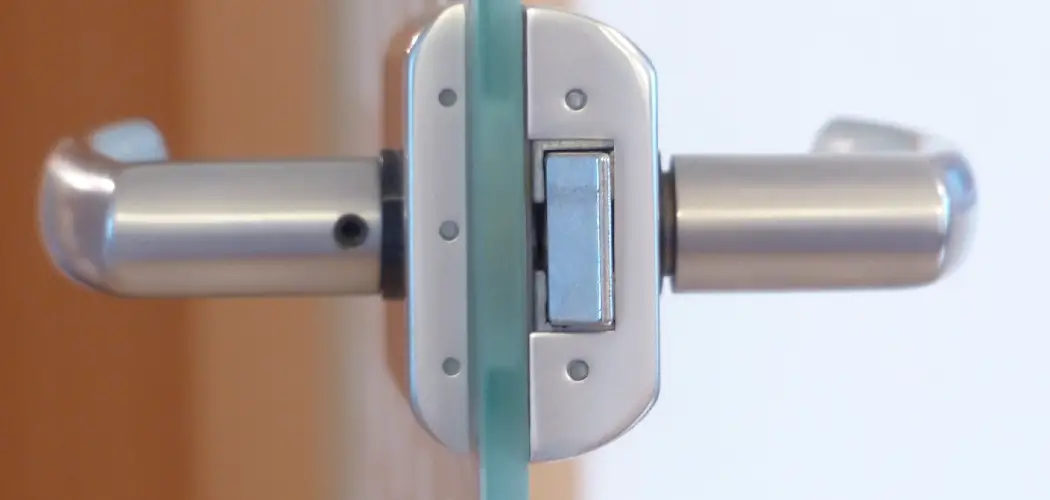
Tightening the handle on a glass shower door is a straightforward yet essential maintenance task that can enhance both the functionality and safety of your bathroom experience. Over time, the handle may become loose due to regular use or wear and tear, potentially leading to difficulties in opening and closing the door.

This introduction will guide you through the necessary steps for how to tighten handle on glass shower door, ensuring that your shower door operates smoothly and safely. By following these simple instructions, you can prevent further issues and prolong the lifespan of your shower door hardware.
Types of Shower Door Handles
When it comes to selecting the right handle for your glass shower door, there are several types to consider, each offering different aesthetic and functional qualities.
- Pull Handles: These are the most common type, designed for easy operation. They come in various styles and finishes, making them a versatile choice for any bathroom decor.
- Knob Handles: A more traditional option, knob handles are usually round and can be easier to grip, especially for users with limited dexterity. They are available in both minimalist and ornate designs.
- Lever Handles: Lever handles provide a more ergonomic option, allowing users to open the door with a simple push down, which can be helpful for those with arthritis or similar conditions.
- Magnetic Handles: These innovative handles not only aid in opening the door but also help keep it securely closed when not in use, creating a seamless look while adding an extra layer of convenience.
- Integrated Handles: Also known as recessed handles, these are built directly into the shower door, eliminating protruding elements. This sleek design is perfect for smaller bathrooms where space is at a premium.
Each type of handle offers unique benefits, so consider your functional needs and design preferences when choosing the right one for your glass shower door.

10 Methods How to Tighten Handle on Glass Shower Door
1. Tighten the Set Screws
One of the most common reasons for a loose shower door handle is that the set screws have come undone. Set screws are small screws that secure the handle to the glass door. To tighten these, first identify where the set screws are located, usually on the side or underside of the handle. Use an appropriate-sized Allen wrench or screwdriver to tighten the screws. Turn them clockwise until they are snug but avoid overtightening, as this could strip the screw threads or damage the handle. This quick and simple method often resolves the issue in minutes.
2. Use Thread Locker on the Set Screws
If the set screws on your shower door handle keep coming loose even after tightening, applying a thread locker can help secure them more permanently. Thread locker is a liquid adhesive designed to keep screws in place by preventing them from vibrating loose. After tightening the set screws, remove them and apply a small amount of thread locker to the threads. Then, reinsert and tighten the screws. Allow the thread locker to cure according to the manufacturer’s instructions before using the handle again. This method is particularly effective if your handle loosens frequently.

3. Check and Tighten Bolts Inside the Handle
Some shower door handles are secured to the door with bolts that run through the handle itself. To access these bolts, you may need to remove a decorative cover or cap on the handle. Once you’ve exposed the bolts, use a wrench or screwdriver to tighten them. Hold the handle steady with one hand while tightening the bolts with the other to prevent the handle from shifting or becoming misaligned. Be careful not to overtighten, as excessive pressure can crack the glass. This method ensures that the internal hardware is secure and holds the handle firmly in place.
4. Remove and Reinstall the Handle
If simply tightening the screws or bolts doesn’t resolve the issue, it may be necessary to remove the handle entirely and reinstall it properly. Start by unscrewing the handle and gently removing it from the door. Inspect both the handle and the glass surface for any dirt, debris, or damage. Clean both surfaces thoroughly before reinstalling the handle. When reattaching the handle, make sure all screws and bolts are aligned correctly and tightened securely. This method helps reset the handle and ensures that everything is aligned correctly.

5. Replace Worn or Stripped Screws
Over time, screws in the handle assembly can become worn or stripped, making it difficult to tighten the handle effectively. If you notice that the screws are no longer gripping properly, it’s time to replace them with new ones. Take one of the worn screws to a hardware store to find a matching replacement. When reinstalling the handle, use the new screws and ensure they are tightened securely. This method provides a more permanent solution by addressing the worn hardware that could be causing the handle to loosen.
6. Use a Rubber Washer for Extra Grip
If the handle continues to slip or loosen, adding a rubber washer between the handle and the glass can provide extra grip and stability. Rubber washers create friction and help distribute the pressure more evenly across the glass, preventing the handle from moving around. To install, remove the handle and place the rubber washers over the screws or bolts before reattaching the handle to the door. This small adjustment can make a big difference in how securely the handle fits and prevents future loosening.
7. Check the Glass Holes for Damage
Sometimes, the issue isn’t with the handle itself but with the glass holes where the handle is mounted. Over time, these holes can become worn or enlarged, making it difficult for the handle to stay tight. Inspect the glass holes for any signs of damage, such as cracks or chips. If the holes are damaged, you may need to use rubber grommets or washers to help fill the gaps and provide a more secure fit for the handle screws or bolts. This method can prevent the handle from shifting and keep it tight against the glass.
8. Align the Handle Correctly
A misaligned handle can cause unnecessary stress on the screws or bolts, leading to loosening over time. When tightening or reinstalling the handle, make sure it is properly aligned with the door. This means ensuring that both sides of the handle are level and parallel with the edges of the glass. If the handle is crooked or angled, it may put uneven pressure on the mounting points, causing it to loosen faster. Correct alignment helps distribute the pressure evenly, keeping the handle securely in place.
9. Tighten Both Sides Simultaneously
Many glass shower door handles are mounted on both sides of the door, with screws or bolts that connect through the glass. When tightening these handles, it’s important to tighten both sides simultaneously to ensure even pressure on the glass. Have a partner hold the opposite side of the handle while you tighten the screws or bolts on your side. This ensures that both sides of the handle are tightened evenly and securely, preventing uneven pressure that could cause the handle to loosen over time.
10. Replace the Handle if Necessary
If all else fails and your shower door handle continues to loosen despite your efforts, it may be time to replace it. Handles can wear out over time, especially in high-traffic bathrooms, and replacing a faulty handle may be the best long-term solution. Look for a new handle that fits your shower door and is made of durable materials such as stainless steel or brass. When installing the new handle, follow the manufacturer’s instructions carefully and ensure all screws, bolts, and washers are properly secured. A new handle will not only solve the loosening issue but also refresh the look of your shower door.

Common Mistakes to Avoid
When addressing loose shower door handles, it’s important to be aware of common mistakes that can hinder your efforts. One frequent error is overlooking the need for proper cleaning before reinstalling the handle. Failing to remove dirt and debris can prevent effective adhesion and create uneven surfaces, leading to further loosening.
Another mistake is not using the right tools; ensure you have the appropriate screwdrivers and wrenches to avoid stripping screws or damaging the handle. Additionally, many users tend to overtighten screws, which can crack the glass or cause other types of damage.
Take care to follow the manufacturer’s guidelines on torque specifications. Lastly, neglecting routine checks can lead to recurring issues; make it a habit to inspect the handle regularly to catch any signs of loosening early on. By being mindful of these pitfalls, you can help maintain your shower door handle and extend its lifespan.
Conclusion
A loose shower door handle can be a frustrating issue, but it’s one that can often be resolved with simple tools and techniques. From tightening the set screws and bolts to adding rubber washers or using thread locker, there are numerous methods available to secure your handle and prevent it from loosening again. Regular maintenance, such as checking for worn screws or misalignment, can also help prolong the life of your shower door handle. Thanks for reading, and we hope this has given you some inspiration on how to tighten handle on glass shower door!

