Tightening the toilet tank is an important step in maintaining a healthy toilet. When the toilet tank isn’t properly secured, it can lead to water waste and costly repairs. A loose toilet tank can cause leaks, which can damage floors and contribute to mold growth. It could also become a safety hazard if the tank topples over or becomes damaged and pieces break off. To avoid all these issues, it’s important to learn how to tighten a toilet tank.

The advantages of learning how to tighten a toilet tank are many. Firstly, it is an easy process that can be completed in a few minutes and requires minimal tools. This means anyone with basic plumbing knowledge and DIY skills can do the job without worrying about expensive repairs or professional help. Additionally, tightening a toilet tank prevents water from leaking into the bowl and keeps it at a safe level to ensure no flooding. In this blog post, You will learn how to tighten the toilet tank.
Step-by-step Instructions for How to Tighten Toilet Tank
Step 1: Inspect Your Toilet
Make sure the bolts that connect your tank to the bowl are exposed. If not, remove any caps or covers. To prevent flooding, shut off the water supply valve. This will be located along a pipe behind or below your toilet.
Step 2: Tighten the Bolts
Use a screwdriver and/or wrench to tighten the nuts that attach your toilet tank to the bowl. You may need to use an adjustable wrench if you cannot turn the nut with a standard one. Make sure not to over-tighten them. Otherwise, it could cause damage.
Step 3: Check for Leaks
After tightening the bolts, turn the water back on and check for any leaks around the tank. If there are any, use a putty knife to tighten them. If you still have leaking, you may need to replace some of the sealant or even entire parts of your toilet.

Step 4: Check the Tank
Once everything is tightened and sealed, inspect the tank to ensure nothing is loose. Check the screws and bolts that secure it to ensure they won’t come undone over time. Replace any parts if necessary. When you’re done tightening your toilet tank, clean up the area. Dispose of any old sealant or parts that you removed. Wipe down any surfaces and make sure everything is completely dry before using your toilet again.
Step 5: Test the Toilet
Once your work is done, flush your toilet to ensure it works properly. If it doesn’t, you may need to check the parts again and ensure everything is connected properly. Replace any covers or lids that you removed to access the bolts. Check to make sure they fit snugly and won’t slip off easily.
Step 6: Adjust the Float Valves
Adjust the float valves inside your tank to ensure your toilet bowl fills up with the right amount of water. You may need to use a wrench to do this. If you notice leaks around your water supply line, tighten it with a wrench. Make sure not to over-tighten. Otherwise, it could cause damage.
Tips for How to Tighten Toilet Tank
- Disconnect the power supply of your toilet tank before performing any tightening procedure to ensure safety.
- Wear protective gear such as rubber gloves and goggles when working on the toilet tank for protection against germs, splashes, or dirt.
- Ensure that all toilet tank components are properly tightened before operating it again.
- Check for any signs of damage or leaks before operating the toilet tank again.
- Have a bucket handy in case of water leakage from the tank while performing the tightening procedure.
- If you are unsure how to tighten something, consult a professional plumber or technician.
- Read and follow the manufacturer’s instructions carefully regarding How to Tighten Toilet Tank.
- Make sure to regularly check all the screws, bolts, and nuts for tightness as part of your routine maintenance tasks.

By following these safety tips when tightening a toilet tank, you can ensure that it is properly tightened without any risk of damage or leakage. As with all plumbing tasks, following the manufacturer’s instructions and wearing appropriate safety gear is essential for the proper maintenance and upkeep of your toilet tank.
How Often Should You Check the Tightness of Your Toilet Tank?
The tightness of the toilet tank is an important factor in having a well-functioning and efficient toilet. How often you check the tightness of your toilet tank depends on a few factors, such as how much it is used and how old the tank is. Generally, you should check your tank every 6 to 12 months to ensure that the bolts and nuts are fastened properly. If you notice any loose parts, it is important to tighten them immediately to avoid further damage or water leakage.
To check the tightness of your toilet tank, start by lifting up the lid until the tank is visible. Then examine the nut-and-bolt connections at each corner of the tank. You can tighten any parts with a wrench or pliers if any parts are loose. Be sure to check the drainage pipe connections, too, and make sure that they are secure. Once all of the nuts and bolts have been tightened, replace the toilet lid and flush the toilet to ensure it is still functioning properly. If there is any water leakage, continue to tighten the connections until the problem is resolved.
How Should You Clean and Maintain a Tight Toilet Tank?
Toilet tanks can become loose over time, leading to annoying sounds and water leakage. To avoid this from happening, it’s important to tighten the tank regularly. Here are some tips for how to do so:

- First, turn off the water supply valve and flush the toilet to empty the water tank.
- Open the tank lid and inspect the water supply line. See if it’s loose or in need of tightening. If so, use a wrench to tighten it up. Ensure not to overtighten, as this could damage the connection and cause leaks.
- Inspect the bolts that secure the tank to the bowl. Make sure that they are tight and not loose or rusted. If necessary, use a wrench to tighten them.
- Check the flush handle for any signs of wear or damage. If it’s loose, tighten the nut with a wrench or pliers to secure it and prevent water from leaking.
- Finally, test out the toilet to ensure it’s tight and secure. Flush the toilet several times and check for any signs of leakage or dripping. If everything looks good, replace the lid and turn on the water supply valve.
Regularly checking and tightening your toilet tank can help keep it in good condition and prevent problems from occurring. Additionally, make sure to clean your toilet tank regularly to help prevent the buildup of bacteria, mold, and mildew.
How Do You Prevent Future Plumbing Problems Caused by a Loose or Improperly Tightened Toilet Tank?
To ensure that your toilet tank remains securely fastened and functioning correctly, it is important to periodically check the bolts holding your tank in place for tightness. If you notice any loosening of the bolts, tighten them immediately to avoid future plumbing problems. Additionally, if the bolts seem excessively weak or corroded, consider replacing them entirely with new ones.
When tightening toilet tank bolts, you should use adjustable pliers to ensure that the bolts are properly tightened and not over-tightened. Additionally, when attaching the nuts to the bolts, it is important to use a regular wrench, as an adjustable wrench will slip and cause the nut to become too tight.
Finally, you may want to consider using thread seal tape or a plumber’s putty when attaching the nuts and bolts to ensure that they remain secure. Thread seal tape should be wrapped around the bolt’s threads before it is inserted into its connector, while the plumber’s putty can also be used to fill any gaps between the nut and bolt.
How Much Will It Cost to Tighten Toilet Tank?
The cost of tightening a toilet tank will vary depending on the type and condition of your toilet. Generally, it can range from $50 to $150 in labor costs plus the cost of any replacement parts that may be needed. The average price for a basic toilet installation is about $200, so if you have an older or more complicated setup, the cost could be higher.

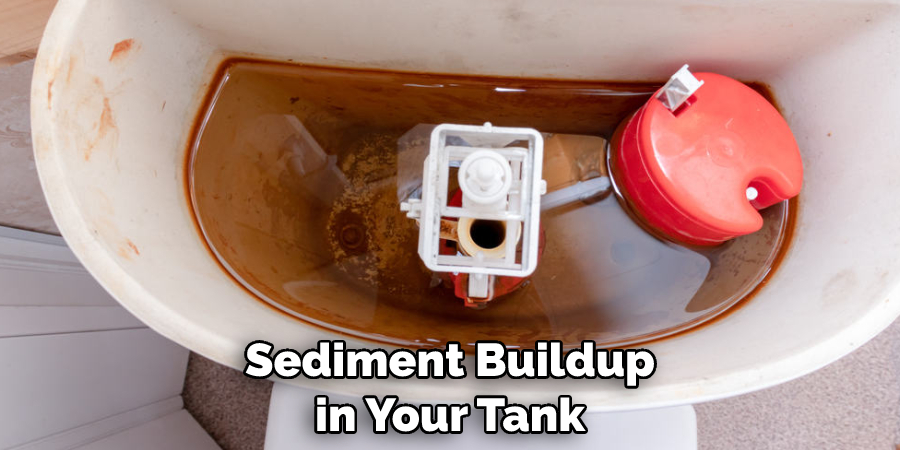
It is important to note that it is best to hire a professional plumber if you feel uncomfortable doing the repair yourself. A professional will have the experience and knowledge necessary to ensure your toilet tank is properly tightened and any potential problems are identified and fixed before they become major repairs. Additionally, they will be able to provide advice on any issues that may arise in the future, such as how to prevent rust and sediment buildup in your tank.
Conclusion
The main disadvantage of tightening a toilet tank is the potential for causing damage. Toilet tanks are secured to the bowl by two bolts that can become worn or corroded over time, and if these bolts are tightened too much, it can cause them to break or strip. If this happens, then you will have to replace both the tank and the bowl.
Additionally, if you tighten the bolts too much, it can cause cracking in the porcelain tank or bowl, which will also require replacement. It is important, therefore, to be very careful when tightening toilet tanks and follow all instructions carefully. I hope this article has been beneficial for learning how to tighten toilet tank. Make Sure the precautionary measures are followed chronologically.

