A frozen sump pump line can lead to devastating consequences, including basement flooding and extensive water damage to your home. Addressing this issue promptly is vital to maintain the integrity of your property and prevent costly repairs.
Sump pump lines typically freeze due to several common factors, such as inadequate insulation, exposure to extremely cold temperatures, or blockages caused by debris and ice build-up. This article provides a comprehensive guide on how to unfreeze sump pump line effectively, detailing the necessary preparations and methods to thaw the frozen section.
Additionally, it will cover essential preventive measures to safeguard against future freezing, ensuring that your sump pump operates efficiently throughout the colder months. By understanding these critical steps, homeowners will be better equipped to deal with frozen sump pump lines and protect their basements from potential flooding.
Identifying a Frozen Sump Pump Line
Recognizing the signs of a frozen sump pump line is crucial for timely intervention and preventing further issues. One of the most evident indicators is No Water Discharge: if the sump pump is operating, but there is no water being expelled from the discharge pipe, this typically signals a blockage due to freezing.
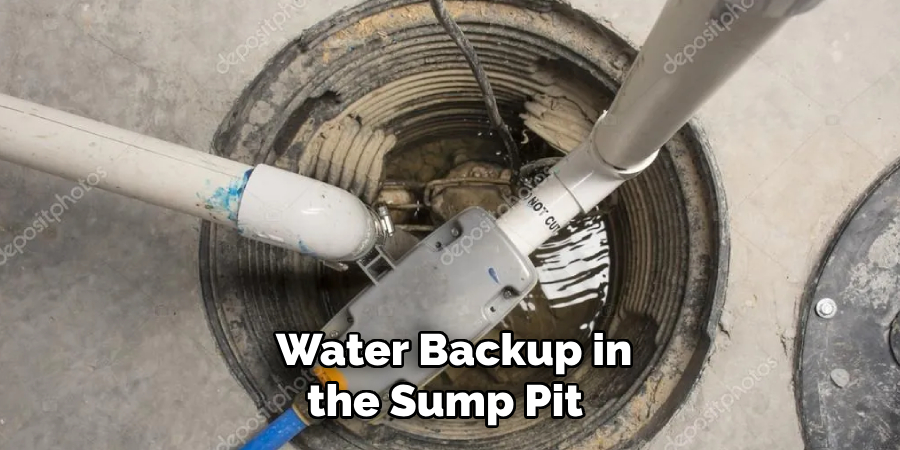
Additionally, Water Backup in the Sump Pit can be another clear sign; if you notice water accumulating in the sump pit or experiencing slow drainage, it may suggest that the discharge line is frozen and preventing proper water flow.
Lastly, a visual inspection can reveal Visible Ice on the Discharge Pipe; the presence of frost or ice build-up on the exterior of the pipe can confirm that freezing has occurred, necessitating immediate action to resolve the issue.
Safety Considerations Before Starting
Before attempting to address a frozen sump pump line, it’s essential to prioritize safety. First and foremost, Power Off the Pump. Turning off the sump pump prevents it from running dry, which can lead to permanent damage if the line is indeed frozen. Furthermore, it is important to Wear Protective Gear; donning gloves, safety goggles, and warm clothing is advisable, especially when working outside in frigid conditions. Taking these precautions ensures that you remain safe while effectively tackling the frozen line situation.
Tools and Materials Needed
To effectively unfreeze a sump pump line, having the right tools and materials on hand is crucial.
Tools
- Hairdryer: A convenient tool for applying gentle heat to small areas of ice build-up.
- Heat Gun: Useful for more severe cases, but should be used with caution to avoid damaging the pipe.
- Space Heater: Provides ambient warmth to the surrounding area, aiding in the thawing process.
- Heated Tape: Can be wrapped around pipes to prevent future freezing.
Materials
- Pipe Insulation: Essential for insulating any exposed pipes to prevent future freeze-ups.
- Towels: These are helpful for soaking up any water that might result from thawing ice.
- Garden Hose: This may be used to flush out the line once it has thawed.
Optional Equipment
- Utility Knife: Useful for cutting insulation to size.
- Infrared Thermometer: Allows for precise temperature readings to ensure safe thawing.
How to Unfreeze Sump Pump Line: Step-by-Step Guide
Step 1: Locate the Frozen Section of the Line
Start by identifying the specific part of the frozen sump pump line. This involves checking both the interior and exterior sections of the pipe. Begin inside your home by observing the sump pit to see if the water level is unusually high, which could signal a blockage in the discharge line.
Next, move outside and examine the discharge pipe, particularly any areas exposed to cold air or poorly insulated.
Areas that are less sheltered from the elements are more susceptible to freezing. Pay close attention to elbows or joints in the piping, as ice accumulates in these areas. If you’re unsure, you can run your hand along the pipe to feel for temperatures significantly colder than other sections, indicating a potential frozen spot.

Step 2: Apply Heat to the Frozen Pipe
Once you’ve located the frozen section, it’s time to apply heat. If using a hairdryer or heat gun, begin by turning it on the lowest setting. Start from the end of the pipe nearest the sump pump and work toward the discharge point. Moving the heat source continuously is essential to avoid concentrating heat in one area, which could lead to pipe damage or pressure buildup.
Alternatively, if using a space heater, position it safely near the frozen section, allowing ambient warmth to penetrate the area gradually. Consider wrapping heated tape around the frozen section for a more consistent thaw. This will provide even warmth along the length of the pipe, significantly aiding in the thawing process without the risk of overheating any particular spot.
Step 3: Monitor and Check for Water Flow
While the heat is being applied, monitor the situation closely. Listen for the sound of water flowing as you apply heat; this clearly indicates that the ice is starting to melt.
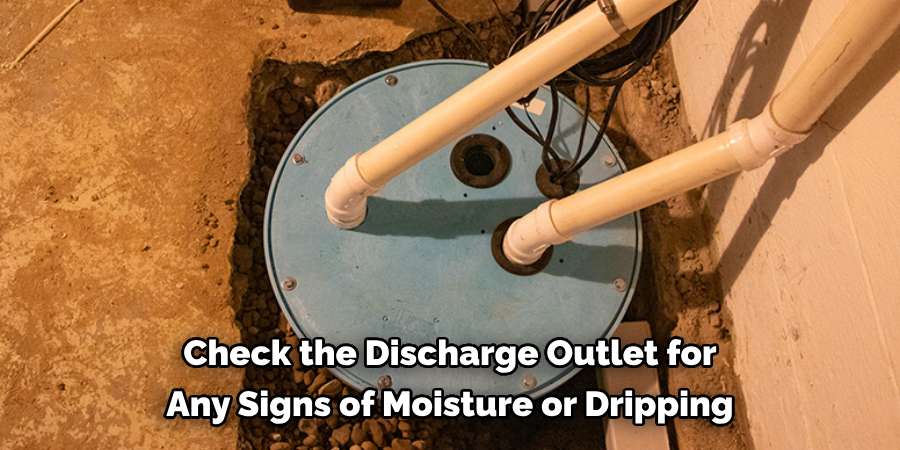
You should also check the discharge outlet for any signs of moisture or dripping, which can suggest that water is beginning to move through the pipe again. Once you believe the ice has cleared, it’s essential to cautiously turn the sump pump back on.
Start with a low setting if available, and observe if water is being expelled through the discharge line. You have thawed the line if the pump engages successfully and water flows freely. However, additional heat application or professional assistance may be required if there are still signs of blockage or if the pump fails to operate.
Common Mistakes to Avoid
Applying Too Much Heat Too Quickly
One of the most critical mistakes to avoid when unfreezing a sump pump line is applying excessive heat too rapidly. High heat settings or open flames, such as a blowtorch, can warp or damage the pipe material, potentially leading to cracks or bursts that result in costly repairs.
Not Addressing the Source of the Freeze
Failing to identify and rectify the root cause of the freezing issue can lead to recurring problems. Common freezing sources include inadequate insulation around pipes or a clogged discharge line. Ensuring proper insulation and checking for any hindrances preventing water from moving freely is essential.
Ignoring Drainage Issues
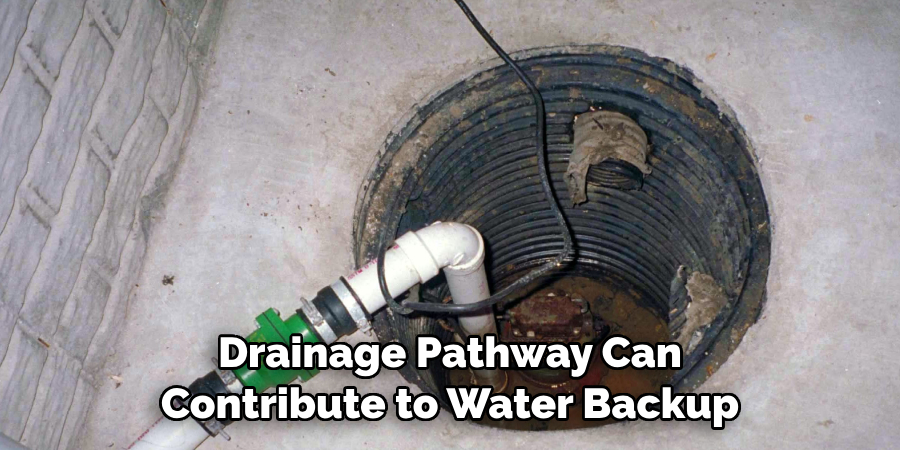
Neglecting to inspect the overall drainage system is another mistake that can exacerbate freezing problems. Blockages throughout the drainage pathway can contribute to water backup, leading to freezing conditions in the sump pump line. Regular assessments of the complete drainage system are vital to maintain functionality.
Preventive Measures to Avoid Future Freezing
Implementing comprehensive preventive measures is essential to prevent the sump pump line from freezing in the future. By focusing on insulation, rerouting, and ensuring proper drainage, you can significantly mitigate the risk of ice buildup and the associated inconveniences.
Insulate the Discharge Pipe
Proper insulation of the discharge pipe is a simple yet effective way to keep it from freezing. Wrap the exposed sections of the discharge line tightly using foam pipe insulation, ensuring that the insulation fits snugly around the pipe. Sealing the ends with duct tape can enhance its efficiency. For added protection, apply heat tape along the length of the pipe before insulating. Heat tape will maintain a consistent temperature and prevent freezing, especially during extremely cold weather.
Re-route the Discharge Line
Consider rerouting the discharge line to a less exposed area, which can help prevent freeze-ups. If feasible, extend the discharge pipe away from the house foundation and ensure that it discharges at least five to ten feet from the exterior walls. This distance reduces the exposure to cold air while also ensuring that any discharged water has ample opportunity to drain away from the foundation, reducing both flooding and freezing risks.
Ensure Proper Slope and Drainage
Another crucial preventive measure is ensuring that the discharge line maintains the correct slope. The line should slope downward away from the pump at a minimum drop of 1 inch for every 10 feet. This helps prevent water from sitting in the pipe, which can freeze and create blockages. Installing a check valve within the system also aids in preventing backflow, further reducing the chances of water accumulating in the line and freezing. Regular checks can keep the drainage system clear and functional, minimizing future freezing issues.
When to Seek Professional Help
Persistent Freezing Issues
If your sump pump line continues to freeze despite implementing preventive measures, it may be time to consult a professional. Repeated freezing can indicate underlying issues that require expert evaluation. Persistent problems suggest that standard procedures are insufficient, and a specialist will be equipped to diagnose the root cause effectively, ensuring that the freezing does not reoccur.
Complex or Extensive Freezing
Professional help is essential in cases where the frozen section of the pipe is difficult to access or if there are significant issues with the sump pump or discharge system. Attempting to resolve complex freezing problems without expertise can lead to further complications or damage. A qualified technician will have the tools and knowledge necessary to address intricate issues safely and effectively, ensuring the entire system’s integrity.
Conclusion
In conclusion, understanding how to unfreeze sump pump line effectively is crucial for maintaining the functionality of your drainage system, especially during the colder months. You can minimize the risk of future blockages by implementing proper techniques such as applying gentle heat, addressing the sources of freezing, and taking preventive measures.
If freezing issues persist, seeking professional assistance ensures that any underlying problems are addressed comprehensively, keeping your sump pump line operating smoothly and preventing potential damage. By staying proactive and informed, you can protect your home from the adverse effects of freezing conditions.

