Do you have a mysterious water stain on your ceiling? Are you concerned about what may be causing the leak and how to address it? Leaks in your ceiling from a pipe or appliance can cause serious damage if left unchecked, so it’s essential to take action as soon as possible.

In this blog post, we’ll provide detailed instructions on how to detect water leaks in ceiling and help you understand proactive steps to avoid such issues in the future. We’ll also discuss how quickly this problem should be addressed, helpful tips for managing existing leaks, and potential preventative measures to keep your property safe.
With the correct information and an organized approach, detecting water leaks in ceilings can be manageable!
What are the Causes of Water Leaks in Ceiling?
Before we jump into detecting water leaks, it’s essential to understand what causes them. The most common causes include flawed plumbing, worn roof structures, and poorly sealed windows or doors.
A leaking pipe may directly result from a broken connection or faulty installation. On the other hand, worn roof shingles or flashing can cause water to seep through the ceiling during rainstorms. It’s also possible for water to enter through poorly sealed windows or doors, especially if they are older or damaged.
Signs of Water Leaks in Ceiling
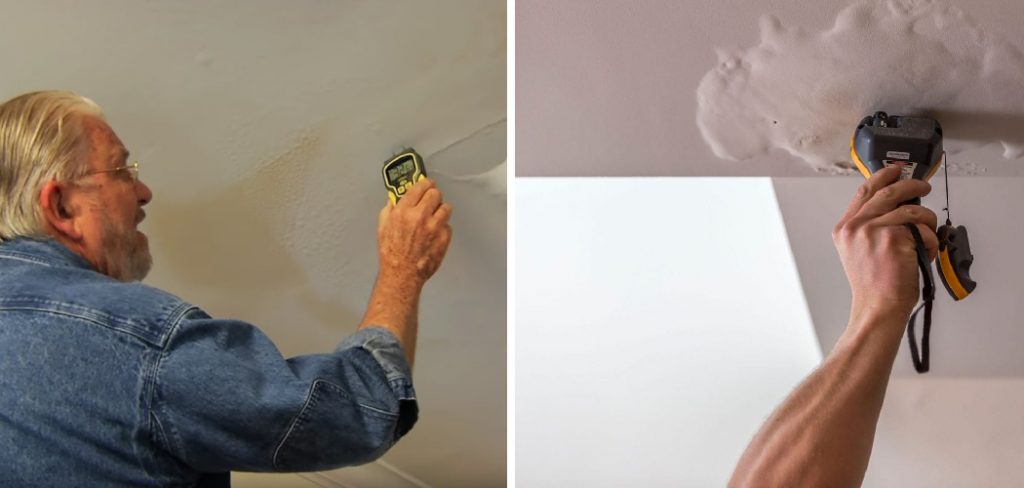
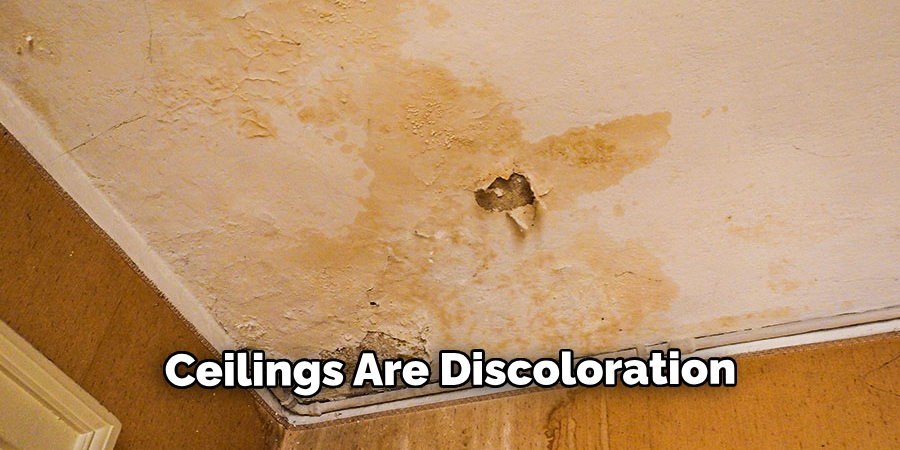
Now that we know what causes water leaks, it’s vital to recognize the signs of a leak. Some indicators include apparent stains on your ceiling, discoloration, peeling paint, or bubbling wallpaper. You may also notice a musty smell if the leak has existed for some time. If you don’t see any visible signs, you can check for water damage by lightly pressing your ceiling with a broomstick or mop handle. If the spot feels soft and spongy, moisture may be trapped inside.

Overall, the most common signs of water leaks in ceilings are discoloration, stains, and soft spots. If you notice any of these indicators, it’s important to take action immediately.
What Will You Need?
Before you start detecting water leaks in the ceiling, it’s important to gather some essential tools. You’ll need the following:
- A ladder or step stool
- A flashlight
- Binoculars (optional)
- Protective gear like gloves and a mask (if there is mold present)
- A bucket to collect any water that may be leaking
Once you have these items, you’re ready to start looking for the source of the leak.
10 Easy Steps on How to Detect Water Leaks in Ceiling
Step 1. Identify the Area:
Start by identifying the exact area where the leak is occurring. Water stains, discolored patches, or sagging drywall usually indicate this. Stand back and observe the overall scene before you begin the detailed inspection.
Step 2. Inspect the Area Closely:

Climb your ladder or step stool and use your flashlight to get a closer view of the area. If you have binoculars, they can help you observe more intricacies from a safe distance. Look for dampness, mildew, or mold, as they are all telltale signs of water damage. Don’t forget to wear your protective gear if you suspect mold. Remember to use a bucket to collect water if the leak is active.
Step 3. Trace the Source:
While water stains on the ceiling are a clear indicator of a leak, the source of the leak may not be directly above the stain. Water travels along roof panels, beams, or pipes before dripping onto your ceiling. To find the source, look for dampness, discoloration, or damage around the stained area and trace backward toward the direction it may have originated from. This could be a faulty pipe, a cracked roof tile, or a window. Remember that this step may require several iterations and a lot of patience.
Step 4. Check the Attic:
If the leak source isn’t immediately apparent inside your living space, your next best step is to check the attic. Wearing your protective gear and using your flashlight, carefully examine the underside of the roof for any signs of water leakage. Look for wet insulation, rusty nails, or dark spots on the wood – these are all potential signs of water leakage. Be sure to tread carefully to avoid injury and further damage.
Step 5. Examine the Roof:
If you cannot locate the leak’s source after checking the attic, the next step is to inspect the roof. Safety should be your primary concern during this phase, so only proceed if you have the right equipment and feel comfortable doing so. Look for signs of missing or cracked shingles, damaged flashing, or any other abnormalities. Pay special attention to roof penetrations such as vents, skylights, and chimneys, as these areas are more likely to allow water ingress.
Step 6. Perform a Water Test:
If you have not yet located the source of the leak, performing a water test can help isolate the area. You’ll need a helper inside the house with a flashlight while you’re on the roof with a garden hose. Start by soaking the downhill side of the chimney first, then each side, then the top on both sides. The helper should notify you when they see a drip, helping you identify the leak’s origin. Be patient, as this process can take several minutes.
Step 7. Consider the Plumbing:
Plumbing could be the culprit if the roof inspection or water test doesn’t reveal the leak source. Leaky pipes and condensation along the piping can cause water stains and damage. Investigate any plumbing above the leak and look for wet spots on pipes, dripping water, or condensation.

Step 8. Consult a Professional:
If you cannot detect the source of the water leak in your ceiling despite following all these steps, it may be time to consult a professional. Water leaks can cause extensive damage if not addressed promptly, and a professional will have the experience and tools to find and fix the leak. They can also assess any potential structural damage and provide recommendations for repairs.
Step 9. Repair the Leak:
Once you’ve identified the source of the leak, it’s time to repair it. This may involve replacing damaged shingles on the roof, sealing around windows and doors, or fixing leaky pipes. Again, if the repair is beyond your skill set, you should hire a professional to ensure it is done correctly and prevent further leaks.
Step 10. Enjoy a Leak-Free Ceiling:
Now that you’ve identified and repaired the leak in your ceiling, you can rest easy knowing your home is safe from water damage. It’s always a good idea to regularly check for any signs of new leaks and address them promptly to prevent further damage.
By following these 10 easy steps, you can effectively detect and fix water leaks in your ceiling. Remember to prioritize safety and seek professional help if needed.
5 Additional Tips and Tricks
- Pay Attention to Stains: A clear sign of a water leak in your ceiling is the presence of brown, yellow, or copper-colored stains. They typically start small but can expand if the leak still needs to be addressed.
- Note Changes in Texture: A bulging or sagging ceiling texture can indicate water accumulation. Be sure to check for any unusual changes in the surface of your ceiling.
- Check for Mold: A moist environment caused by a water leak is a perfect breeding ground for mold. If you notice a musty smell or visible mold spots, it’s time to investigate for a leak.
- Listen for Dripping Sounds: The sound of dripping or rushing water can often be a telltale sign of a water leak in your ceiling. Listen carefully, especially during quiet times.
- Monitor Your Water Bill: An unexpected increase in your water bill could suggest a hidden leak. If your usage hasn’t significantly changed, but your bill has spiked, it might be time to look for leaks.

With these additional tips and tricks, you can be more confident in detecting a water leak in your ceiling.
5 Things You Should Avoid
- Avoid Ignoring Small Stains: A tiny discolored patch on your ceiling can indicate a severe hidden leak. Never ignore these signs.
- Do Not Overlook High Humidity: High humidity in a particular home area can indicate a hidden leak. If an area feels unusually damp, it’s essential to investigate.
- Refrain From Neglecting Exterior Signs: Water leaks in the ceiling can sometimes manifest as wet spots or discoloration on the exterior of your home. Keep an eye out for these signs.
- Avoid Disregarding Flaking Paint or Wallpaper: If you notice the paint or wallpaper in your home starting to flake or peel, it could be due to a water leak.
- Remember Your Attic: Regularly inspect your attic for any signs of water damage or condensation, as leaks often originate from the roof.
By avoiding these common mistakes, you can enhance your ability to detect water leaks in your ceiling early, preventing further damage and expensive repairs.
Conclusion
To recap, if there is a water leak in your ceiling, the first step is determining the origin of the issue. If it’s minor dripping from the air conditioner condensate pan, you can purchase a replacement part and install it yourself. However, if the water source is from a pipe or sewage system,, it is time to call an expert for help. It’s essential to take action immediately to prevent further damage – and expense – from happening due to lack of repair.
As long as you stay proactive about solutions and are willing to reach out for assistance when needed, you should be able to detect & fix any water leaks in your ceiling quickly and easily.
Hopefully, the article on how to detect water leaks in ceiling has provided you with a better understanding of the signs to look out for and the necessary steps to take to address this issue.
Don’t let water worries bring you down – tackle them head-on before they become a bigger problem!

