Listen up, all DIY enthusiasts; this one’s for you! Are you tired of constantly calling a plumber whenever there’s an issue with your toilet tank? Do dripping sounds or water pooling at the base of your toilet annoy you to no end? Well, fear not because we have the perfect solution for you. In this blog post, we’ll discuss how to replace the gasket in your toilet tank like a pro. Yes, that’s right – no more expensive plumbing bills or waiting for someone else to fix the problem.

With just a few simple steps on how to replace gasket in toilet tank and some essential tools, you’ll have your gasket replaced and your toilet working and new in no time. So roll up those sleeves, and let’s get started on mastering this essential home maintenance skill!
Necessary Items
Before we get into the actual process, let’s take a quick look at the items you’ll need to replace the gasket in your toilet tank:
- New gasket (make sure to purchase one that is compatible with your toilet model)
- Adjustable wrench or pliers
- Screwdriver (flathead or Phillips, depending on your tank’s screws)
- Towels or rags
- A bucket or container (to catch any excess water from the tank)
10 Steps on How to Replace Gasket in Toilet Tank
Step 1: Shut off the Water Supply
The first step is to turn off the water supply to your toilet. You can usually find a shut-off valve on the wall behind your bathroom or the floor next to it. Turn this valve clockwise until it is completely closed to stop the water flow into your tank.
Step 2: Flush the Toilet and Empty the Tank
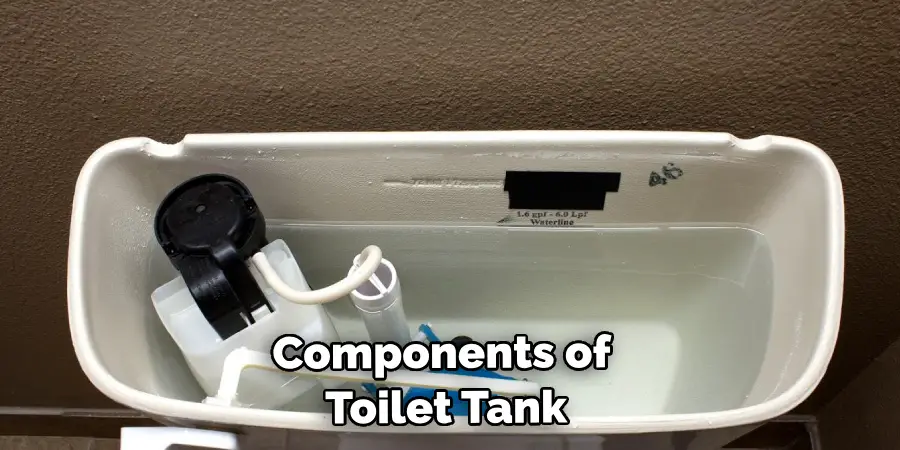
Next, flush your toilet to drain all the water from the tank. If water is still left in the tank after flushing, use a towel or sponge to soak it up and wring it out into a bucket or container. This will prevent excess water from spilling out during the gasket replacement process.

Step 3: Remove the Tank Lid and Set it Aside
Carefully remove the tank lid and set it aside in a safe place. Be mindful not to drop or damage it accidentally. It may be helpful to place it on a towel or soft surface while you work.
Step 4: Disconnect the Water Supply Line
Locate and unscrew the water supply line from the bottom of your tank. You can use an adjustable wrench or pliers to loosen and remove the nut connecting the supply line to the fill valve in your tank.
Step 5: Unscrew the Tank Bolts
Using a screwdriver, unscrew the bolts that secure the tank to the base of your toilet. These are located on either side of the tank bottom and may require some force to loosen.
Step 6: Lift and Remove the Tank
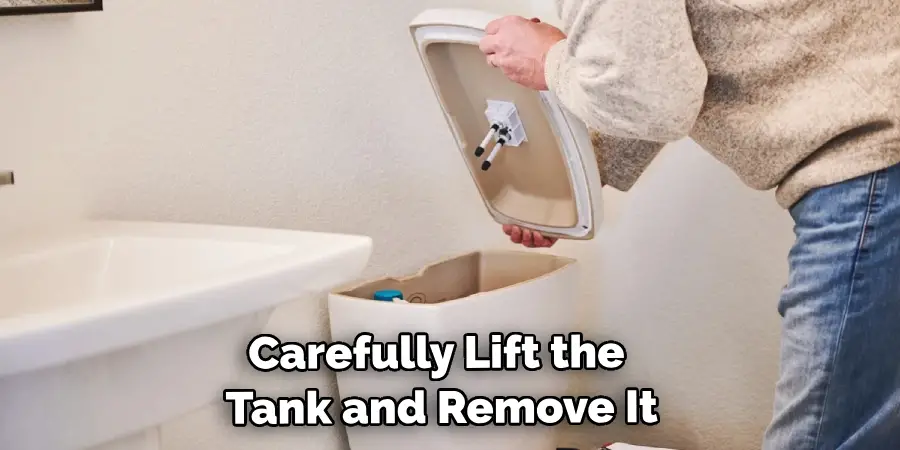
Carefully lift the tank and remove it from the base of your toilet. Place it on a soft surface to avoid damage. If the tank feels stuck, gently wiggle it back and forth until it comes free.

Step 7: Remove the Old Gasket
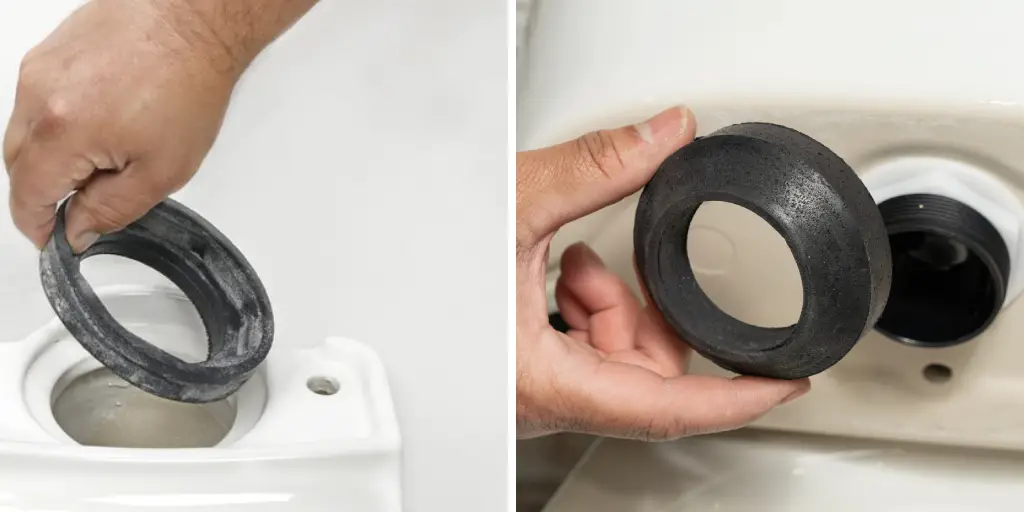
Once the tank is removed, you should see the old gasket between the tank and the base of your toilet. Remove any remaining pieces of the old gasket using your fingers or a screwdriver, and clean the area thoroughly.
Step 8: Replace with the New Gasket
Place your new gasket on top of the base of your toilet, aligning it with the holes where the tank bolts will go through. Ensure the gasket is placed evenly and covers all edges of the tank opening.
Step 9: Reinstall the Tank
Carefully lower the tank back onto the base of your toilet, ensuring that the gasket is securely in place. Use the previously removed bolts to reattach and secure the tank to the floor.
Step 10: Reconnect Water Supply and Test
Finally, reconnect the water supply line and turn on the shut-off valve. Let water fill your tank and flush your toilet to test whether the gasket works correctly. If there are no leaks or issues, congratulations – you have successfully replaced the gasket in your toilet tank!

Replacing the gasket in your toilet tank may seem daunting, but it can be quickly done with the proper instructions and tools. By following these ten steps, you can save time and money by fixing the issue. Regular maintenance of your toilet tank gasket can also help prevent future leaks and keep your bathroom in top working condition.
8 Things to Avoid While Replacing Gasket in Toilet Tank
While replacing the gasket in your toilet tank, it is essential to keep a few things in mind to prevent any potential accidents or mistakes:
1. Avoid Using Excessive Pressure
Be gentle when removing or installing the tank to avoid any cracks or damage. Using excessive force can cause the tank to break, leading to more costly repairs.
2. Do Not Use Damaged Tools
Make sure your tools are in good condition before starting the replacement process. Using damaged or worn-out tools can make the job more difficult and increase the risk of injury.
3. Do Not Overtighten Bolts or Nuts
It may be tempting to tighten bolts and nuts as much as possible, but this can cause damage to the tank and gasket. Tighten them just enough to secure the tank in place.
4. Avoid Using Harsh Chemicals for Cleaning
When cleaning the area around the gasket, avoid using harsh chemicals, as they can damage the material and cause it to deteriorate faster.
5. Do Not Reuse Old Gasket
Even if the old gasket appears in good condition, it is not recommended to be reused. Always use a new gasket when replacing the old one.
6. Avoid Getting Water on Electrical Components
Be mindful of any electrical components or connections near the tank. Make sure to dry them off if they get wet during the replacement process.
7. Do Not Rush
Take your time and follow each step carefully. Rushing through the process can lead to mistakes and a faulty gasket replacement.
8. Avoid Forcing Pieces into Place
If something doesn’t seem to fit or align properly, do not force it. This can cause damage to the gasket and other components of your toilet tank. Instead, try adjusting or repositioning the pieces until they fit correctly.

By avoiding these potential mishaps, you can successfully replace the gasket in your toilet tank without any complications. Always follow safety precautions when working with tools and plumbing components.
Frequently Asked Questions on Toilet Tank Gasket Replacement
How Often Should the Gasket in My Toilet Tank Be Replaced?
It is recommended to replace the gasket every 5-7 years or if you notice any signs of wear and tear. However, this can vary depending on the quality of the gasket and the water conditions in your area.
Can I Use Any Type of Gasket for My Toilet Tank?
It is essential to use a gasket designed explicitly for toilet tanks. Using other gaskets may not provide a proper seal and could lead to leaks or damage.
Are There Any Signs That Indicate a Faulty Gasket?
Yes, a few signs may indicate it is time to replace your gasket. These include water leaks around the toilet’s base, difficulty flushing or filling the tank, and visible wear and tear on the gasket.
Why Is My Toilet Tank Gasket Leaking?
There are a few reasons your toilet tank gasket may leak, such as wear and tear, improper installation, or using the wrong type of gasket. If you notice any leaks after replacing the gasket, double-check that it was installed correctly and consider using a higher-quality gasket.
Can I Replace the Gasket Myself?
Replacing the gasket in your toilet tank can be done yourself if you have the proper tools and follow instructions carefully. However, if you are uncomfortable or experienced with plumbing tasks, it is best to hire a professional.
How Much Does It Cost to Replace a Toilet Tank Gasket?
The cost of replacing a toilet tank gasket can vary depending on the quality of the gasket and whether you choose to do it yourself or hire a professional. It can cost anywhere from $20 to $100 for materials and labor.
When Should I Call a Professional Plumber?
If you are trying to figure out how to replace the gasket or encounter any unexpected issues, it is best to call a professional plumber. They have the experience and tools necessary to handle any complications that may arise during the replacement process.
Overall, it is essential to regularly check and maintain your toilet tank gasket to prevent leaks and ensure proper toilet functioning. With these tips and precautions in mind, you can confidently replace the gasket in your toilet tank and keep your bathroom in top working condition.
Conclusion
Now that you have all the information you need to replace the gasket in your toilet tank, it’s time to put it into action! Remember, this simple, cost-effective fix can save you from dealing with a leaky and inefficient toilet. By following these steps on how to replace gasket in toilet tank and using the right tools, you can easily replace the gasket yourself without having to spend money on a plumber.
Taking care of small maintenance tasks like replacing a gasket in your toilet tank saves money and helps conserve water and reduce our environmental impact. By being proactive about these types of repairs, we are saving ourselves from future headaches and contributing to a greener Earth.

