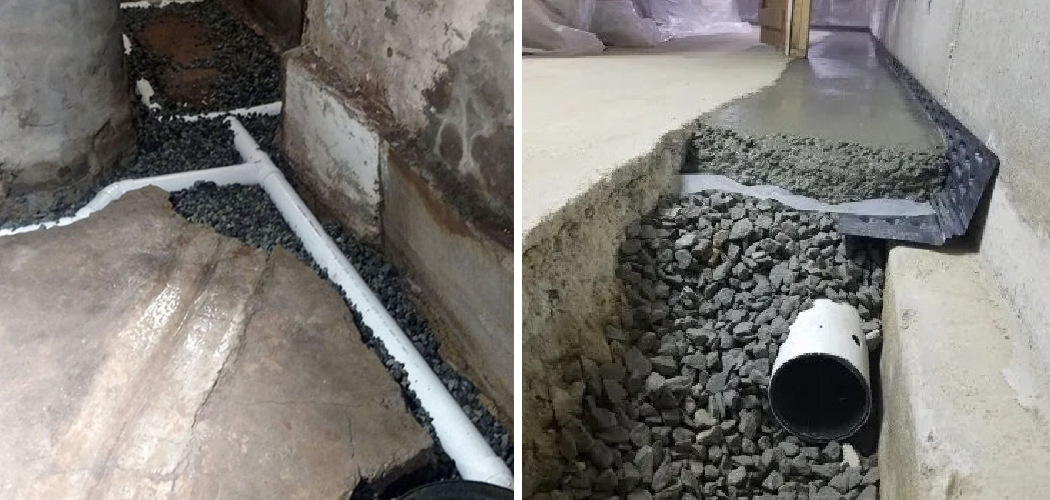
Installing drain tile is a great way to protect your basement from water damage and keep it free of excess moisture. It’s not always easy, though – you have to know what type of materials to use, how to connect the pieces together correctly, and how far down into the ground you should go before stopping.
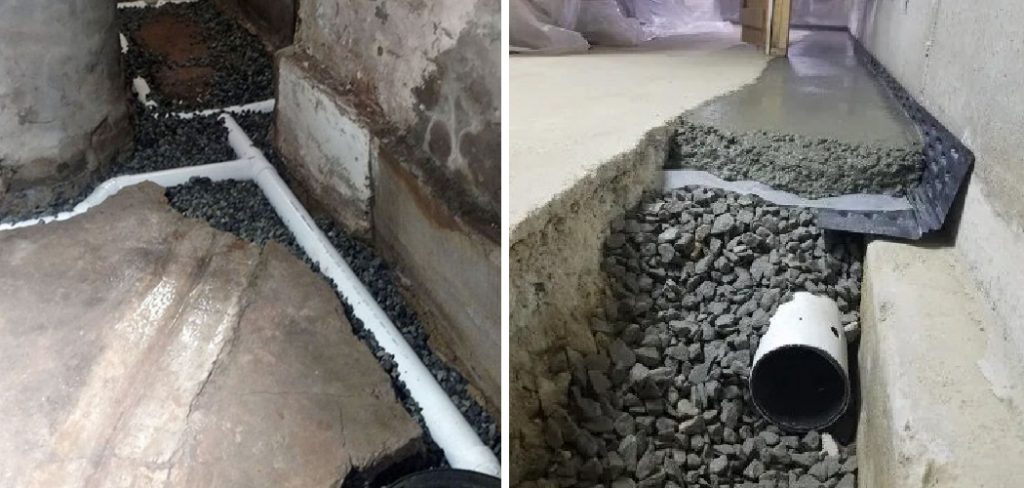
From choosing the best materials for your particular project to knowing when you’ve put in enough pipe, this guide on how to install drain tile in basement will ensure that your drain tile installation will keep your basement dry and comfortable long-term.
Why Do You Need to Install Drain Tile in the Basement?
Drain tile, also known as French drains or perimeter drains, is an important component of any basement waterproofing system. It collects water from around the foundation walls and then carries it away so that your basement remains dry and free of excess moisture. The drain tile also helps prevent flooding from heavy precipitation or a broken pipe.
What Materials Do You Need?
Installing drain tile in your basement requires a few key materials. Given below is a list of materials that you will need:
Drain Tile Pipe
This is a flexible, corrugated pipe with holes along its length that allows for water drainage. It comes in various sizes and lengths; choose the size that best suits your needs.
Filter Fabric
This is a material placed over the drain tile to act as a filter for any dirt and debris that may come through the pipe.
Gravel/Stone
You will need to use gravel or stone to fill in the area surrounding the pipe to make sure water drains properly and quickly.
Aggregate Base Material
This is a solid material designed to provide additional drainage around the drain tile. It’s usually made up of crushed stones and can be mixed with soil or sand.
13 Step-by-step Guidelines on How to Install Drain Tile in Basement
Step 1: Prepare the Area
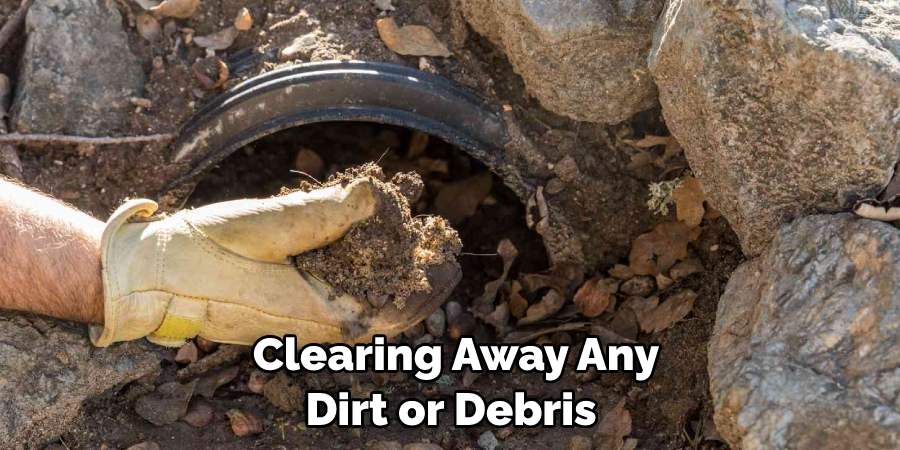
Begin by clearing away any dirt or debris that may be in the area where you want to install the drain tile. Create a depression in the ground for the pipe, making sure it’s deep enough so that the pipe is below the frost line. If you don’t do this, your pipe will be prone to breaking when the ground freezes. But don’t make it too deep – the pipe should be at least 6 inches below the surface.
Step 2: Lay the Filter Fabric
Lay down the filter fabric on top of the depression. Make sure it covers the entire area where you will be installing the drain tile and cut it to size if necessary. However, make sure not to overlap any pieces of fabric – water needs to be able to flow through the entire area so it can be properly drained. If you need to join pieces together, use a seam sealer so that water won’t seep in.
Step 3: Install Pipe Clamps
Install a pipe clamps onto each end of the drain tile pipe and tighten them with a screwdriver or wrench. This ensures that all sections of the pipe are securely connected together.
It’s also important to make sure the clamps are as tight as possible – loose clamps can lead to leaks and water damage. This is especially important if you’re using a flexible pipe. But if you’re using a rigid pipe, you can skip this step.
Step 4: Place Pipe in Trench
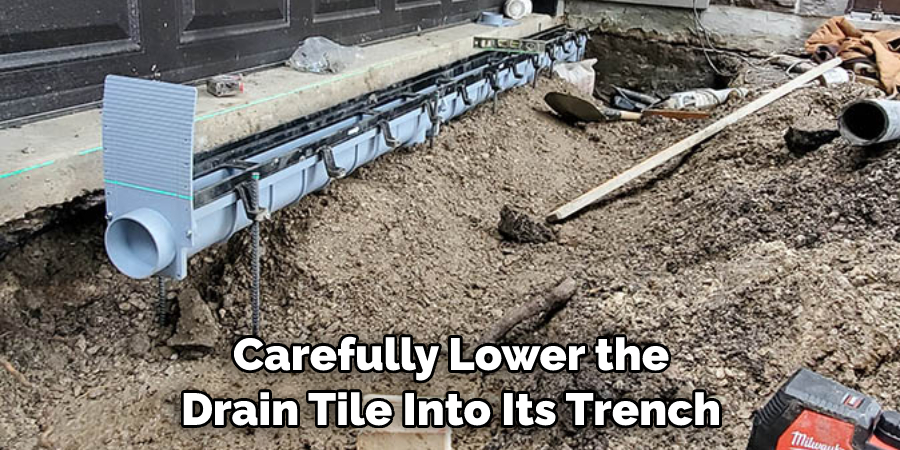
Carefully lower the drain tile into its trench, making sure it’s laid flat so that water can easily flow through it. You may need to reposition any clamps if they become misaligned during this process.
After you’ve placed the pipe, add some aggregate base material on top of it to help provide additional drainage around the pipe. It’s important to use the right amount of aggregate for your particular project – too much or too little can be problematic.
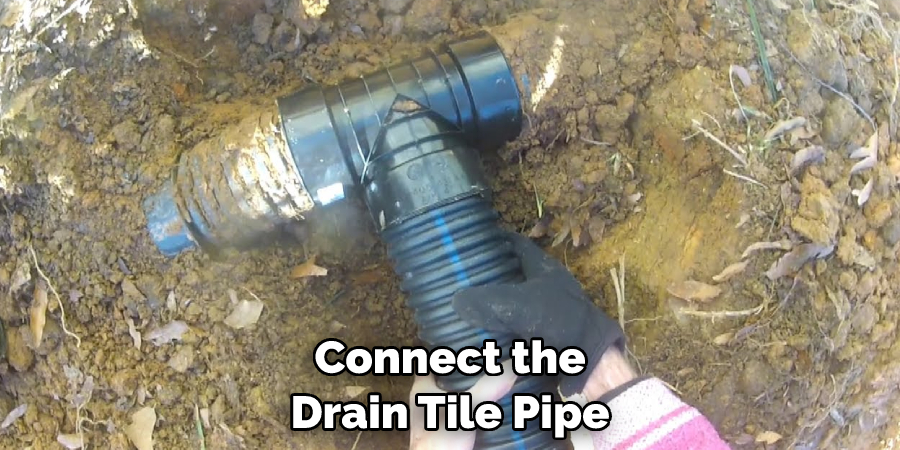
Step 5: Connect Pipe Ends
Connect the ends of the drain tile pipe together using rubber couplings or clamps that are made specifically for this purpose. If you’re using a flexible pipe, make sure to use pipe clamps on either end. This will help ensure that the connection is watertight. If you’re using a rigid pipe, you can use rubber couplings instead. But make sure to use a sealant around the coupling as well for extra security.
Step 6: Fill in Trench with Gravel/Stone
Cover the entire length of the drain tile pipe with gravel or stone, making sure to fill in any gaps between sections. This helps create a more thorough drainage system and prevents debris from getting stuck. If you’re using a flexible pipe, make sure to cover it with enough material so that it won’t move or be displaced when water is flowing through it.
Step 7: Lay Aggregate Base Material
Lay aggregate base material over the top of the gravel or stones, making sure it’s evenly spread out and covers all areas around the drain tile. This acts as an additional layer of protection against dirt and debris entering your basement through the drain tile. If you have any large gaps, you may need to add additional material in those areas. Otherwise, the base material should be at least 2 inches thick.
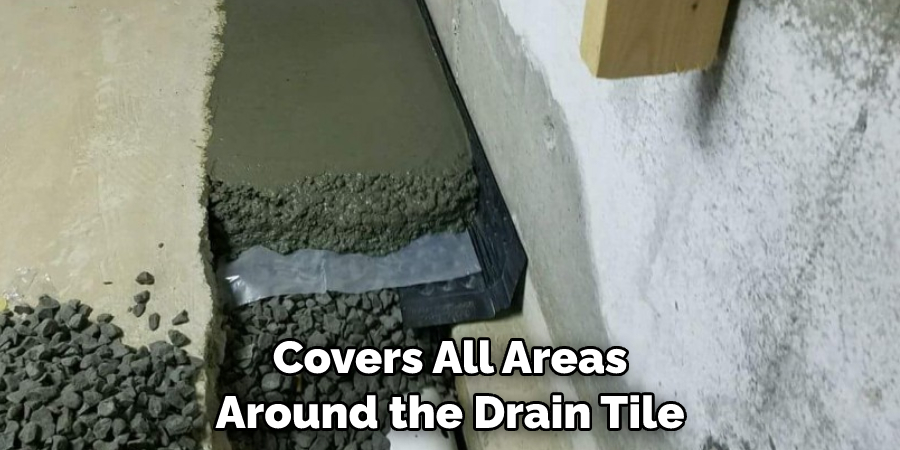
Step 8: Cover with Soil
Pile soil over the aggregate base material, making sure it’s packed down firmly around the drain tile pipe. This helps contain water within the trench and prevents it from overflowing onto your basement floor.
If necessary, you can lay a layer of landscaping fabric or plastic sheeting over the soil to help keep it in place and prevent evaporation. It’s also important to slope the soil away from your house so that water doesn’t pool near the foundation.
Step 9: Connect to the Pump
If you have a sump pump installed in your basement, connect the drain tile pipe to it. This ensures that any water collected by the drain tile is safely pumped out of your basement. If you don’t have a sump pump, you may need to hire a professional plumber to install one before connecting the drain tile. But if you do have a sump pump, just make sure it’s running properly before connecting the drain tile pipe.
Step 10: Cover with Filter Fabric
Lay filter fabric over the top of the connected sump pump and then cover it with another layer of soil or gravel. This will help keep dirt and debris out of the sump pump. This step is optional but highly recommended, as it can help extend the life of your sump pump and reduce the amount of maintenance you’ll need to do each year. It also helps protect your basement from flooding.
Step 11: Check for Leaks
Check that all the connections between pipe clamps and couplings are secure and also look for any signs of leaks. If you find any, adjust the clamps or couplings to ensure a tight seal. If your drain tile pipe is still leaking, you may need to replace the entire pipe or add additional sealant around the joints.
Step 12: Inspect Area Regularly
Once your drain tile installation is complete, make sure to inspect it regularly to check for any potential issues such as blockages or cracks in the pipes. However, if you notice any major signs of damage, it’s best to call a professional plumber to take care of the problem. Otherwise, you can maintain your drain tile system by regularly removing any debris and checking the connections.
Step 13: Maintain System
You should also clean out any debris or dirt that may have accumulated in your drain tile system on a regular basis so that it continues to function properly. This ensures that water can be quickly and effectively drained away from your basement. Always make sure to wear protective clothing and safety equipment when handling drain tile materials, as they can contain sharp edges or chemicals that may be hazardous.
By following these simple steps on how to install drain tile in basement, you can easily and effectively install drain tile in your basement to protect it from water damage and other potential problems. Not only will this help keep your home dry and free of unwanted moisture, but it can also reduce the risk of flooding or mold growth inside your basement.
Do You Need to Use Professionals?
If you are not comfortable or familiar with the process of installing a drain tile system in your basement, it is best to contact professional plumbers who can get the job done correctly and safely. The installation of a drain tile system can be very complicated and should always be done by experienced professionals who have the necessary skills and knowledge to ensure that everything is done correctly.

So if you’re looking for an effective way to protect your basement from water damage, then consider installing a drain tile system. With some basic DIY knowledge and the right tools, you can easily install one yourself or hire professionals to do so. Either way, this investment could save you time and money in the long run!
Frequently Asked Questions
Q: How Long Does It Take to Install Drain Tile in the Basement?
A: The installation of a drain tile system can vary in time depending on the complexity of your basement layout and the size of the drain tile system. On average, a professional plumber may take up to 8-10 hours to install one correctly.
Q: How Often Should I Clean My Drain Tile System?
A: It is recommended that you clean out any debris or dirt that has accumulated in your drain tile system on a regular basis to ensure it continues working properly. Depending on the size of your drain tile system and the amount of usage, this could be as often as once or twice a year.
Q: How Much Does It Cost to Install Drain Tile in the Basement?
A: The cost of installing drain tile in the basement will depend on the size and complexity of your basement layout as well as the materials used. Generally speaking, it could cost anywhere from $500 to several thousand dollars for a professional installation.
Conclusion
Installing drain tile in your basement can be a rewarding experience and one that is well worth the effort. By understanding the rules of effective drainage, using high-quality materials, and getting help if needed, you can transform any basement from a damp and unpleasant space to a safe haven for family fun.
With the right knowledge on how to install drain tile in basement, supplies, and hard work, it’s easy to take control and install drain tile in your own basement. The many benefits include increased structural stability, improved air quality, better moisture management, and decreased mold growth or odors.
Moreover, installing drain tiles can prevent future flooding and devastation due to heavy rains or river overflow. So don’t delay – get your project started today for a dryer and healthier home atmosphere!

